|
The taste buds of the nation have changed since the 1960s, when immigration laws were relaxed and more Asians moved to the U.S., bringing their culinary traditions with them. Their bolder flavors began to attract Americans who had only known a blander European-based diet.
There were American hot sauces, but they were popular largely in the South and Southwest. Hot sauce manufacturing in the U.S. began in Louisiana with Tabasco brand pepper sauce in 1868. While it was distributed in other regions, most people didn’t know about it. Much later, in 1947, Dave Pace combined tomatoes, jalapeños and onions into “picante sauce,” refining the recipe over the next decade.
With the national expansion of Tex-Mex restaurants beginning in the 1960s, more people were introduced to hot sauce, and the demand began to expand. Around the same time, the expanding popularity of the Bloody Mary meant that a bottle of Tabasco could be found in many households.
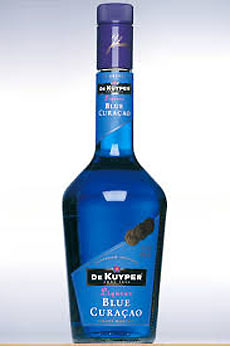
The most recent hot sauce to take hold in the category is Sriracha, a recipe from Thai port of Sri Racha that is produced in California by the Huy Fong company. “Rooster bottles” of the hot chili pureé (the logo is a red rooster), with its ketchup-like sweetness and notes of garlic and spice, have found their way into restaurants and homes alike.
|
|
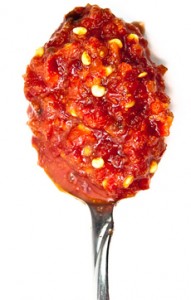
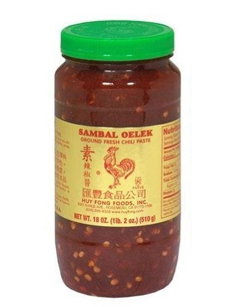
A spoonful of sambal olek, an Indonesian chile paste. Photo courtesy Ryan Spilken. |
Sriracha has gone from an Asian condiment few people had heard of, to the go-to hot sauce for millennials. Sriracha sauce has found its way onto burgers, breakfast eggs, fries, noodles, salads, sandwiches, stir-frys and wings. Chefs have added it to everything from rémoulade sauce to brownies, ice cream and other desserts.
There are even Sriracha-specific cookbooks, including:
The Sriracha Cookbook: 50 “Rooster Sauce” Recipes that Pack a Punch (including Peach-Sriracha Sorbet) and its companion book…
The Veggie-Lover’s Sriracha Cookbook: 50 Vegan “Rooster Sauce” Recipes that Pack a Punch (including Maple-Sriracha Doughnuts and Watermelon Sriracha Sangria)
Sriracha Sauce Cookbook: Top 50 Easy Sriracha Recipes to Satisfy Your Spicy Food Addiction! (including Baked Sriracha Spaghetti Squash and Strawberry Sriracha Margaritas)
Here’s the history of Sriracha sauce and the popular Huy Fong Sriracha Hot Chili Sauce that gave the product its nickname, “rooster sauce.”
O.K., we know that Sriracha is mainstream, appearing in everything from hummus to potato chips. But in the words of fickle foodies and millennials everywhere, what’s next?
It could be sambal oelek!
|
|

A thick paste, sambal oelik has vinegar tartness and fruity sweetness (like ketchup). Top photo courtesy RyanSpilken.com, bottom photo courtesy Huy Fong.
|
|
WHAT’S SAMBAL OELEK?
Vinegar-based sambal oelek is a staple in Indonesian, Malaysian and Thai cooking. The first packaged brand was Indonesian; and the name, Javanese in origin, means “ground by stone mortar.”
Sambal is sauce typically made from a hot chiles and other ingredients, which can include fish sauce or shrimp paste, garlic, ginger, lime juice, rice vinegar or other vinegar, scallion, shallot and sugar.
Tart and vinegary, with fruity notes, it is a paste rather than a thin liquid. And it’s definitel for heat lovers: The vinegar makes the heat even more intense.
The folks at Huy Fong are at the ready, with jars of sambal oelek also bearing their familiar rooster logo.
You can find it at Asian markets or online.
And here’s a trick from Paul McMillan, executive chef at Wyoming Seminary, a prep school where the students love Sriracha:
Spread Sriracha over parchment or wax paper on a sheet pan and dry it in the oven at 180 degrees for at least an hour.
Remove from the oven, cool, and then break it up into crunchy crumbles that you can sprinkle on soups, salads, baked potatoes, rice and…anything.
|
|
Industry experts predict that next on the hot sauce horizon is gochujang sauce (pronounced ko-choo-CHONG), a pungent, hot red chili paste from Korea. It’s made from fermented soybeans, glutinous rice, red chiles, garlic, honey and salt.
The gochujang chili paste is also is made in a sauce version, for easy sprinkling.
But for the rest of the details: That’s another story.
|
|