|
What oils are in your pantry? Are they the best cooking oils to use? Here’s what you should know from Chef Gerard Viverito, a culinary instructor and Director of Culinary Education for Passionfish, an NGO non-profit organization dedicated to educating people around the globe on issues of sustainability in the seas.
National Healthy Fats Day is March 21st.
THE 12 COOKING OILS YOU NEED TO KNOW ABOUT
In your mother’s kitchen, the only cooking oil may have been all-purpose vegetable oil, a blend of inexpensive oils. Then came the Mediterranean Diet and the attention paid to its heart-healthy olive oil.
Today, there are more than a dozen options for cooking oil. Don’t be stuck with mom’s ingredients. Use Chef Gerard’s handy guide to determine which cooking oils you need to add to your collection.
EVERYDAY HEALTHY COOKING FATS
Each of these healthy fats deserves a place in your pantry, says Chef Gerard. (Editor’s note: For higher-flame stovetop cooking, you should also check the smoke point of the oil).
Butter. There’s no need to avoid this tasty fat (it isn’t an oil, but we’re giving it a pass). The myth about saturated fat has been busted. Butter is fine to use in moderation for adding flavor to veggies or potatoes.
Coconut oil. A tropical oil that is gaining in popularity, coconut oil’s medium-chain fatty acids (also found in grass-fed butter and palm oil) are easily utilized as body fuel, which may help with weight management. Coconut oil’s natural sweetness makes it a great choice for baking.
Grapeseed oil. Grapeseed oil has a high smoke point (around 420°F) making it well-suited for things like searing meat and vegetables on the stove, sauteing, stir-frying, and pan-frying. It’s rich in omega-6 fatty acids, which makes it a heart-friendly option.
Malaysian palm oil. This up-and-coming healthy tropical oil is a popular replacement for harmful trans fat. This non-GMO, balanced and ultra-nutritious oil can already be found in many of your favorite packaged foods. It tolerates heat extremely well, so it’s an ideal all-purpose cooking oil. All palm oil isn’t the same. Look for Malaysian certified sustainable palm oil; if it isn’t in your supermarket, check the nearest health food store. The Malaysian palm industry adheres to the 3Ps sustainability model.
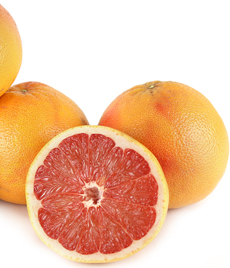
Olive oil. Rich in monounsaturated fat, this oil is great for a healthy heart and healthy skin. Use it for salad dressings and drizzling over slices of bread, but don’t use it for high-temperature applications. This healthy oil starts to degrade before you hit 400°F. (Tip: Have at least two tablespoons a day, whether in salad dressing or straight from the spoon.)
SPECIAL OCCASION COOKING OILS
These oils have more limited uses, and often come with a higher price.
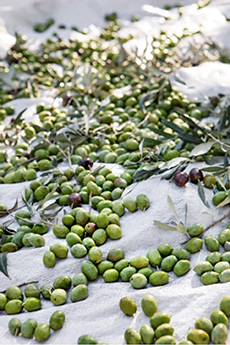
Avocado oil. Avocado oil is rich in nutrients, because it is extracted from the fruit’s flesh. This process is similar to olive oil and palm oil production. Avocado oil tolerates heat up to 500°F, which makes it great for broiling. You can also find flavored olive oils, delicious on salads and other vegetables, potatoes, and grains.
Flaxseed oil. Flaxseed oil is a nutritious yet delicate oil. While many nutrition-focused people want to eat more of it, it begins breaking down at just 225°F so can’t be exposed to heat. The oil is extremely rich in heart-healthy omega-3, but unfortunately, many people find its flavor unappealing. Consider adding a teaspoon of flaxseed oil to your next smoothie to reap its health benefits.
Macadamia nut oil. Although more commonly used as a beauty aid, this sweet and buttery oil is good for your health, too. It contains a 1:1 ratio of omega-3 to omega-6 fatty acids. Why is this important? Many health experts believe the Western diet contains too many inflammatory omega-6s. Try macadamia nut oil in salads.
If you currently use sunflower oil, consider this:
Sunflower oil. Sunflower oil is rich in skin-, brain- and heart-healthy vitamin E tocotrienols. Unfortunately, it’s also high in inflammatory compounds, so instead of cooking with it, it’s better to rub some on your cuticles or use it to smooth your hair. Instead of sunflower oil, get your tocotrienols from Malaysian certified sustainable palm oil, nature’s richest source.
GENETICALLY MODIFIED OILS
If you’re trying to avoid genetically modified foods (GMOs), put these oils on your “do not buy” list. More than 90% of these crops are grown using genetically modified seeds.
Canola oil
Corn oil
Cottonseed oil
Soybean oil
Give all of your current oils the “sniff test.” If they smell musty, they’re ready the recycling bin.
Replace them with “good oils.”
ALL OF THE COOKING OILS
There are more cooking oils, including the pricey-but-delicious hazelnut, pistachio, and walnut oils; and powerful dark sesame oil, which is delicious when used in moderation. Take a look at the different cooking oils in our Culinary Oils Glossary.
And check to see if your oil should be kept in the fridge. Some are very hardy and stay well on the shelf for two years; others, less so.
CHECK OUT WHAT’S HAPPENING ON OUR HOME PAGE, THENIBBLE.COM.
|
|
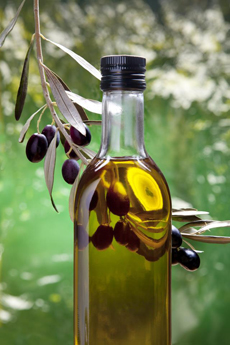
[1] Heart-healthy olive oil has become a staple in American kitchens. Photo courtesy Flavor-Your-Life.com, a great resource for olive oil lovers.

[2] Coconut oil. The liquid form is called fractionated coconut oil. They are equally good for cooking, but differ in their fatty acid composition. Here’s the scoop (photo © Dr. Bronner).

[3] Avocado is a very healthy oil, and also has a high smoke point (photo © Olivado.

[4] Flaxseed oil is extremely high in heart-healthy omega-3 fatty acids (photo © La Tourangelle).

[5] Macadamia and avocado oils are both made in Australia. For the best flavor, look for first cold pressed oils (photo © Brookfarm).
|