|
Just a few years ago, purple potatoes were hard to find, especially for our Red, White & Blue Potato Salad (here’s a bonus recipe), popular fare for Memorial Day and Independence Day.
Thankfully, things have changed. Once called purple Peruvian potatoes, they are now grown worldwide in response to consumer demand, so are much more readily available.
THE HISTORY OF POTATOES
Millennia ago, many potato varieties grew wild in the foothills of the Andes Mountains, in what is now Peru.
Along with many other varieties of potatoes, they were cultivated around 3000 B.C.E. by the Incas.
Imagine European cuisine without potatoes! But they were unknown until the Spanish conquistadors reached the shores of Montezuma’s empire (modern-day Mexico) in 1519. Potatoes sailed back to Spain a few years later.
See the history of potatoes and the different types of potatoes.
MODERN PURPLE POTATOES
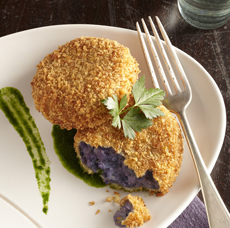
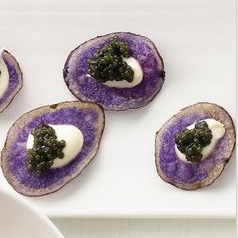
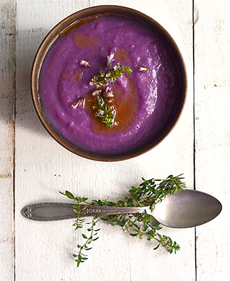
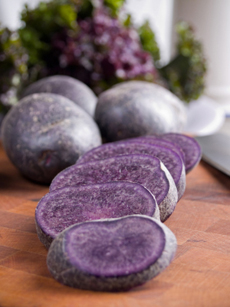
In addition to the vividly colored flesh—some purple, some blue—purple potatoes* have a creamy texture and are rich in flavor. Their starch level is medium, so purple potatoes are an all-purpose potato.
Creamy and earthy-tasting like russet potatoes, the color is very dramatic. Depending on their species, some varieties have a nutty flavor, some varieties become a lighter lavender shade after cooking.
There’s also a purple-fleshed “Okinawan” sweet potato, a staple in Hawaii. Look for it in Asian markets. decreasing the risk of stroke and macular degeneration. †Purple potatoes are now grown around the world.
Try them baked, broiled, fried or mashed to add color and style to your meals. Make purple potato chips as as a beguiling snack, side or garnish.
As with all potatoes, blue/purple potatoes originated in Peru, where the Incas cultivated many varieties of potato (see the history of potatoes). The color can become lavender when cooking. The starch level is medium, so purple Peruvians are an all-purpose potato. They are moist and earthy-tasting, sometimes with a nutty flavor; and the color is very dramatic. Purple potatoes are not only prettier, they have higher levels of polyphenol antioxidants to protect body cells against free radical damage (see this article from NBC News). They can help lower blood pressure, without causing weight gain: guilt-free potatoes!
OKINAWA or OKINAWAN SWEET POTATO, WITH PURPLE FLESH
A purple-fleshed sweet potato used extensively in Hawaiian cuisine, your best bet to find these are in Asian markets or online.
The skin is tan, similar to the familiar russet potatoes; but the flesh is a bright magenta color. The Okinawa purple sweet potato has a delicate, slightly sweet taste and a creamy texture.
The Okinawa is a member of the sweet potato family: order Solanales, family Convolvulaceae, genus Ipomoea, species, I. batatas. Its subspecies is Ipomoea batatas cv. Ayamurasaki.
The white potato is of the same botanical order, Solanales, but diverges from the sweet potato at that level. The taxonomy of the white potato is: order Solanales, family Solanaceae, genus Solanum, species: S. tuberosum.
Okinawa potatoes can be cooked like any sweet potato: baked, boiled, candied, mashed, roasted, scalloped or steamed.
The Okinawa sweet potato is not related to the purple yam, ube, which is popular in Filipino cuisine and creates dishes of intense purple color.
The term “yam” is often used incorrectly in the U.S. Yams are not members of the potato order, family, etc., but are from a totally different order. Be is from the order Dioscoreales, family Dioscoreaceae, genus Dioscorea, species D. alata.
|
|
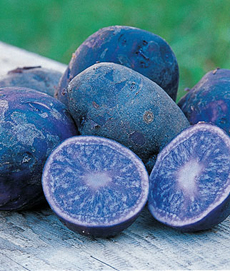
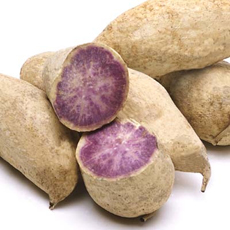
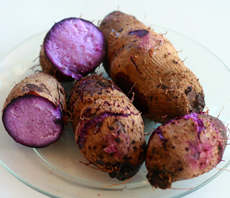
[1] Purple potatoes—in fact, all potatoes—originated in what is now Peru (photo Mona Makela | IST). [2] Some varieties have blue flesh, a result of the soil pH and other factors (photo courtesy Burpee). [3] Okinawa sweet potatoes (photo courtesy Melissa’s). [4] Ube are not potatoes (photo courtesy SulcataGrove.Blogspot.com. |