|
The immigrant Europeans added some salt and fried the mixture in lard in their skillets. Skillet breads, pies, etc. date back generations before people had home ovens, much less baking pans. Everything was cooked over a fire in a cast iron pot or a skillet; or in some towns, in a central community oven.
In parts of England, hoe was a colloquial term for griddle. The tale that hoe cakes were cooked by field workers on their hoes over a fire is a story perpetuated but not substantiated.
The fried corn batter is also known as hoe cakes and johnnycakes. Today, outside the South, we call them corn pancakes.
Here’s a recipe for hoecakes and for johnnycakes; the photos are below.
Johnnycake is similar, The modern johnnycake is found in the cuisine of New England, A modern johnnycake is fried cornmeal gruel, which is made from yellow or white cornmeal mixed with salt and hot water or milk, and sometimes sweetened
The immigrants adapted cornmeal to their European recipes: bread loaves and muffins, corncakes, fritters, hoecakes and pancakes, liquor, porridge and so on. Most people had little cooking equipment. The skillet served multiple purposes, from frying to baking.
Cornbread became popular as the main ingredient for a dressing or stuffing with fowl (the difference: stuffing is cooked inside the bird; dressing is cooked in a separate pan).
What Is Cornmeal?
Cornmeal is produced by grinding dried raw corn grains. The finest grind is used for baking, a medium grind for porridge and polenta, and a coarse grind for grits. Raw corn kernels spoked in hot water and an alkaline mineral like calcium hydroxide is called hominy (pozole in Spanish) and ground and mixed into masa harina, the dough used to make tamales and tortillas.
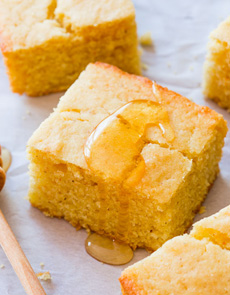
Cornbread can be baked or fried, even steamed. Steamed cornbread is more like cornmeal pudding or mush, moist and chewier than a traditional bread. Here’s more on the evolution of cornbread plus early cornbread recipes.
One thing to note: Originally cornbread did not contain sugar. As disposable income increased, this expensive ingredient was added as a variation, to make cornbread more like a cake.
Unfortunately, more and more sugar was added until cornbread became an overly-sweet, simple bread. That’s fine if you want cake; you can serve sweet cornbread with berries and whipped cream.
But if it’s bread you want, lose the sugar. We prefer to add whole corn kernels for sweetness, or enjoy cornbread as a savory bread.
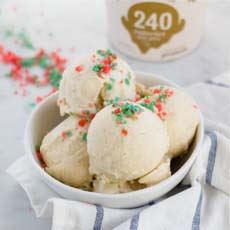
CRÈME FRAÎCHE, MASCARPONE OR SOUR CREAM?
When should you use which? Here are the differences.
Here are the differences.
|
|
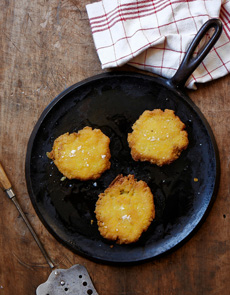
[4] Hoecakes, also called corn pone and johnny cakes, was the immigrant European’s version of the Native American cornmeal flatbread. Here’s the recipe from the Wall Street Journal (photo Christopher Testani | Wall Street Journal).
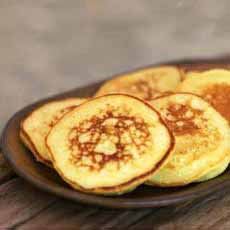
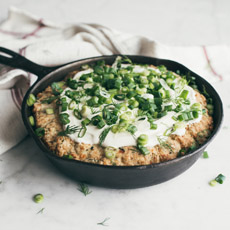
[5] Johnnycakes come in different shapes—flatter, plumper, individual or the size of an entire skillet. Here’s the recipe for these pancake-syle johnnycakes from About.SouthernFood.com.
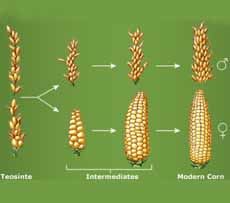
[6] Who would have imagined that the wisp at the left evolved into the plump ear of corn we know today? Here’s the whole story.
|