|
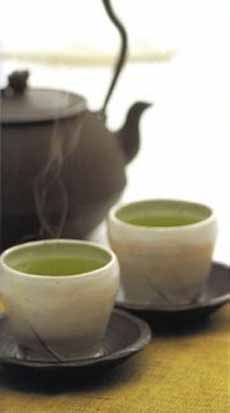
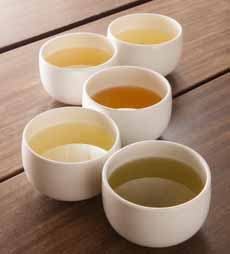

[1] Green tea and a conventional iron pot, called a tetsubin (photo courtesy Japanese Green Tea Online). [2] Green tea isn’t necessarily green. It depends on where the tea was grown and production factors (photo courtesy Coffemania | NYC). [3] A conventional sushi plate of nigiri and maki (photo courtesy Takibun). [4] Sashimi (photo Direct Photo). [5] Genmaicha, with toast rice: our favorite (photo courtesy Sugarbird Sweets).
|
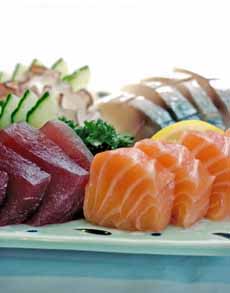
|
Sushi and sashimi are among our favorite foods, and we down cups of green tea with each plate.
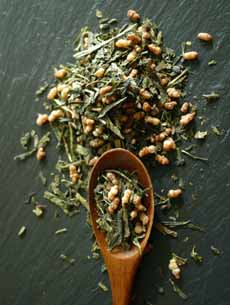
Most of the complimentary green tea served at Japanese restaurants is, not surprisingly, average quality. Even if it’s good tea to start with, it can grow pretty weak due to infusing the same leaves one time to many.
In Japan as well as the U.S., the tea used is often sencha, a basic green tea (approximately 80% of the tea produced in Japan is sencha). It may also be bancha, the second-most-widely-produced tea, more robust and astringent than sencha.
If you want to train your palate to the differences, ask your server to tell you which type it is.
In Japan, the lower down the line the sushi bar is (such as a takeout place), the more likely it is that the tea is agari, a low-quality, powdery tea—which should never be confused with to the pricey powdered matcha, to which it has zero relation.
The variety, known as konacha or kona-cha, is a mix of the residual dust, fannings, leaf particles, and bits of stem broken off during the processing of quality teas, like gyokuro or sencha (paradoxically, it’s low-quality tea from high-quality leaves). Konacha has a bitter taste, said to complement the flavor components of of sushi very well.
ENJOYING GREEN TEA WITH YOUR SUSHI OR SASHIMI
If you don’t like the green tea that is served with your raw fish, consider that it may be the particular green tea, and not an indictment of the entire green tea category. As with any product, those at the top end can be glorious. They just may not be available where you eat your sushi.
In New York City, where we enjoy thrice-weekly sushi meals, it’s very rare that we get anything resembling a satisfactory (much less a good) cup of tea unless we’re at a very high-end restaurant. While our everyday sushi is excellent quality, the tea quality never measures up to the fish. We wish we could pay for better tea, but it’s not the Japanese way.
That being said, any green tea served, no matter how bland, goes well with the raw fish.
Trending At Asian Fusion Restaurants
Some Asian-fusion restaurants we patronize don’t give any tea away, but will sell you pots of tea.
We respect that: Profit margins in restaurants are notoriously low, and since we’d rather have tea with our sushi than [higher profit] beer, we have no problem paying for it. You’ll get higher quality than with freebie tea, abut it still may not be sublime, depending on available varieties and your palate.
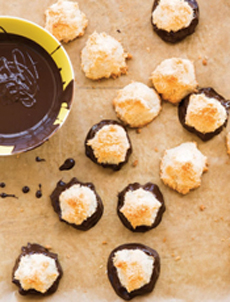
Only once in a blue moon do we find our favorite green tea to pair with sushi and sashimi, genmaicha (photo #5), at a restaurant. This lively green tea, a base of sencha, bancha or a combination of both, is blended with earthy roasted rice or popcorn. You either love it or not; but for us, it’s green tea happiness.
Should You Pay For Tea?
Our tip of the day is: If your restaurant offers a cup of better tea at a price, don’t hesitate to try it. It’s a modest sum compared to the price of the sushi (or a beer). It could be good and worth it; or you don’t have to order it again.
We’ve been to chic restaurants (Asian and Western) that have a tea menu. Ideally, this should be top-quality loose tea. Some even bring out a fancy wood box that holds different bags* from which you choose.
It’s a step in the right direction, but we often find that these teas—which are from specialty American purveyors—are not assertive (flavorful enough). While some people may like that milder style, we want full-flavor tea.
Don’t let the box, or silky tea bags, convince you that this is top green tea; or think that the tetsubin, the traditional small, cast iron tea pot, makes the tea any better (more aesthetic, yes; better-tasting, no).
Again, you don’t know until you try.
If you’re a tea fan as well as a sushi fan, what can you do to ensure that the tea is at the level as the sushi?
In foodie desperation (and not wanting to insult the restaurant), we thought to sneak good green tea into our local restaurant, to augment the tea we purchased. Then, fearing that we would, in fact, insult them if discovered, we asked if they would mind if we added some of our own tea to theirs—or if they wished, take our tea, add hot water, and charge us the same as their tea.
This was not a difficult ask, as we brought genmaicha, green tea blended with toasted rice or popcorn (photo #5). It’s an easy excuse to claim one’s love of genmaicha with sushi.
The other option was ordering in (i.e. delivery)—a less aesthetic experience, but one which guaranteed our choice of tea.
AN OFT-ASKED QUESTION ABOUT RESTAURANT GREEN TEA
Why is the tea served in sushi restaurants so hot?
It’s often so hot that we can’t pick up the cup without using a napkin to protect our fingers. We laud the servers who bring it to us with no such protection.
The answer:
The very hot water and green tea both work to cleanse the palate and remove the natural oil reside that can be left behind by the fish. You may not notice them in your sushi or sashimi, but they’re there.
Green tea, which is the norm in Japan, has more astringency than other tea types (black, oolong, white). This makes it even more effective to cleanse the palate.
|
Here’s more on palate cleansing:
As one navigates through an assorted plate of sushi or sashimi, the subtle flavors of each type deserve appreciation.
Each type of raw fish has a very distinct but delicate taste. It is also desirable to cleanse the palate to fully appreciate the flavor of each piece.
Marinated slices of ginger, called gari, also serve to refresh the taste buds between pieces.
IF YOU CAN CHOOSE YOUR TEA, WHICH SHOULD YOU CHOOSE?
The tea should not be overpowering or have a flavor/aroma that could dominate the fish: never a flavored tea! Much as we like jasmine tea, the floral aroma and flavor detract from the delicate raw fish.
We would pair what the restaurants serve, but the best quality we can get:
Bancha: A widely used restaurant and household tea; “the peoples’ tea”; a refreshing, lightly sweet flavor.
Sencha: Juicy sweet flavor, deep umami, and crisp, refreshing finish.
Genmaicha: This can be sencha, bancha or a blend, combined with roasted rice. The rice acts as a starchy sponge, aiding in the absorption of oils and flavors in the mouth. It’s one of our favorite green teas for any tea-drinking occasion.
For more robust, richer, cooked foods in Japanese restaurants, such as teriyaki, shabu shabu, negimaki and yakisoba, go for a more robust tea.
A popular pick is houjicha, bancha leaves and stems that have been roasted. It’s smooth, with hints of coffee and roasted barley.
Tea and sushi lovers: Go forth and conquer.
DISCOVER LOTS MORE IN OUR:
SUSHI GLOSSARY
TEA GLOSSARY
|