|
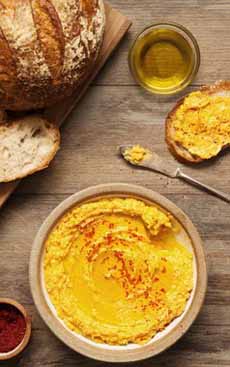
Leave it to our creative colleague, Hannah Kaminsky, to come up with this one: combining two great Mediterranean spreads, hummus and tzatziki (tsat-ZEE-kee).
Both of us love Mediterranean spreads, and we’ve included our dozen favorites below.
But who would have thought to mix two of them together: hummus and tzatziki, chickpea paste and yogurt dip? She named the blend hummiki.
“It exceeded even my own expectations from the very first batch. Lighter and fresher than the typical dip, crisp cucumbers added textural contrast so often missing from hummus.
“Zesty lemon and dill brightened the flavor profile considerably, imparting an unmistakably summery flavor, even if made in the heart of winter.”
The recipe follows, and today’s tip is: Don’t hesitate to mix and match. Our foray includes blending sour cream or yogurt into sauces to make creamy sauces or dips; but we’re going to put on our thinking cap to do more.
RECIPE: HUMMUS + TZATZIKI = HUMMIKI
Note that Hannah did not include tahini, the oily ground sesame paste that is the second ingredient in hummus. So, if you want a hack of mixing store-bought hummus and tzatziki, it will be different from this recipe.
Ingredients For 3-1/2 To 4 Cups
1 6-ounce container (3/4 Cup) plain yogurt
1 15-ounce can (1-3/4 cups) chickpeas, drained and rinsed
2 large cloves roasted garlic
2 tablespoons olive oil
Zest and juice of 1/2 lemon
1 tablespoon chopped fresh dill
1/4 teaspoon ground cumin
Salt and pepper
1 cup seeded and finely diced cucumber
Preparation
1. TOSS all of the ingredients except for the cucumber, into a food processor or blender. Purée thoroughly, until silky-smooth. Scrape down the sides of the bowl as needed, and give the machine ample time to blend. For the best consistency, it may take as long as 5 – 10 minutes. When thoroughly blended, add salt and pepper to taste.
2. STIR in the chopped cucumber by hand, and chill for at least 2 hours before serving. It will keep in an airtight container in the fridge for up to a week…if you can resist finishing it long before then.
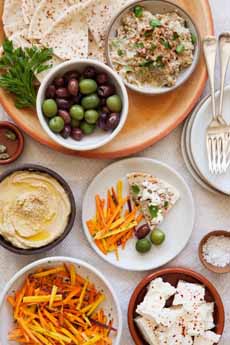
MEDITERRANEAN SPREADS
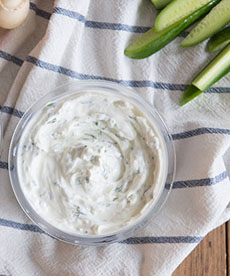
Depending on country—Greece versus any of the countries in what was formerly called the Levant*—there may be different names for the same or similar dishes. For example, Greek tzatziki is Turkish cacik.
Here are a dozen favorites. Note that spellings may differ because the names are transliterated into the Latin alphabet from the Arabic or Greek alphabets.
Baba ghanoush: Smoky roasted eggplant and tahini combine in a dip that can be smooth or chunky. Baba ghannouj is another spelling. Here’s a recipe.
Cacik: The Turkish name for tzatiki, a yogurt and cucumber dip. It is pronounced kah-SEEK.
Ezme: Similar to Israeli salad, ezme is a Turkish salad of finely chopped tomatoes, cucumbers, onions, mild peppers, parsley and olive oil.
Hummus: A paste of chickpeas, olive oil, garlic and spices. There surge in popularity has resulted in dozens of blend-ins, from the traditional Mediterranean flavors (olive, red pepper) to the trendy (chipotle, edamame hummus, everything bagel topping). Here’s a recipe to make your own.
Labneh: Labneh is thick, strained yogurt with a consistency similar to spreadable cheese like cream cheese. It is spread onto pita. Here’d more about it, and a recipe.
Htipiti: Htipiti (tee-PEE-tee) is a spicy spread of roasted red pepper and feta, mixed with olive oil, thyme, shallots and garlic. It can be smooth or chunky, and is closely related to kopanisti and tirokafteri (see below).
Melitzanosalata: This traditional Greek Eggplant dip is difference from baba ghanoush in that the latter is Levantine* and uses tahini. Melitzanosalata is Greek and doesn’t have tahini. Common ingredients are eggplant, olive oil, garlic, lemon, salt, pepper. Some melitzanosalata recipes add onion. Chopped parsley is a traditional garnish.
|