THE NIBBLE BLOG: Products, Recipes & Trends In Specialty Foods


Also visit our main website, TheNibble.com.

An Easy Appetizer Plate Recipe For Beautiful Starters

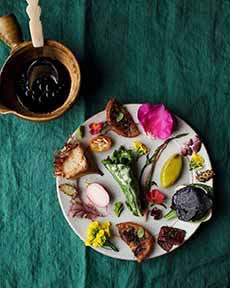
This appetizer isn’t fancy, but it’s on the menu of Noma, a three-Michelin-star restaurant run by chef René Redzepi in Copenhagen, Denmark. (The name is a syllabic abbreviation of the two Danish words nordisk (Nordic) and mad (food), and the restaurant is known for its reinvention and interpretation of New Nordic Cuisine. It aims to limit menu ingredients to those found or made in Scandinavia.

In 2010, 2011, 2012 and 2014, Noma was ranked as the Best Restaurant in the World by Restaurant magazine. It closed for a couple of years as Redzepi traveled the world studying foods of different cultures. As of 2019, the last year of rankings before the pandemic, it ranked #2.

The food isn’t necessarily haute cuisine. It’s more of a combination of flavors that bring excitement to the palate, and includes foraged ingredients that would never be found in food stores.

We particularly liked the ease of this appetizer plate. As you can see, these are foods that anyone can prepare.
 
 
THE NOMA APPETIZER PLATE

This appetizer plate includes fruits, vegetables and seeds, and lots of edible flowers for color. The sweet and savory selection includes:

  • Dressed lettuce leaf
  • Edible flowers
  • Grilled artichoke heart half
  • Grilled half orange slice
  • Grilled half fig
  • Half French radish
  • Marinated beets and atop a raw mushroom slice and spinach leaf
  • White mulberry and…
  • Some items we can’t identify, including the sauce*
  •  
    Most of these items are easily found in your grocery store (especially if you substitute a blackberry for the mulberry).

    We’re not so keen on edible flowers, which provide much of the color here. We’re just not wild about the flavor and most people don’t eat them anyway; so why waste the food and the money?

    However, we substitute other colored vegetables: a grape tomato or half a cherry tomato, pickled red onion.
     
     
    START THINKING ABOUT COLORS & SHAPES

    Your plate will be most interesting if you select an assortment of colors and shapes; for example:

  • Green: asparagus, castelvetrano olives, fig, marinated green beans, sugar snap peas.
  • Orange: grilled orange bell pepper, kumquat, mango, pickled carrot, orange cherry or grape tomato, spiced mandarin or orange segments.
  • Purple: blackberries, boysenberrie, fig, grilled eggplant (grilled) Fruits: figs, purple cabbage.
  • Red: balsamic-marinated strawberry, grilled red bell pepper, radicchio, red leaf lettuce, red pepper flakes, tomato (grape, cherry)<./li>
  • Yellow: corn relish, grilled yellow bell pepper, grilled pineapple, yellow cherry or grape tomatoes.
  • White: grilled cauliflower floret, mashed turnip or parsnip, white cheese
  •  
    Set them on a nice plate that shows off the plates and colors, and you’re in business.
     
    Here’s a longer list of vegetables by color. 


    [1] This plate of mixed bites, artistically chosen, is a modern version of the classic mixed hors d’oeuvre or antipasto plate (photo © Restaurant Noma | Copenhagen).


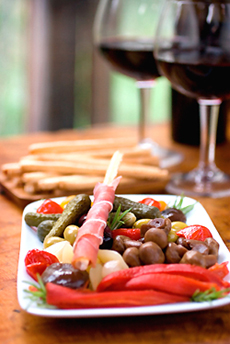
    [2] Americans are more familiar with an antipasto plate (photo © Kelly Cline | iStock Photo).


    [3] Colorful fall fruits and vegetables (photo © Good Eggs).


    BEYOND FRUITS & VEGETABLES

    While Noma choose a vegan plate of fruits, vegetables and seeds, you can also include white proteins: baked fish, chicken breast slice, deviled egg or boiled/poached quail egg, grilled tofu, raw scallop, white anchovy, white cheese, etc.

    ________________

    *It may be balsamic or black vinegar with a small amount of oil.


    Comments off

    Food Fun: Stephanie Izard’s Cheez-It Crunch Cake & Recipe


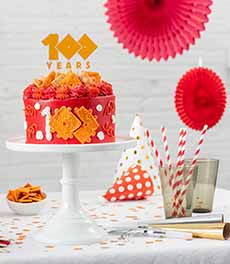
    [1] The original Cheez-It cake, made to celebrate the brand’s 100th birthday (all photos © Kellogg’s Cheez-It).


    [2] Take a big bite!


    [3] The cake was created for the 100th anniversary of Cheez-It. The brand’s history is below.


    [4] Have some Cheez-Its with your Cheez-It cake.


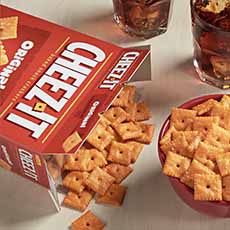
    [5] Don’t want to bake the cake? Enjoy Cheez-Its with your favorite soft drink (here, with cola).


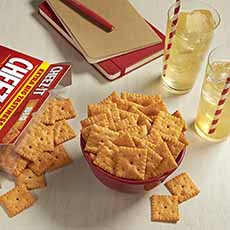
    [6] Here, with ginger ale.


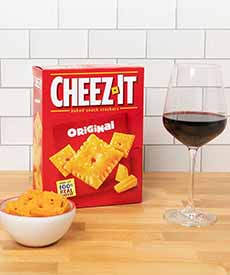
    [7] Here, with a glass of wine.


    [8] An easy snack: teeny peanut butter crackers (make a sandwich with PB).


    If you’re a Cheez-It fan, you might like to know about Stephanie Izard’s Cheez-It cake, incorporating her favorite snack. The Top Chef and James Beard Award winner even celebrated her wedding with a four-tiered Cheez-It cake, that went on to inspire retail variations by other bakeries.

    And good news: The recipe is below.

    The Chicago chef is restaurateur (Girl & the Goat, Little Goat Diner, Duck Duck Goat, Cabra Cevicheria) and bakery owner (Sugargoat Bakery).

    To mark its 100th birthday, the brand partnered with Chef Stephanie to create the cake (the history of Cheez-It is below).

  • Chef Stephanie estimates that there’s an entire box of large Cheez-It crackers in every cake.
  • Cheez-It crackers are crumbled to make Cheez-It flour, Cheez-It shortbread crumble on the inside, dulce caramel white chocolate Cheez-
  • The cake itself is at half Cheez-it.
  • The red icing is flavored with Nesquik, which Izard says “give[s] it a sweet, nostalgic flavor that goes nicely with the saltiness of the Cheez-It crackers” [source].
  •  
    You can purchase it on Goldbelly

     
    RECIPE: CARAMEL CRUMBLE CAKE WITH CHEEZ-ITS

    Here’s Stephanie’s cake for home bakers (recipe © Stephanie Izard). “Sweet, salty and savory,” she says, “this cake has it all!”

    Note that this is a two-layer cake, not the four layers in the photos and on Goldbelly.

    To save time, two 16-ounce cans of purchased vanilla frosting may be substituted for the homemade buttercream frosting, and 1 cup or purchased caramel ice cream topping may be substituted for the homemade caramel sauce.

    Prep Time is 2½ hours, total time is 6¼ hours. Yield: 16 servings.
     
    For The Cheez-It Crumble

  • 1 box (12.4 ounces) Cheez-It® Original
  • ½ cup (1 stick; 4 ounces) cold unsalted butter, cut into ½-inch pieces
  • ½ cup all-purpose flour
  • 3 tablespoons granulated sugar
  •  
    Ingredients For The Cake

  • 1½ cups granulated sugar
  • ½ cup vegetable oil
  • ½ cup sour cream
  • 2 eggs
  • 2½ cups sifted pastry flour or cake flour
  • 3½ teaspoons baking soda
  • ¾ teaspoon salt
  • 1½ cups buttermilk
  • 1 cup (4 ounces) shredded Cheddar cheese
  • 1 tablespoon vanilla
  •  
    The recipes for the caramel sauce and frosting are below.

    Preparation For The Cheez-It Crumble

    1. PREHEAT the oven to 350°F. Line a 15 x 10 x 1-inch baking sheet with foil.

    2. MAKE the Cheez-It Crumble. Freeze the Cheez-It crackers for at least one hour. Remove from the freezer and place in a blender container or food processor bowl. Cover and process until very fine crumbs form. Repeat the processing, if needed, to make the crumbs as fine as possible. Remove and discard any large pieces.

    3. COMBINE in a mixer bowl ½ cup of the Cheez-It crumbs (reserve the remaining crumbs for the cake), the cup butter, flour and sugar. Beat with the paddle attachment, with the electric mixer on medium speed, until the pieces are the size of peas.

    4. SPREAD on the prepared baking sheet. Bake for 20 to 25 minutes or until golden brown, stirring every 10 minutes. Cool completely, stirring to break up any large pieces.

    Preparation For The Cake

    1. REDUCE the oven temperature to 325°F. Grease and flour two 8-inch round cake pans with 2-inch-high sides. Line the bottoms of the pans with circles of parchment paper. Set aside.

    2. COMBINE in a large mixer bowl 1½ cups sugar and the vegetable oil. Beat on medium speed with the wire whisk attachment of the electric mixer until combined. Add the sour cream and beat until mixed. Add the eggs, one at a time, beating on high speed after each addition until light and fluffy.

    3. ADD the reserved Cheez-It crumbs, pastry flour, baking soda and teaspoon salt. Mix on low speed just until combined.

    4. COMBINE in a medium saucepan the buttermilk and shredded cheese. Cook and whisk over medium heat until cheese is softened. Blend with an immersion blender until smooth. (Or, pour the buttermilk-cheese mixture into a blender or food processor container. Carefully process with the feeder cap removed until smooth.) Stir in 1 tablespoon vanilla.

    5. TURN the mixer to medium-low speed. Gradually add the buttermilk mixture to the beaten cake mixture, beating just until combined. Pour into the prepared cake pans.

    6. BAKE about 40 minutes or until toothpick inserted near the center comes out clean. Transfer to a wire cooling rack and cool the cake layers in the pans for 10 minutes. Remove the layers from the pans. Remove the parchment paper from bottoms of the cake layers. Cool completely.

    Assembly instructions follow the recipes for the caramel sauce and the buttercream frosting.
     
     
    RECIPE: SALTED CARAMEL SAUCE

    Ingredients

  • 1 cup heavy cream
  • ½ cup water
  • 1 cup granulated sugar
  • 1 teaspoon salt
  • 1 teaspoon vanilla
  •  
    Preparation For The Caramel Sauce

    1. HEAT the cream in small saucepan, just until warm and small bubbles begin to form around edges. Remove from the heat. Cover to keep warm and set aside.

    2. PLACE the water in a 2-quart saucepan with heavy bottom. Pour 1 cup of sugar and the teaspoon of salt into the center of the pan, forming a low mound. Do not stir. Pat the mound down until it’s evenly moistened. Any sugar touching sides of the pan should be below the water line.

    3. COVER and cook over medium heat, without stirring, until the sugar dissolves and syrup looks clear.

    4. UNCOVER the saucepan and continue to cook the sugar mixture over medium heat until it turns a light amber color. Swirl the pan gently (instead of stirring) if the mixture begins to color unevenly.

    Check the color frequently by using a bamboo skewer or toothpick to place a drop of syrup on a light-colored plate. As soon as the syrup is light amber, remove it from the heat.

    5. STAND back to avoid splattering and gradually stir in the warm cream and the vanilla. Return to the heat. Cook, stirring constantly over low heat, about 1 minute or until smooth.

    6. REMOVE from the heat. Let stand for 5 minutes. Pour into a heatproof bowl. Refrigerate about 1 hour or until cool.


    RECIPE: BUTTERCREAM FROSTING

    Note that salt is added to this buttercream to maintain the sweet-and-salty profile of the cake.

    Ingredients

  • 5 egg whites
  • 1 cup granulated sugar
  • 1 cup (2 sticks; 8 oz.) unsalted butter, cut into 1-inch pieces and softened
  • 1½ teaspoons vanilla
  • 1 teaspoon salt
     
    Buttercream Frosting Preparation

    1. COMBINE the egg whites and 1 cup sugar in top of double boiler or a heat-proof pan that fits over top of medium saucepan. Place over boiling water (the upper pan should not touch the water). Cook, whisking constantly or beating with a hand-held mixer, until an instant read thermometer reads 160°F and the sugar is completely dissolved. Remove from the heat.

    2. POUR the warm egg white mixture into the bowl of an electric mixer. Using the whisk attachment, beat on medium-high speed until cool and stiff peaks form (the tips stand straight).

    3. CONTINUE to beat on medium-high speed, adding the butter, a few pieces at a time. Beat until the butter is completely incorporated after each addition. (If the mixture deflates and looks curdled, keep beating until smooth. If the mixture looks soupy, refrigerate the bowl for 20 minutes and beat again. It may need more than one session in the refrigerator.)

    4. ADD the vanilla and the salt. Beat until smooth and spreadable.
     
     
    TO ASSEMBLE THE CAKE

    1. PLACE one cake layer on a cardboard disk or cake plate. Spoon about 1 cup of the buttercream on top. Drizzle with about ½ cup of the caramel sauce. Sprinkle with half of the Cheez-It crumbles. Top with the second cake layer.

    2. FROST the top and sides of cake with a thin layer of the buttercream. Refrigerate about 1 hour or until firm.

    3. SPREAD the remaining buttercream over the top and sides of the cake. Drizzle with the remaining caramel sauce. Sprinkle with remaining Cheez-It crumbles. Slice and serve.

    For longer storage, loosely cover and refrigerate. Let stand at room temperature for 2 hours before serving.
     
     
    CHEEZE IT HISTORY

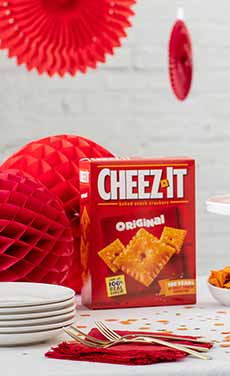
    Cheez-It cheese crackers were introduced in 1921 by the Green & Green Company, a manufacturer of snack crackers based in Dayton, Ohio. The original tag line was “A Baked Rarebit”—rarebit being a melted cheese over toasted bread (here’s more about it).

    The rectangular crackers are made with wheat flour, vegetable oil, cheese, salt and spices.

    The brand was acquired by Sunshine Biscuits 1932. Sunshine Biscuits became a subsidiary of the Keebler Company in 1996. Keebler, in turn, was acquired by Kellogg in 2001. Here’s more history.

    Today there are nine varieties of Cheez-It, from Extra Toasty and Extra Cheesy to Pepper Jack and Whole Grain. There are also Cheez-It Grooves, Duoz, Snap’d, snack mixes and snack packs.


  • Comments off

    Rum Punch Recipes For National Rum Punch Day

    Raise a toast to September 20th, National Rum Punch Day. Punch is a general term for a broad assortment of mixed drinks, made with or without alcohol. The drink originated on the Indian Subcontinent, and was called paantsch.

    The word “punch” derives from that Hindi word, also spelled panch, which in turn comes from the Sanskrit panchan, meaning five. In India, panch was made from five different ingredients: sugar, lemon, water, tea or spices, and an alcoholic spirit; hence the name.

    Punch was “discovered” in India by the British sailors of the East India Company. The concept was brought to England in the early 17th century.

    From there it spread to other countries. While Western punch recipes generally contain fruit or fruit juice, fruit isn’t essential.

    Nor is an elegant punch bowl required: A pitcher is fine, and in many cases, it’s more practical.

    We’ve got a number of rum punch recipes for you, starting with two from Hawaii’s Koloa Rum.

    Rum is a New World product. It wasn’t until 1655 when Jamaican rum was introduced to make punch, that the rum punch was born.

    The first two recipes have a Hawaiian twist. They’re made with Koloa Rum, which is distilled on the island of Kauai from pure cane sugar and Hawaiian mountain rainwater.

    You can find more drink recipes the on Koloa Rum website.
     
     
    RECIPE #1: WATERMELON RUM PUNCH
     
    Ingredients For 2 Drinks

  • 4 ounces Koloa White Rum or substitute (photo #3)
  • 3 cups watermelon, cubed
  • 1 + ½ large limes, juiced, divided
  • 2 tablespoons sugar
  • Handful fresh mint leaves
  • Ice
  • 4 ounces club soda
  • Garnish: lime wheel, mint leaf, watermelon wedge
  •  
    Preparation

    1. COMBINE the watermelon, lime juice from 1 lime, and the sugar in a blender, and blend until liquid.

    2. MUDDLE the mint and juice from 1/2 lime in a cocktail shaker. Add the rum, watermelon mixture, and ice.

    3. SHAKE well and strain into rocks glasses over fresh ice. Top with club soda. Garnish with a lime wheel, fresh mint, and a watermelon wedge.
     
     
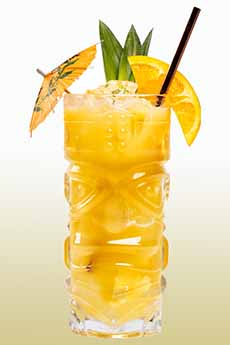
    RECIPE #2: SPICED PINEAPPLE RUM PUNCH

    You’ll fill up a 64-ounce pitcher with this recipe, which makes 60 ounces of punch.
     
     
    Ingredients For A Party Pitcher

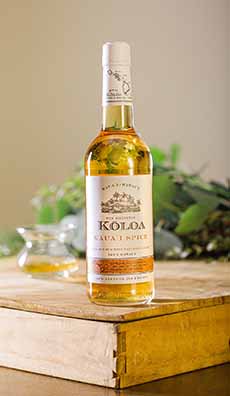
  • 1 cup Koloa Spice Rum or substitute (photo #3)
  • .5 cup Koloa White Rum (photo #4)
  • 2.5 cup fresh pineapple juice
  • 1 cup fresh orange juice
  • .5 cup lime juice
  • Few drops citrus bitters
  • 1 cup ginger ale
  • 1 cup lemon-lime soda (e.g. Sprite)
  • Ice
  • Garnish: orange wedge, pineapple spear, pineapple leaves*
  • Optional rim: cinnamon sugar
  •  
    Preparation

    In advance, chill all the ingredients (except the bitters), as well as the pitcher (64 ounces or more).

    1. MAKE the rim sugar. Combine ground cinnamon with sugar in a ratio of 1:4. Dip the rims of tall glasses into a saucer of water, then twist them in a saucer of cinnamon sugar.

    2. COMBINE all of the drink ingredients in the pitcher and stir thoroughly to combine.

    3. ADD ice to the glasses and fill them with the punch.
     
     
    MORE PUNCH RECIPES

  • Bacardi Rum Punch
  • Coconut Rum Punch
  • Frozen Bourbon Milk Punch
  • Mai Tai & Other Tiki Drinks
  • Mango Rum Punch
  • Planter’s Punch
  • The Best Rum Cocktails
  •  
     
    ________________

    *Look for a pineapple with nice leaves for garnishing. You can substitute basil, rosemary, or thyme leaves.


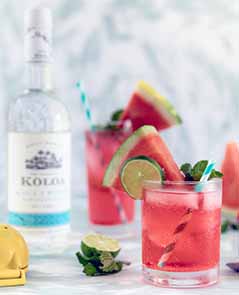
    [1] Recipe #1: Watermelon rum punch (all photos © Koloa Rum).

    Spiced Pineapple Rum Punch
    [2] Recipe #2: Spiced rum and white rum combine with pineapple and orange juices.

    Koloa White Rum Bottle At The Beach
    [3] Koloa White Rum.

    Koloa Spiced Rum Bottle
    [4] Koloa Spiced Rum.


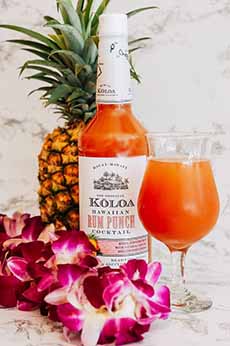
    [5] Koloa also sells a bottled Rum Punch.


    CHECK OUT WHAT’S HAPPENING ON OUR HOME PAGE, THENIBBLE.COM.


    Comments off


    © Copyright 2005-2026 Lifestyle Direct, Inc. All rights reserved. All images are copyrighted to their respective owners.