|

[1] Spicy Thai chicken wings (photo © Spice Market Restaurants).
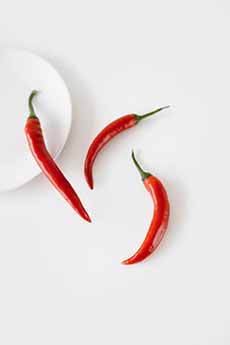
[2] Thai chiles (photo © Anna Nekrashevich | Pexels).
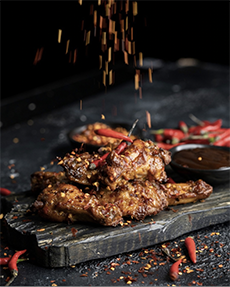
[3] Food art: Thai chiles raining down on chicken wings (photo © FinaMill).
|
|
According to the National Chicken Council’s 2012 Wing Report, more than 1.25 billion wing portions will be consumed during Super Bowl weekend.
Updated 2020: The National Chicken Council’s Annual Chicken Wing Report projects a record-breaking 1.4 billion chicken wings during Super Bowl LIV weekend.
That’s more than 100 million pounds of wings!
It’s the most eaten food during the Super Bowl each year [source].
If you haven’t decided on a wing recipe, here’s one from Jean-George Vongerichten’s Spice Market restaurant in Manhattan’s Meatpacking District.
Anyone who loves fried chicken and Thai flavors will love this dish. It’s a Thai-seasoned version of wings, coated with a sweet-and-sour sauce after being fried to a crisp.
The recipe below makes 4 servings. You can multiply the recipe to make a large batch for a party.
> National Chicken Wing Day is July 29th. International Chicken Wing Day is July 1st.
> The year’s 40 chicken holidays.
> The history of the chicken.
> The different parts of a chicken (how many can you identify)?
> The different types of chiles: a photo glossary.
THAI FRIED CHICKEN WINGS WITH HOT & SOUR SAUCE AND SALTED MANGO
Ingredients For The Hot & Sour Sauce
1/4 cup grape seed, corn or other neutral oil
1/2 cup thinly sliced shallots
1/4 cup thinly sliced garlic
2 tablespoons chopped dried red finger chiles
1/2 fresh red Thai chile (substitute bird’s eye or serrano*)
1/4-inch piece fresh galangal, peeled and cut crosswise into 1/4-inch slices
1/8 teaspoon shrimp paste (belacan)
1-1/2 tablespoons palm sugar
2 tablespoons tamarind paste
2 tablespoons red wine vinegar
2 tablespoons fresh lime juice
3/4 teaspoon nam pla (Thai fish sauce)
3/4 teaspoon salt
For The Wings
1/2 cup soy sauce
1/2 cup fresh lime juice
2 tablespoons nam pla (Thai fish sauce)
3 garlic cloves, crushed
2 fresh red Thai chiles, thinly sliced
1 tablespoon sugar
2 pounds chicken mini drumsticks from chicken wings, separated at joint
1 ripe mango, cut into 1-inch slices
2 teaspoons salt
Grapeseed, corn or other neutral oil for deep-frying
1/2 cup cornstarch
1/2 cup rice flour
1/4 cup chopped fresh mint leaves
|
|
Preparation
1. MAKE the sauce: Heat the oil in a medium saucepan over medium heat. Add the shallots and garlic and cook, stirring, until they become a deep golden brown. Add the remaining ingredients and bring the mixture to a boil.
2. SIMMER, stirring, for 1 minute, then remove from the heat and transfer to a blender. Purée carefully until smooth, transfer to a large mixing bowl, and set aside until ready to use.
3. MAKE the wings: Put the soy sauce, lime juice, nam pla, garlic, chiles and sugar in a medium saucepan and bring to a boil, stirring occasionally. Cool completely, then pour over the mini drumsticks in a shallow baking dish and toss to coat well. Cover with plastic wrap and refrigerate for at least 1 hour. Meanwhile…
4. TOSS the mango cubes with the salt in a small bowl and let sit for 30 minutes. When ready to cook…
5. POUR the oil to a depth of 3 inches in a heavy, deep pot and heat to 375°F. Remove the drumsticks from the marinade and pat dry. Combine the cornstarch and rice flour on a shallow plate. Dredge the chicken in the mixture, then carefully put in the pot. Do not overcrowd; work in batches if necessary. Cook until crisp, brown, and cooked through, about 10 minutes. Adjust the heat as necessary to maintain the oil’s temperature.
6. DRAIN on paper towels and transfer to the bowl of hot-and-sour sauce. Toss well to coat and transfer to the serving plates. Arrange the salted mango in a little mound next to the chicken, garnish with the mint leaves, and serve.
________________
*Bird’s eye is a type of Thai chile, typically measuring between 50,000 and 100,000 Scoville Heat Units (SHU) on the Scoville scale. If you’re looking for a less heat, serranos typically range from 10,000 to 25,000 SHU. The green chiles are milder than the ripe red ones.
CHECK OUT WHAT’S HAPPENING ON OUR HOME PAGE, THENIBBLE.COM.
|


