|
Thinking ahead to Mother’s Day food, our colleague Hannah Kaminsky created this “heart-felt” endive salad recipe by cutting strawberries into heart shapes and combining them with endive, artichoke hearts, hearts of palm and hemp.
Don’t worry if you don’t have hemp seeds: You can substitute sesame seeds or chopped pecans.
A bright, punchy, yet delicate dressing of grapefruit and cayenne gives the salad some kick, without smothering the vegetables’ subtle nuances.
RECIPE: HEART-FELT ENDIVE SALAD
Ingredients
4 green and/or red endive hearts
1 14-ounce can quartered artichoke hearts, drained
1 14-ounce can hearts of palm, drained, halved or quartered if large
1/2 cup fresh strawberries, cut into heart shapes
1-2 tablespoons hemp hearts
Fresh chives, minced
Fresh basil (tear the large leaves)
For The Dressing
2 tablespoons grapefruit juice
2 teaspoons maple syrup
1/2 teaspoon Dijon mustard
1/4 cup olive oil
1/4 teaspoon salt
Pinch cayenne pepper
Preparation
1. MAKE the dressing first so that it’s ready to go when you are. Simply whisk the grapefruit juice, maple syrup, and mustard together in a small bowl. Slowly drizzle in the oil while whisking vigorously to emulsify. Season with salt and add cayenne pepper to taste. Set aside.
2. CUT off and discard the woody bottoms of the endive; separate the leaves. Toss them in a large bowl along with the artichokes and hearts of palm.
3. CUT the strawberries into heart shapes: Slice them in half, and then cut a triangular notch from the top. Add the berries to the bowl, along with the hemp hearts.
4. DRIZZLE on the dressing, toss thoroughly to combine, and coat all of the vegetables. Finish with the fresh herbs. Serve immediately.
Here’s another recipe with artichoke hearts and hearts of palm.
ABOUT HEMP HEARTS
When most Americans hear “hemp,” they think of a particular species of Cannabis, used as a recreational drug. However, a second species of hemp has long been used for fiber and rope-making, and a third for hemp seed and hemp oil, which are made into a broad variety of food products (more about culinary hemp).
Hemp seeds make it easy to add omega-3 and -6 essential fatty acids, protein, and fiber to your diet. Just sprinkle them like a spice or herb on cereal, salad, vegetables, yogurt and other foods. In addition to the nutrition, it adds a rich, nutty flavor and a light crunch.
Hemp Hearts, marketed by Manitoba Harvest, are the most nutritious part of the hemp seed. Some people like to eat them straight from the bag. And, unlike whole hemp seed, they don’t need to be ground in order to release their nutrition.
Hemp seeds provide 10 grams of complete, plant-based protein per 30 grams (3 tablespoons). According to the World Health Organization, the ideal ratio of omega-6 to omega-3 essential fatty acids is 4:1; the naturally occurring ratio in Hemp Hearts is 3.75:1. Hemp Hearts contain more protein and omega-3 and -6 essential fatty acids and fewer carbs than a similar serving of chia or flax seeds.
|
|

[1] A bouquet of colors and flavors. Endive salad recipe and photo courtesy Hannah Kaminsky | Bittersweet Blog.

[2] Hearts of palm (photo © Trikaya).
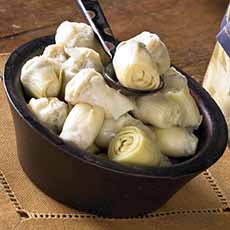
[3] Artichoke hearts (photo © La Tienda).

[4] Hemp hearts (photo © Manitoba Harvest | Facebook).
|