|
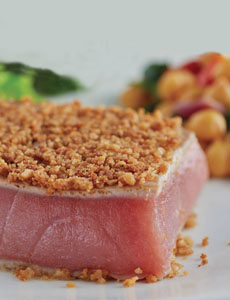
Beyond panko: Turn pretzels into a tasty crust for seared fish.
We love the appeal of this seared tuna recipe from Bonefish Grill. Not only do we love tuna; but the pretzels offer a fun alternative to the sesame crusted tuna recipe we typically use.
We endeavored to recreate the recipe at home, and discovered that:
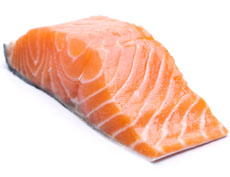
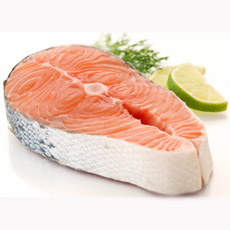
The recipe can be used with any thick fish fillet or steak.
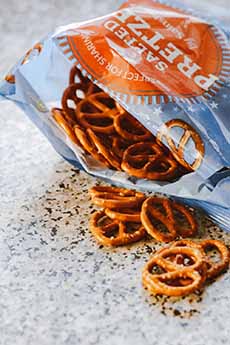
It is easiest to crush pretzel sticks; thin and uniform, they crush quickly and evenly.
But you can use any pretzel. We also tried the gluten-free Pretzel Crisps we had on hand, and whole wheat pretzels from Snyder’s Of Hanover (which also makes GF pretzel sticks).
Our favorite crust was made from Utz sesame pretzels. But we think our choice going forward will be to add some toasted sesame seeds to whole wheat pretzels.
Don’t add much salt to the red wine sauce, unless you’re using salt-free pretzels. Otherwise, there’s plenty of salt in the pretzel crust.
Check out the history of pretzels, below. Without prayers and kids, we wouldn’t have them.
April 26th is National Pretzel Day.
> The different species of tuna.
RECIPE: PRETZEL-CRUSTED TUNA
Ingredients For 2 Servings
2 tuna steaks
1 cup crushed pretzels
1 teaspoon salt
1 tablespoon unsalted butter
For The Sauce
1 shallot
2 tablespoons Dijon mustard
3/4 cup red wine
1 tablespoon unsalted butter or canola oil
Pinch salt
Preparation
1. Pulse the pretzels in a food processor to the consistency of bread crumbs. Set aside.
2. MAKE the sauce: Mince the shallot and heat the butter in a skillet over medium heat. Add the shallots and sauté until soft. Then add the wine and deglaze the pan. Simmer the sauce for three minutes so the alcohol evaporates and the sauce thickens.
3. HEAT a cast iron skillet over high heat and add the butter or oil. Press the tops of the tuna steaks into the pretzel crumbs to coat. When the fat starts to smoke, place the fish face down in the pan.
4. COOK for 4-5 minutes top down, then flip over and cook for another 3 minutes to serve rare, as they do at Bonefish Grill.
5. SERVE with the sauce on the side, so the crumbs stay crisper.
THE DIFFERENCE BETWEEN A SKILLET & A FRYING PAN
It’s this easy: A skillet has slanted sides. A frying pan, also called a sauté pan, has straight sides that are higher than the skillet’s. (For this recipe, use whatever you have.)
Why the two different side shapes?
Frying/Sauté Pan Benefits
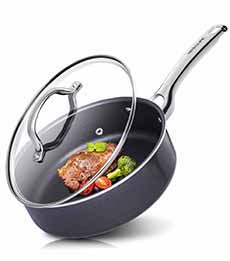
If both pans are the same size, the frying/sauté pan (photo #5) will have a slightly larger surface area. In a 12-inch diameter pan, it can make the difference when fitting in pieces of chicken or other food, so you can cook everything in one batch.
The other benefits of a frying/sauté pan: Liquids are less likely to splash out of the higher, straight sides; and lids fit more tightly, limiting evaporation.
Skillet Benefits
Chefs prefer the sloping sides of a skillet (photo #6) for quick cooking techniques like stir-frying, where the ingredients need to be moved around continuously. A skillet is also a better option for a frittata, served straight from the pan.
It is a fun fact in cooking that a skillet is better for sautéing than a sauté pan. The sloping sides make it easier to move pieces of food around while constantly stirring, and to more easily shake the pan to toss the food for even cooking. For the best sear, choose a cast iron skillet. It gets hotter than other metals.
You can, of course, sauté your food in a straight-sided sauté pan, but it requires more work: constant stirring and turning.
Guessing that the straight-sided frying pan may have come first, and the skillet adapted for greater flexibility, we tried to locate the facts. What we found was this, in Wikipedia:
Before the introduction of the kitchen stove in the mid-19th century, a commonly used cast iron cooking pan called a spider had a handle and three legs used to stand up in the coals and ashes of the fire. Cooking pots and pans with legless, flat bottoms were designed when cooking stoves became popular; this period of the late 19th century saw the introduction of the flat cast iron skillet.
Related Pans
Professionals use a sauteuse (saw-TOOZ), a pan that combines the best higher sides of the sauté pan and the sloping sides of the skillet. It is also called a fait-tout (fay-TOOT), which literally means that it “does everything”.”
Finally, mention must be made of the grill pan. It’s a frying pan with very low sides and series of parallel ridges on the cooking surface, which both enables cooking with radiant heat like a grill, and allows the fat to drain down.
THE HISTORY OF PRETZELS
It was all for the kids. In 610 C.E., monks in the what is today southern France northern Italy twisted and baked scraps of dough as a reward for children who had memorized their Bible verses and prayers.
The shape represented the monks’ concept of a child’s arms folded in prayer. The monks called this soft, baked dough a “pretiola,” Latin for “little reward.”
The word evolved into the Italian “brachiola,” which means “little arms.” Over the next few centuries, the pretiola journeyed through the French and Italian wine regions, crossed the Alps, traveled through Austria and arrived in Germany, where it became known as the Bretzel or Pretzel.
Here’s more pretzel history.
|