THE NIBBLE BLOG: Products, Recipes & Trends In Specialty Foods


Also visit our main website, TheNibble.com.

TIP OF THE DAY: Breadcrumb Topping On Pasta

Macaroni & Cheese With Breadcrumbs

linguine-bread-crumbs-all-ondaFB-230

TOP PHOTO: Mac & cheese, crumbed for
crunch and glamour. Photo courtesy Morgans
Hotel | NYC. BOTTOM PHOTO: Linguine
tossed in olive oil, Parmesan and herbs,
topped with bread crumbs. Photo courtesy
All’onda | NYC.

  If you peruse recipes for mac and cheese, you’ve likely noticed that the better recipes—certainly those by name chefs—regularly add a sprinkle of toasted breadcrumbs on top of the dish. Chefs like Marcus Samuelsson and Michael Symon have contributed crumbed mac recipes to this website.

While mac and cheese may not be a southern Italian tradition, toasted breadcrumbs are, often replacing grated cheese as a garnish for the pasta.

As we close out National Pasta Month, our tip is: Go southern and garnish some of your pasta dishes with breadcrumbs instead of cheese. If you can’t live without grated Parmesan, toss the pasta with it before topping with breadcrumbs.

In its simplest form, just toss cooked pasta in olive oil, plate it and sprinkle with breadcrumbs. If you like anchovies, try the classic recipe with anchovies and chile flakes below.

THE HISTORY OF BREADCRUMBS ON PASTA

According to Academia Barilla, the tradition of pasta with breadcrumbs in Southern Italy was created by poorer people who could not afford pricier ingredients like cheese.

They would prepare the breadcrumbs using stale bread leftovers. Those who had them also added kitchen staples, salted anchovies and dried chili peppers.

Over time in the region of Calabria, people began to prepare this dish on Christmas Eve, which was traditionally fish or seafood (or, in the Feast Of Seven Fishes, both).
 
MAKE YOUR OWN PANGRATTATTO BREADCRUMBS

When we have enough bread ends left over, we make pangrattatto (“grated bread”) instead of buying gourmet seasoned breadcrumbs. This classic Italian garnish consists of breadcrumbs toasted in olive oil and seasoned.

Feel free to use your favorite seasonings. Anchovy paste, cayenne, chili flakes, garlic, herbs, lemon zest, Parmesan cheese and parsley are traditional; but you can try curry, nutmeg or whatever you think adds pizzazz to your pasta recipe.


The type of bread doesn’t matter; a combination of different loaves only adds to the flavor. If you don’t have enough bread ends saved up, you can dry out fresh bread (details follow) or default to panko, Japanese breadcrumbs.

In addition to pasta topping, use the crumbs on casseroles and gratins, in meatballs and meatloaf.


Preparation

1. PLAN ahead. Store all the ends and leftover slices from loaves of bread in a heavy-duty freezer bag. You can keep it in the freezer or not. When you’re ready to make breadcrumbs…

2. LET the bread sit at room temperature overnight or until it gets hard enough to grate into breadcrumbs. (Our Nana kept the ends in a breadbox for weeks until she had enough to make crumbs.) If your bread isn’t hard enough, you can dry it in a 250°F oven.

3. GRATE the bread on the grating disk of a food processor to the desired texture, or with a hand grater. We prefer a coarser crumb that provides crunch, rather than the fineness of commercial breadcrumbs.

4. STORE the crumbs in an airtight jar. When ready to use, measure out what you need for the recipe.

5. HEAT a bit of olive oil in a sauté pan over medium heat (1/4 cup olive oil for 4 tablespoons crumbs). Add the breadcrumbs and seasonings. Toast the breadcrumbs for 2 to 3 minutes, or until they are golden.
 

  bucatini-anchovies-crumbs-theculinarychronicles-230
This version of Bucatini With Anchovies & Chilies uses anchovy paste and adds kale, with a light dusting of crumbs. Here’s the recipe from The Culinary Chronicles.
 
RECIPE: BUCATINI WITH ANCHOVIES & CHILI FLAKES

This Calabrian dish, courtesy of Acadamia Barilla is made with bucatini, a thick spaghetti-like pasta with a hole running through the center. The name comes from the Italian buco, “hole” and bucato, “pierced.” You can substitute any ribbon pasta.

This dish is traditionally served on—but not confined to—Christmas Eve. You can make it in just 25 minutes, anytime you have a hankering for anchovies.

If you don’t want the brininess of anchovies but want a depth of piquant umami flavor, substitute anchovy paste.

Serve the dish with a full-bodied red wine.

Ingredients For 4 Servings

  • 1 pound bucatini
  • 4 salted anchovies (substitute 1 heaping tablespoon anchovy paste)
  • 4 tablespoons breadcrumbs
  • ¼ cup extra virgin olive oil
  • 1 pinch red chili flakes (more to taste)
  •  
    Preparation

    1. BRING a large pot of water to a boil. While it heats…

    2. RINSE the anchovies well under running water and debone them. Place a pan over low heat and add half the olive oil. Once the oil is hot, add the anchovies and cook for a couple of minutes, until the anchovies break down. While the anchovies are cooking…

    3. PLACE another pan with the remaining oil over medium heat. Add the breadcrumbs and chili flakes. Toast the breadcrumbs for 2 to 3 minutes, or until they are golden.
    Once the water is boiling…

    4. ADD the salt and cook the bucatini following the package instructions. Drain the pasta when done and toss with the anchovies and toasted breadcrumbs.
      

    Comments off

    TOP PICK OF THE WEEK: Serpent’s Bite Apple Cider Flavored Whisky

    Serpent's Bite Bottle
    [1] Good enough to tote in a flask (photo © Spirits Marque One).

    Serpent's Bite Shot
    [2] Take a sip, bite the apple (photo © Spirits Marque One).


    [3] How about adding some Serpent’s Bite to a glass of cider? (photo © Freestocks).

      Flavored shots are trending, and our favorite this season is Serpent’s Bite Apple Cider Flavored Whisky.

    It does for whisky what so many distillers have done for vodka: infuses a delectable layer of flavor.

    And Serpent’s Bite is the flavor of fall. It will appeal to fans of whisky and hard apple cider alike.

    It’s very smooth with a fine balance of sweet, crisp apple cider flavors with the whisky.

    The latter is distilled from corn and rye, which are blended during distillation and then infused with the apple cider flavors.

    Serpent’s Bite was made to be enjoyed in a neat shot, straight up with a slice of apple, or in a mixed-based shooter.

    At 35% ABV/70 proof, it’s a bit less alcoholic than your typical shot.

    It’s available in 50 ml (MSRP $1.89), 750 ml (MSRP $15.99) and 1 liter bottles (MSRP $18.99).

    If you want to know anything else about it..hmm.

    The only things on the one-page website are links to Facebook page, Instagram and Twitter feeds, the latter promoting the hashtag #BiteTheNight.

    Perhaps the only thing to say is: It tastes really good and would be a swell gift for the right folks.

    Spirits Marque One, producer of Serpent’s Bite, is part of Constellation Brands, the holdings of which comprise the world’s largest producer of wine, including Manischewitz and Robert Mondavi.

    Other alcohol brands among the hundred-plus include Corona beer and Svedka vodka.
     

    WHISKY VS. WHISKEY

    Whisky is the Scottish spelling of whiskey.

    The alternative spelling was chosen to differentiate the national product from Irish whiskey.

    The “whisky” spelling is used in Canada, Japan and Wales, as well as Scotland.

    In the United States, a 1968 directive from the Bureau of Alcohol, Tobacco and Firearms specifies “whisky” as the official U.S. spelling. However, it allows the alternative spelling, “whiskey.”

    Most U.S. producers prefer to include the “e,” as do we. Without it, it looks like something is missing.

    And another reason to keep the “e”: Irish whiskey predates Scotch whisky.

    Check out this brief hhistory of whiskey.

    Ironically, distillation was discovered in the 8th century in Persia—a country that has not permitted the sale and consumption of spirits since the 1979 Islamic revolution.


    Comments off

    HALLOWEEN: Layer Cake With Candy Corn

    Halloween Layer Cake Recipe

    /home/content/p3pnexwpnas01 data02/07/2891007/html/wp content/uploads/halloween layer cake tasteofhome 230
    TOP PHOTO: Halloween Layer Cake from
    Harry & David. BOTTOM PHOTO: Make your
    own Halloween layer cake with this recipe.
    Photo courtesy Taste Of Home.


    If yesterday’s Spider Web Brownies didn’t blow your cobwebs away, how about a layer cake?

    In addition to Halloween, the recipe below, from Taste Of Home, is also spot-on for October 30th, National Candy Corn Day.

    There are two orange-colored labels and one chocolate layer. You’ll need three 9-inch round cake pans.

    Prep time is 20 minutes, bake time is 30 minutes plus frosting and glaze.

    RECIPE: HALLOWEEN LAYER CAKE

    Ingredients For 12-16 Servings

  • 1 cup unsalted butter, softened
  • 2 cups sugar
  • 4 eggs
  • 3 cups all-purpose flour
  • 1 tablespoon baking powder
  • 1/2 teaspoon salt
  • 1 cup milk
  • 1/4 cup baking cocoa (not cocoa drink mix)
  • 1/4 cup water
  • 1/2 teaspoon vanilla extract
  • 1/2 teaspoon orange extract
  • 1 tablespoon grated orange peel
  • 10 drops yellow food coloring
  • 6 drops red food coloring
  •  
    For The Frosting

  • 3 packages (3 ounces each) cream cheese, softened
  • 5-3/4 cups confectioners’ sugar
  • 2 tablespoons milk
  • 8 drops yellow food coloring
  • 6 drops red food coloring
  •  

    For The Glaze

  • 3 ounces semisweet chocolate
  • 1/3 cup heavy whipping cream
  • Candy corn for garnish
  •  
    Preparation

    1. PREHEAT the oven to 350°F.

    2. CREAM the butter and sugar in a bowl, until light and fluffy. Add the eggs one at a time, beating well after each.

    3. COMBINE the flour, baking powder and salt; add alternately with the milk to creamed mixture. Mix well.

    4. COMBINE the cocoa, water and vanilla; stir in 2 cups of the cake batter. Pour into a greased and floured 9-inch round baking pan.

    5. ADD the orange extract, peel and food coloring to the remaining batter. Pour into two greased and floured 9-inch round baking pans. Bake for 30 minutes or until the cake tests done. Cool for 10 minutes before removing from the pans to wire racks.

    6. MAKE the frosting: In a bowl, beat all frosting ingredients until smooth. Place one orange cake layer on a cake plate; spread with 1/2 cup frosting. Top with chocolate layer; spread with 1/2 cup frosting. Top with second orange layer. Frost the sides and top of each.

    7. MAKE the glaze: Microwave the chocolate and cream on high 1-1/2 minutes or, stirring once. Stir until smooth; let cool 2 minutes. Slowly pour over cake, letting glaze drizzle down sides. Garnish with candy corn.

      Candy Corn Cake Recipe

    /home/content/p3pnexwpnas01 data02/07/2891007/html/wp content/uploads/candy corn cheesecake tablespoon.com 230
    TOP PHOTO: Edge the cake with rolled wafer cookies and top with candy corn. Recipe from TexasMonkey.Blogspot.com. BOTTOM PHOTO: Candy Corn Cheesecake. Recipe from from Tablespoon.com.


    Comments off

    TIP OF THE DAY: Pumpkin Soup, In A Pumpkin Or Not

    /home/content/p3pnexwpnas01_data02/07/2891007/html/wp content/uploads/pumpkin stew cristinaferrare 230

    Pumpkin Soup Recipe

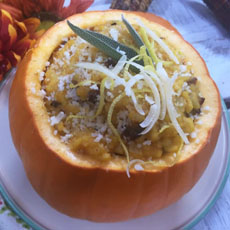
    TOP PHOTO: Pumpkin soup in a pumpkin
    terrine. Photo courtesy Cristina Ferrare.
    BOTTOM PHOTO: Pumpkin soup in a real
    pumpkin. Photo by G.M. Vozd | IST.


    When was the last time you had pumpkin soup? It seems to have been supplanted by its cousins, acorn squash soup and butternut squash soup.

    The multi-purpose fruit was introduced by the Native Americans to American colonists, who turned it into soups, sides, desserts and beer.

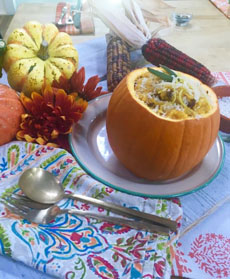
    You can make pumpkin soup a Halloween tradition. Serve it from a scooped-out pumpkin, invest in a pumpkin tureen, or simply serve it from the pot.

    Pumpkin soup is adaptable to different flavors, from anise to chile, curry, and just about any spice on the shelf.

  • Gordon Ramsay tops his with wild mushrooms and shaved Parmesan.
  • A pumpkin-beef soup celebrated the Independence of Haiti in 1803.
  • In Southeast Asia, chunks of pumpkin are served in a clear broth with ground pork, scallions and cilantro.
  • Here are three pumpkin soup recipes we’ve published previously, along with instructions to turn a pumpkin into a tureen.
  •  
    The recipe below is from Cristina Ferrare, host of Hallmark Channel’s The Home and Family Show. She flavors the soup with pumpkin pie spices and suggests multiple garnishes so each diner can customize his or her soup. And she uses cream cheese instead of cream, for an even richer soup.

    Whether for sophisticated palates or to warm up the kids prior to trick-or-treating, make pumpkin soup part of your Halloween tradition.
     
    Trivia: The word pumpkin comes from the Greek pepõn, large melon. The word soup derives from Late Latin suppa, “bread soaked in broth,” from Proto-Germanic sup, “to take liquid.” For many people, yesterdy’s bread soaked in broth was the main meal of the day and also the derivation of “supper.”

     
    *All squash are native to the Andes and Mesoamerica. They are members of the gourd family, Cucurbitaceae, and the genus Cucurbita. Pumpkin, acorn and summer squash belong to Curbita pepo; butternut squash is Curbita moschata; hubbard squash and buttercup squash belong to Curbita maxima. Curbita is Latin for “gourd.” Who said taxonomy is dull?
     
    RECIPE: PUMPKIN SOUP WITH CUSTOM GARNISHES

    Ingredients

  • 1/3 cup olive oil
  • 2 medium yellow onions, thinly sliced
  • 4 scallions, chopped
  • 1 tablespoon dry sherry
  • 1 teaspoon ground cinnamon
  • 1/8 teaspoon ground cloves
  • 1 teaspoon freshly ground nutmeg
  • 1 1/2 teaspoons kosher salt
  • Pinch of cayenne pepper
  • 1 can (29 ounces) pure pumpkin
  • 1 quart homemade chicken stock or store-bought chicken broth
  • 1 package (8 ounces) regular or low-fat cream cheese, cut into small pieces, divided
  •  
    Garnishes

    Use as many of these as you like:

  • Sour cream or plain Greek yogurt
  • 4 scallions, finely chopped
  • 1 small jalapeño, sliced thin (remove seeds and pith for less heat)
  • 1/4 cup pomegranate seeds
  • Olive, pumpkin or walnut oil for drizzling
  • 1/4 cup toasted pumpkin seeds (recipe below)
  • Croutons
  •  

    Preparation

    1. HEAT a saucepan or stockpot over medium-high heat until hot. Add the olive oil, then quickly add the onions and scallions. Stir.

    2. TURN the heat down to medium. Sauté until the onions start to caramelize, about 10 to 12 minutes. Stir in the sherry. Add the cinnamon, cloves, nutmeg, salt, cayenne and pumpkin, and mix well.

    3. ADD the chicken stock and stir until all of the ingredients are well blended.

    4. LOWER the heat and simmer for 20 minutes, until the soup starts to thicken slightly. If the soup is too thick, add more chicken stock or water, a half cup at a time. Turn off the heat.

    5. FILL a blender halfway with the soup and half of the cream cheese, and blend unit smooth. Pour into the soup pot. Continue the process with the rest of the soup and cream cheese until everything has been blended.

    6. PLACE the soup pot back on the stove and heat through. Serve piping hot, garnished with a dollop of sour cream, finely chopped scallions, chopped jalapeño and pomegranate seeds; a drizzle of olive, pumpkin or walnut oil; and the pumpkin seeds (recipe below).
     

    RECIPE: ROASTED PUMPKIN SEEDS

    This recipe is adapted from one from Elise on SimplyRecipes.com. You can see the step-by-step process with photos.

    With Elise’s technique, first boiling the seeds in salted water allows salt to permeate the seeds, not just coat the outside. If they’re properly toasted and are from small to medium size pumpkins, she notes, they can be eaten shells and all.

    Ingredients

  • Raw pumpkin seeds
  • Water
  • Salt
  • Olive oil
  •   Pumpkins

    roasted-pumpkin-seeds-elise-simplyrecipes-230
    Carve the pumpkin, roast the seeds. Top photo courtesy Starling Farms. Bottom hoto courtesy Elise | Simply Recipes.

     
    Preparation

    1. USE a strong metal spoon to scrape the seeds and strings from the inside of the pumpkin. Place in a colander and run under water to rinse and separate the seeds.

     
    2. MEASURE the pumpkin seeds in a cup measure. Place the seeds in a medium saucepan. Add 2 cups of water and 1 tablespoon of salt to the pan for every half cup of pumpkin seeds. Add more salt if you would like your seeds to be saltier.

    3. BRING the salted water and pumpkin seeds to a boil. Let simmer for 10 minutes. Remove from the heat and drain.

    4. PREHEAT the oven to 400°F. Toss the seeds in oil and spread out in a single layer in a baking pan or rimmed baking sheet.

    5. BAKE on the top rack until the seeds begin to brown, 5-20 minutes, depending on the size of the seeds (small pumpkin seeds may toast in 5 minutes, large pumpkin seeds may take up to 20 minutes). Keep an eye on the pumpkin seeds so they don’t get over-toasted. When lightly browned…

    6. REMOVE the pan from the oven and let cool on a rack until ready to serve. Test to see if you enjoy the seeds whole. If not, crack to remove the inner seeds.


    Comments off

    HALLOWEEN RECIPE: Spider Web Brownies

    /home/content/p3pnexwpnas01 data02/07/2891007/html/wp content/uploads/spider web brownies kingarthur 230
    Brownies for Halloween. If you want to place an edible spider in your web, sandwich two chocolate wafers with icing and add candy eyes and string licorice legs. Photo courtesy King Arthur Flour.


    Need to bring something to a Halloween party? How about a twist on that party favorite, chocolate brownies?

    This recipe for Spider Web Brownies is from King Arthur Flour, the source of everything wonderful for baking. Prep time is 18 to 22 minutes, baking time is 28 to 30 minutes.
     
     
    RECIPE: SPIDER WEB BROWNIES

    Ingredients For 24 Pieces
     
    For The Brownies

  • 4 large eggs
  • 1-1/4 cups dark cocoa or Dutch-process cocoa
  • 1 teaspoon salt
  • 1 teaspoon baking powder
  • 1 teaspoon espresso powder
  • 1 tablespoon vanilla extract
  • 1 cup (2 sticks) unsalted butter
  • 2-1/4 cups sugar
  • 1-1/2 cups unbleached all-purpose flour
  • 2 cups chocolate chips
  •  
    For The Spider Web

  • 4 ounces cream cheese, at room temperature
  • 2 tablespoons sugar
  • 1 tablespoon unbleached all-purpose flourr
  • 1 large egg yolk
  • Optional: 1/2 teaspoon mint flavoring
  •  

    Notes Prior To Preparation

  • The order in which the ingredients are mixed is important.
  • The cream cheese for the web must be soft, so the sugar and flour can be incorporated smoothly.
  • Be sure there are no lumps in the mixture BEFORE adding the egg yolk and flavoring to the web ingredients. If you forget, you can press the mixture through a strainer to get rid of lumps, but it’s a lot of work.
  • Note that the image above shows a round spiderweb, while the directions and step-by-step photos show a 9″ x 13″ rectangular pan. You can make either shape from the same recipe. To make round spider web brownies, divide the batter into two 8″ round cake pans.
  • Here are step by step photos of how the cream cheese web is made.
  •  

    Preparation

    1. MAKE the brownie base. Preheat the oven to 350°F. Lightly grease a 9″ x 13″ pan or two 8″ round cake pans.

    2. CRACK the eggs into a bowl; add the cocoa, salt, baking powder, espresso powder and vanilla and beat at medium speed for about 4 minutes.

    3. MELT the butter in a medium-sized microwave-safe bowl, or in a saucepan set over low heat. Add the sugar and stir to combine. Continue to heat (or microwave) briefly, just until the mixture is hot but not bubbling, 110°F to 120°F. It will become shiny looking as you stir it. Heating the mixture to this point will dissolve more of the sugar, which will help produce a shiny top crust on the brownies.

    4. ADD the hot butter/sugar mixture to the egg/cocoa mixture, stirring until smooth. Add the flour and chips, stirring until smooth. Spoon the batter into the pan(s).


    Mummy Brownies
    More Halloween brownies: round, bite-size, wrapped in fondant, by Blissful Brownies. Available exclusively at Williams-Sonoma.

     
    5. MAKE the “spider web.” Combine the cream cheese, sugar and flour in a small bowl, and mix until smooth. Add the egg yolk and optional flavoring, mixing until smooth once again. Transfer the mixture to a disposable pastry bag and cut just the very tip off the end.

    6. PLACE a small pool of the mixture in the center of the brownie batter. Draw concentric circles around the pool, about 1 inch apart, moving out from the center. Once the circles are drawn, take a table knife, wet the tip, and draw it back and forth through the circles. The knife will draw the cream cheese filling into arcs. When the arcs are finished…

    7. USE the remaining filling in the pastry bag to trace the path where the knife traveled, to create the spokes of the web.

    8. Bake the brownies for 30 minutes, until the brownies just barely pull away from the edge of the pan. The center will rise while baking, but will sink back level once the brownies are cool. Remove them from the oven and cool before cutting.

    When testing to see if brownies are done, insert a cake tester into the center of the pan, digging around just enough to see the interior. You should see moist crumbs, but no uncooked batter. You’ll be left with a small divot in the center of the brownies; cover it up with a dab of the cream cheese frosting.


    Comments off

    The Nibble Webzine Of Food Adventures


    © Copyright 2005-2026 Lifestyle Direct, Inc. All rights reserved. All images are copyrighted to their respective owners.