|
One of our favorite bistro foods is Moules Marinières (mool marin-yair), Sailor-Style Mussels. The mussels are steamed in a flavorful broth, to which they add their briny juice.
We recently had a pot of the classic dish at Restaurant Dominique in Greenwich Village—a handsome room with big windows facing charming West Village streets.
We not only ate every mussel; we scraped the pot for every last bit of the divine broth. We can’t wait to go back for more mussels…and everything else on the classic bistro menu.
There’s also a mussels restaurant in New York City that serves 21 different variations, from the classic (white wine broth with garlic, shallot, parsley) to cuisine-specific riffs.
We’ve tried everything from Indian Moules (cinnamon, curry, garlic, star anise, white wine) to Mexican Moules (calamari, chipotle in adobo, chorizo, posoles), even Meatball Moules (meatballs, tomato, onion, garlic, pesto, Parmesan cheese).
During our most recent mussels foray, however, we were reminded of how cramped and noisy the restaurant is; not to mention that one needs to book a table days in advance. The next day we came across the following recipe from Chef Eric LeVine, for our favorite Moules Marinières: Thai curry with coconut milk and lemongrass.
We were hit with a blinding revelation of the obvious: We can make this at home in short order. Mussels are $4 a pound, compared with a $25 restaurant serving.
If you don’t like Thai flavors, find a recipe for what you do like. Here’s one for classic Moules Marinières, plus how to buy and clean mussels.
Steamed mussels are low in calories and gluten-free.
> November 10th is National Mussels Day.
> The year’s 56 fish and seafood holidays.
> Below: The history of mussels.
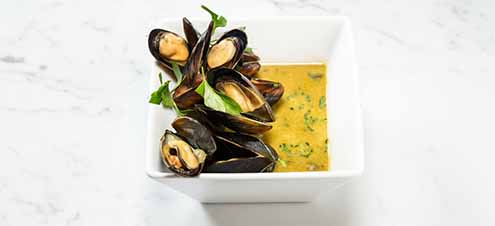
[1] You’re half an hour away from enjoying this dish (photo © Chef Eric Levine).
RECIPE: MOULES MARINIÈRES (STEAMED MUSSELS)
IN THAI CURRY BROTH
Prep time is 10-15 minutes and cooking time is 12-15 minutes.
Ingredients For 4 First Courses Or 2 Mains
8 sprigs cilantro, separate leaves and stems and roughly chop both
4 cloves of garlic, sliced thin
2 small shallots, sliced thin
½ teaspoon whole coriander seeds
½ teaspoon red chili flakes
1 teaspoon zest plus 1 tablespoon juice from 1 lime
Kosher salt
1 can (15 ounces) coconut milk
1 tablespoon olive oil
1 tablespoon Thai green curry paste
1 tablespoon brown sugar
1 tablespoon fish sauce, plus more to taste
2 pounds fresh mussels (ours were from Prince Edward Island), scrubbed with beards removed
1 small Thai or Serrano chile, thinly sliced
Preparation
1. COMBINE the cilantro stems, 2 cloves of garlic, 1 shallot, the coriander seed, chili flakes, lime zest, and a pinch of salt in a mortar and pestle. Grind into a smooth paste.
2. SCOOP 2 tablespoons of thick cream from the top of the coconut milk into a large saucepan. Add the oil and heat over medium heat. Add the remaining garlic, shallots, and ground paste plus the green curry paste. Cook for 4 minutes.
3. ADD the remaining coconut milk, sugar, and fish sauce. Bring to a simmer and cook for about 3 minutes. Taste and season as desired,
4. ADD the mussels, first discarding any that are cracked or already opened. Stir, cover, and cook, shaking the pan until the mussels open. Stir in the chopped cilantro, sliced chile, and lime juice.
5. DISCARD any mussels that haven’t opened in the pot. Divide the contents, including the broth, among two or four bowls.
THE HISTORY OF MUSSELS
Mussels as a group are hundreds of millions of years old. Bivalves—which include clams, mussels, oysters, and scallops—have inhabited the the oceans for more than 500 million years, first appearing in the middle Cambrian (about 300 million years before the dinosaurs).
However, a disclosure: The specific modern mussel species we eat today are not quite so old!
Early humans and proto-humans relied heavily on shellfish. Research suggests that the nutrient-rich shellfish allowed proto-humans to grow large brains, leaving the other primates behind (although primates like baboons also dig for shellfish, and macaques in Myanmar and Thailand are exceptional divers and swimmers and divers who forage along the ocean floor commonly use tools to open shellfish).
Archaeological evidence shows that early humans harvested mussels from the shores of Europe, North America, and Asia as far back as the Paleolithic era (a.k.a. the Old Stone Age*). They were an important food source for coastal communities due to their abundance, ease of harvest, and high nutritional value.
Around the world, archaeologists find piles and piles of mussel shells. In Scotland, many prehistoric settlements that date back more than 20,000 years are identified by the proximity of large piles of mussel shells.
The ancient Greeks and Romans were among the first to cultivate mussels, and the shellfish became a regular feature in their diets. The Romans particularly loved them and used them in a variety of dishes.
|
|

[2] Wild mussels (photo © Good Eggs).
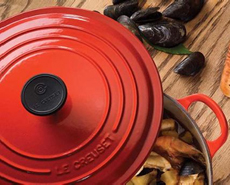
[2] Into the pot (photo © Le Creuset).
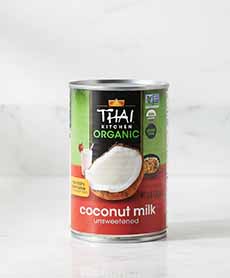
[4] Coconut milk, a versatile and delicious ingredient (Gemini Photo).
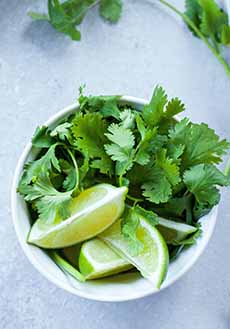
[5] Cilantro, a Thai staple (photo © Lindsay Moe | Unsplash).

[6] Red chile flakes (photo © The Spice House).
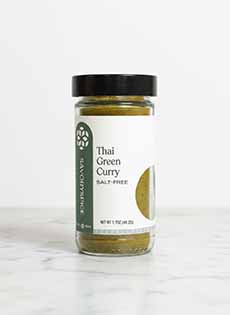
[7] Thai green curry seasoning. You can find it at Asian food stores or online (photos #7 and #8 © Savory Spice Shop).
[8] Whole coriander seeds are ground with other seasonings in this recipe; but we used the ground coriander we already had in our spice rack. Not as intense as grinding whole coriander, of course.
|
In the early 13th century, mussel farming in Europe has an interesting tale. It was supposedly invented by shipwrecked Irish sailor named Patrick Walton, who found himself on the coast of France, in the Bay of Aiguillon after losing his boat in a storm. Starving, he erected crude nets between wooden poles to catch seabirds.
But he quickly realized that tiny seed mussels gathered on the poles and quickly fattened up, leading him to put up more poles and enjoy a diet of mussels. These wooden poles, called bouchots, are still widely used in France today.
In the U.S. during World War II, mussels were commonly served in diners and restaurants across the country due to wartime rationing and shortages of red meat.
Mussels are a very sustainable food to farm, and are considered a “superhero seafood” because they filter water, require no commercial feed, and even capture and store CO2 from the atmosphere!
And thanks to aquaculture they’re catching on elsewhere.
________________
*The Paleolithic era began around 3.3 million years ago with the first use of stone tools, and ended approximately 10,000 to 12,000 years ago with the end of the last ice age. It represents the longest period of human prehistory, during which early humans evolved from simple hunter-gatherer societies into more complex ones, and modern humans (Homo sapiens) first appeared.
CHECK OUT WHAT’S HAPPENING ON OUR HOME PAGE, THENIBBLE.COM.
|