|
Most people think of crostini as nibbles to be served with wine or beer—“cocktail food.”
Crostini the Italian word for “croutons,” which refers to any toast breads. They can be medium or large slices, plain or garnished.
They are not the miniature bread cubes that garnish green salads and bowls of soup. Instead, medium or large crostini, plain or garnished, would be served with the salad or soup.
In fact, Italy’s crostini are appetizer size, for with drinks, soup, and snacking. Cheese crostini are Italy’s “grilled cheese sandwich.” A topping of olive oil and garlic is Italy’s “garlic bread.”
Crostini are a scrumptious breakfast choice, too. We especially like DIY crostini, where we put out toasted bread along with bowls of toppings, and let each person construct his or her own.
First, plan your toppings from the list below, or add your own.
Next, get the best bread you can find. We like thick slices of a crusty rustic sourdough loaf for breakfast crostini. It makes a nicely crunchy toast.
Remember that this is a do-it-yourself recipe, so you can serve sweet ingredients (fresh cheeses, fruits and honey, for example), savory ingredients (bacon, eggs, hummus, sautéed spinach), or some of each.
TOPPING SUGGESTIONS
Breakfast fish: gravlax, marinated herring, smoked salmon, taramasalata
Breakfast meats: bacon, ham, sliced sausage or sausage patties
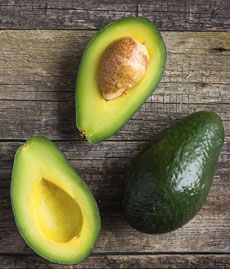
Breakfast spreads: avocado, hummus, spreadable cheese, yogurt, etc.
Cooked vegetables: sautéed or steamed kale, spinach, zucchini
Eggs: boiled, fried, poached
Fresh cheeses: burrata, cottage cheese, cream cheese, farmer’s cheese, fromage blanc, goat cheese, labné, Neufchatel, ricotta, quark (anything spreadable)
Fresh fruits: berries, citrus sections, diced pears, sliced figs, sliced stone fruits
Fresh vegetables: breakfast radishes, chopped green onions, sliced cucumbers, sliced tomatoes, sundried tomatoes marinated in olive oil
PLUS CONDIMENTS
Balsamic vinegar
Butter
Chili flakes
Fresh herbs
Lemon or lime wedges
Olive oil
Salt (especially flake salt or seasoned salt) and pepper
Lemon or lime wedges
Sweet condiments: honey, marmalade, preserves
PREPARATION
1. SET OUT the toppings.
2. TOAST the bread; cook the eggs and breakfast meats. That’s it!
____________________
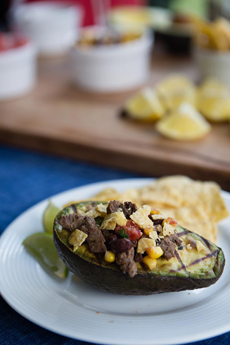
Photo credits: Top, Fig & Olive restaurant. Second, Safest Choice Eggs. Third: Mixed Greens Blog. Bottom: Locanda Verde Restaurant.
|
|

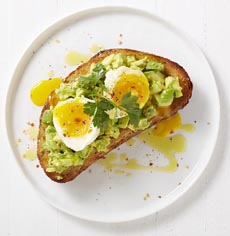
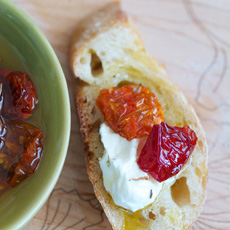
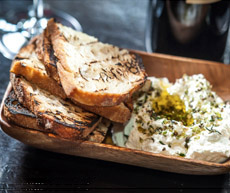
Top: Fresh figs, goat cheese and a drizzle of honey. Second: Mashed avocado and boiled egg with a drizzle of EVOO. Third: Ricotta topped with sundried tomatoes marinated in olive oil and herbs. Bottom: Serve plates of toast and ricotta, and let people top their own. |