[1] Mix summer fruits and vegetables into a salad or a grain bowl (recipe below; photo courtesy Elegant Affairs Caterers). [2] Use the “bundt technique” to neatly remove the corn kernels (photo courtesy SimplyRecipes.com).
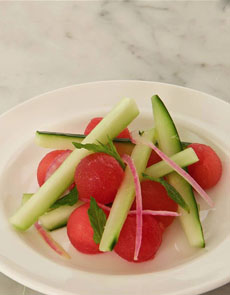
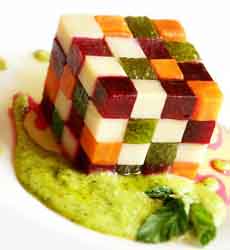
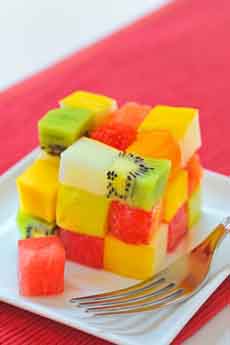
|
|
Mix it up this summer. Beyond fruit salads and mixed grilled vegetables, combine the two produce groups into new concepts.
Almost everyone has made a mixed fruit or vegetable recipe, but how about mixed fruit and vegetables?
Think grilled pizza with figs and yellow squash or arugula and nectarines; raw or grilled skewers (bell peppers, cucumbers, melon, stone fruit, summer squash), or the corn and peach salad recipe below. Here’s a reference list for your combinations:
SUMMER VEGETABLES
Berries: blackberries, blueberries, boysenberries, loganberry, raspberries, strawberries
Melon: cantaloupe, casaba, crenshaw, honeydew, persian, watermelon
Stone fruits: apricots, cherries, nectarines, peaches, plums
Miscellaneous: avocado, grapes, fig, loquats, longan, lychees, mango, passionfruit
SUMMER VEGETABLES
Colorful: beets, bell pepper, corn, red jalapeño, radishes, red endive, red onion, tomatoes
Green: arugula, baby spinach, butter lettuce, Chinese long beans, edamame, French beans, green beans, sugar snap peas, tomatillos, watercress
Pale: bok choy, cucumber, chanterelles, endive, sweet onions, Yukon Gold potatoes
Summer squash: crookneck, yellow squash, zucchini
Plus
Whole grains for a grain bowl
|
RECIPE: FRESH CORN & PEACH SALAD
This refreshing summer salad is delicious with grilled proteins, roast chicken, or on a salad buffet.
You can prepare steps 1 and 2 a day in advance.
Ingredients For 4 Servings
4-6 ears fresh yellow corn (2 to 2-1/2 cups kernels)
2 cups sliced fresh peaches
2-3 cups greens, washed and patted dry
1/4 cup shredded/julienned fresh mint or basil leaves
3 tablespoons olive oil
1 tablespoon cider vinegar or flavored vinegar
1 tablespoon fresh lime juice (1/2 lime)
Salt and freshly-ground black pepper
Optional: red chili flakes
Optional: whole grains, cooked
Preparation
1. CLEAN the corn and cut the kernels from cob. It’s neater if you use the bundt pan technique: Steady the ear of corn in the hole at the top of the funnel of a bundt pan (see photo 2 above). When you cut the kernels, they fall into the pan for neater gathering. If you have a silicon pad or other nonslip surface, put it under the bundt pan before you begin,
2. COMBINE the corn, peaches and seasonings to taste in a medium bowl. Add the oil, vinegar and lime juice; toss to coat. Add the seasonings to taste. When ready to serve…
3. PLACE the greens at the bottom of a serving bowl or individual plates (if using grains, add them first). Top with the corn and peaches, then the mint or basil. If using a serving bowl, toss before serving.
Grilled Variation
You can grill the corn and peaches before making the salad.
1. BRUSH the shucked ears of corn and halved peaches with olive oil and grill on a covered grill over medium heat for 10 minutes, until lightly browned. Turn occasionally for even browning.
2. REMOVE from the grill and let cool to the touch. Then cut the kernels and slice the peaches.
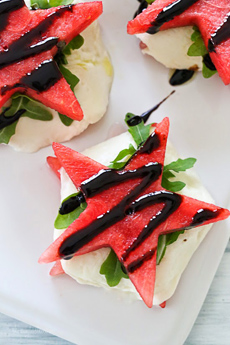
Caprese Variation
Make a Caprese Salad of peaches and tomatoes, with the corn substituting for, or in addition to, the mozzarella cheese. Garnish with basil and olive oil.
Here’s a recipe.
|
|