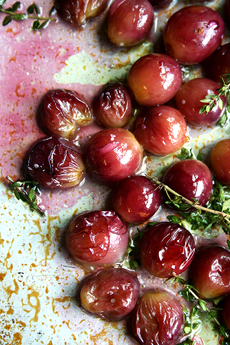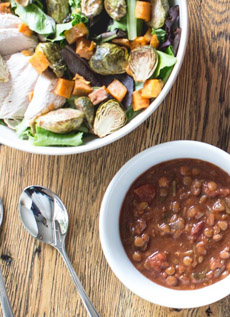
[1] Make a fall salad with brussels sprouts, squash, and seasonal garnishes (photo © Sweetgreen).
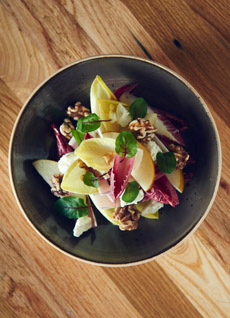
[2] Another popular fall combination: endive, pear, and maple-candied walnuts (photo © Barrel and Ashes [permanently closed]).
|
|
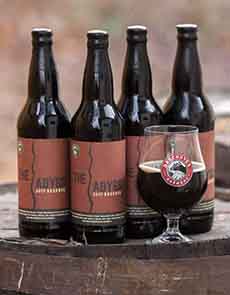
With each change of season, change your perspective on food. Look for seasonal ingredients in everything from salad ingredients to beer styles.
For inspiration, check the websites of salad cafes like Fresh & Co., Just Salad and Sweetgreen
At Just Salad, the fall menu includes:
Autumn Caesar: romaine, grilled chicken, bartlett pears, shaved parmesan, dried cranberries, and multigrain croutons.
Sweet Mama: baby spinach, apples, sharp cheddar, turkey bacon, and honey maple walnuts.
Thanksgiving Salad: turkey, roasted green beans, baby spinach, roasted acorn squash, dried cranberries, almonds.
At Sweetgreen, a fall highlight is:
Apples, Pears + Organic Cheddar Salad: mesclun, shredded kale, apples, pears, cheddar, pecans, basil, and balsamic vinaigrette.
Other favorite fall ingredients:
Beets, raw or roasted
Roasted sweet potato slices (slice, then roast)
In addition to Recipe #1, Fall Salad, there’s a fall cheese course recipe below, along with a recipe for lime-flavored salt.
RECIPE #1: FALL SALAD WITH BRUSSELS SPROUTS & SQUASH
Here’s another yummy idea from Sweetgreen: the Chicken + Brussels salad with roasted brussels sprouts, chopped romaine, mesclun, roasted chicken, sweet potatoes, and cranberry vinaigrette.
You can serve it with or without the protein, the former as a lunch salad, the latter as a side salad with dinner.
We didn’t have cranberry vinegar, so used pear balsamic vinegar—another fall touch (so is fig balsamic vinegar).
Ingredients
Your favorite greens
Grilled or roasted Brussels sprouts and acorn/butternut squash
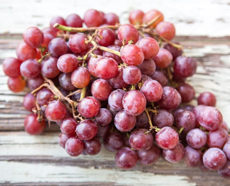
Apple, diced (substitute grapes)
Grilled sliced chicken or other protein
Other ingredients: beets, mushrooms
Optional garnish(es): dried cranberries/cherries/raisins, nuts and/or seeds, shaved Parmesan, toasted nuts
|
|
FLAVORED BALSAMIC VINEGAR
If you like balsamic vinegar, try flavored balsamics. They add sweetness without significant calories.
Here’s a sampler of organic balsamic vinegars in fig, pear, pomegranate and raspberry; and another sampler of apple cinnamon, blood orange, mango and pomegranate balsamics (not organic).
|
|
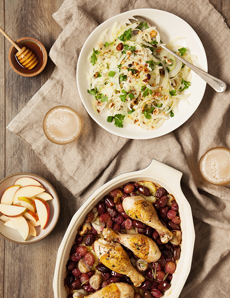
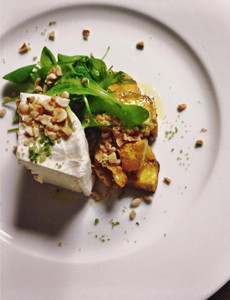
RECIPE #2: FALL CHEESE COURSE
Turn your salad course into a cheese course with the addition of…cheese. In France, a salad with cheese is a popular follow-up to the main dish.
This one, from the Oyster Club in Mystic, Connecticut, is perfect for fall, with a delicious balance of flavors. Bloomy-rinded cheeses can have a subtle mushroomy undertone: perfect for fall.
Just roast the vegetables, toast the nuts, make the vinaigrette (olive oil and lime juice), and assemble the plate (see photo #3).
Ingredients For 4 Servings
Bloomy rind cheese* (brie, camembert, triple-crème, some chevrès)
Diced roasted beets or squash
Artisan honey, drizzled over the beets/squash
Toasted hazelnuts, chopped
2 cups mâche (lamb’s lettuce), mesclun, or other interesting salad
3 tablespoons extra-virgin olive oil
1 tablespoon fresh-squeezed lime juice
Optional garnish: lime salt (purchased or made with recipe below)
If you’re not a fan of bloomy rind cheeses, any hearty cheese is fall-appropriate: aged cheddar, blue cheeses, Comte, real Swiss cheeses, washed rind cheeses.
Much as we love them, leave the fresh goat cheeses for spring.
Check out the different types of cheeses in our Cheese Glossary.
__________________________
*Bloomy rind cheeses have soft, often fuzzy, edible rinds that are a result of the introduction of molds like Penicillium candidum. They are known for the white color and mushroomy flavor of the rind. The two best-known examples are Brie, Camembert, and triple-crèmes. Bloomy rind cheeses are generally aged for two weeks, which produces a mild flavor and subtle aroma.
With a triple crème, the cream is added to the milk to create the richest, most buttery group of cheeses. Triple crèmes are a type of bloomy rind cheese and also are aged for about two weeks. In order to qualify as a triple-créme, the cheeses must have more than 72% butterfat content, which provides a smooth texture. As with other cheeses that have short aging periods, the flavors are mild and the aromas are subtle. Examples include Brillat-Savarin, Explorateur, and St. André. This group of cheeses pairs well with Champagne and other sparkling wines.
_______________________
RECIPE #3: LIME SEA SALT
It’s easy to make flavored sea salt at home. This recipe is from TheThingsILove.com.
While you can buy lime sea salt, it lacks the fresh lime zest which adds a punch of flavor and color.
If it seems like too much work for just a sprinkle: Lime sea salt is a terrific Margarita glass rimmer, a real step up!
Ingredients
3 limes, zested and juiced
1 cup coarse sea salt
|
|
[3] A fall cheese plate (photo © Oyster Club).
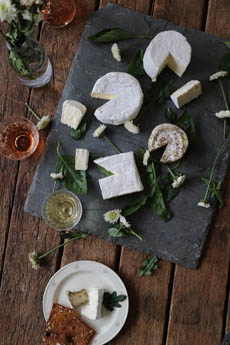
[4] Bloomy-rind cheeses (photo © Murray’s Cheese).
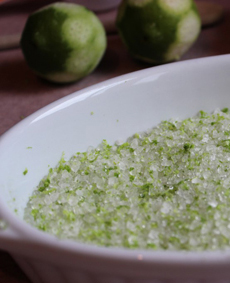
[5] Lime sea salt (photo © These Things I Love).
|
Preparation
1. PREHEAT the oven to 200°F. Combine the sea salt, lime juice, and zest in a small bowl. Spread out on a parchment-lined baking sheet.
2. BAKE for 15-20 minutes, until the salt looks dry but not brown. Remove from the oven and let cool.
3. BREAK up any clumps that may have formed. Store in an airtight container.
4. SPRINKLE a bit on the plate as a colorful element.
CHECK OUT WHAT’S HAPPENING ON OUR HOME PAGE, THENIBBLE.COM.
|
|