|
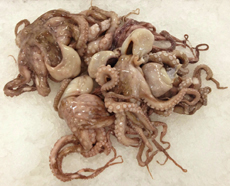


[1] Cleaned, frozen, thawed and ready to cook (photo courtesy EuroUSA). [2] Ceviche with marinated (not grilled) octopus (photo courtesy Lola | Denver). [3] Seared and ready to plate (photo courtesy Scarpetta | NYC). [4] A classic first course or luncheon salad: grilled octopus and fancy greens atop a bean salad vinaigrette (photo courtesy l’Amico | NYC). [5] An easy yet fancy main (photo courtesy Gardenia | NYC). [6] Octopus tostadas (photo courtesy MexicanFoodMemories.co.uk).
|
|
Over the past 10 years, charred/seared or grilled octopus has become de rigueur at just about every restaurant we patronize.
That’s great news, because we love grilled octopus with a drizzle of olive oil. It doesn’t get more delicious than that.
Yet, simple as it is to grill seafood, we never tried it at home. One reason: We typically don’t see mature octopus at fish markets (in mainstream markets, it’s often a special order); and we personally don’t like the miniature size (not as meaty, not as tender, etc.).
So this past weekend, we happened upon frozen octopus at a Latin American grocer. It was tentacles only, which means we didn’t have to remove the head and beak. What could we do but buy it and give it a shot?
It turns out that frozen octopus is actually more tender than fresh. Freezing and then thawing the tentacles helps to tenderize the meat. White wine, often used as a braising liquid to slow-cook the tentacles, is a second tenderizer.
Octopus, first braised/poached and then charred/seared or grilled, is incredibly versatile and can take on any aromatics. The classic Mediterranean preparation is poached in white wine with garlic and oregano, served with gigante beans and/or some combination of capers, lemon, olives and tomatoes.
But you can make anything from octopus tostadas to tandoori octopus; or go beyond the popular octopus and bean salad with a salad of fennel, mint, orange slices and red onion in a sherry vinaigrette.
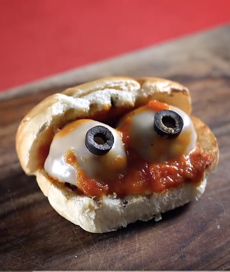
You can cut the cooked octopus into kabob chunks, serve it thinly sliced on a flatbread pizza. We made a hero sandwich with sliced octopus, roasted red peppers and giardiniera.
Perhaps the most difficult step with octopus is he first step: deciding how you want to serve it, with so many delectable options. Some of our favorites are shown in the photos—at least, the ones we’re capable of making. Also take a look at pulpo a la gallega, an octopus and potato torta from Spain; and octopus terrine, which can be turned into octopus pastrami.
RECIPE: SEARED OR GRILLED OCTOPUS
Here’s an important note before you start: As with bacon, onions and other foods, what looks like a lot of cooks down to far less. Estimate 3/4 to 1 pound per person as a first course.
Ingredients For 6 First Courses
1/4 cup plus extra-virgin olive oil
3 pounds octopus, thawed overnight in the fridge
6 garlic cloves, peeled
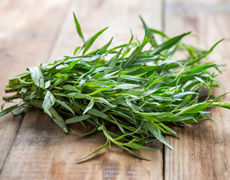
1 tablespoon plus 1 teaspoon crushed red pepper, oregano, or both
1 bottle dry white wine (e.g. Pinot Grigio, Sauvignon Blanc)
2 tablespoons extra-virgin olive oil
Salt
Preparation
1. REMOVE the beak from the octopus. Place a plastic cutting board in the sink, slice off the head, and flip the octopus to remove the beak, which is in the middle of the tentacles. With a paring knife, slice around the beak and pushing it through, as if coring a pear or tomato. It will to pop out the other side.
2. HEAT 2 tablespoons of the olive oil in a large enameled cast-iron casserole or dutch oven. Add the octopus and cook over moderately high heat, turning until lightly browned (2 to 3 minutes). Transfer the octopus to a plate or bowl. Add the garlic cloves to the casserole and cook over moderate heat, stirring until lightly browned, about 2 minutes. Add the crushed red pepper and cook, stirring, until fragrant, about 20 seconds.
3. ADD the white wine gently, and bring the braising liquid to a boil. Here’s a tip from every Italian nonna: When slow-cooking in wine, put the actual wine cork in the braising liquid to cook along with the octopus. It’s one of those tricks that no one can explain. But simple slow cooking (braising) also creates tender tentacles, so don’t go crazy looking for “the secret.” There is one tip we’ll pass along from Bon Appetit: If you want the tentacles to curl, dip them in the hot poaching broth three times before submerging.
4. RETURN the octopus to the casserole, add up to 1 cup of water or broth if necessary, to cover the octopus. Cover the casserole and braise over moderately low heat until very tender, about 1 hour and 30 minutes. Remove from the heat and let the octopus completely in the braising liquid, another technique that keeps the flesh tender.’’
5. REMOVE the red skin by rubbing it with a paper towel, taking care to leave the on suckers, which are the parts that get crispy when grilled. Plus, removing them will dry out the cooked octopus. If the suckers start to come off when rubbing, it means the octopus has been cooked it too long. It isn’t ruined, but do your best to keep the remainder intact for the aforementioned reasons.
|
6. FINISH the octopus by searing in a large skillet with 2 tablespoons of olive oil, creating a deep char on the outside. We prefer to sear the tentacles whole, about 8 minutes per side (we like ours very crispy). The flesh and suckers will caramelize nicely; (you can also thinly slice the tentacles and grill cut side down over moderately high heat, for about 1 minute; then and cook for 20 seconds. We cook the octopus in long lengths, and prefer to serve it two meaty 6-inch or four 3-inch pieces. Cut the head into 1-1/2-inch pieces. We use them in green salads or as a garnish for fish.
7. PLACE on a platter lined with paper towels to absorb any excess olive oil. Season lightly with salt. Transfer the octopus to plates. Fill the radicchio leaves with the Italian salad and set beside the octopus. Garnish with fennel fronds and serve.
Variation: You can also roast the octopus, but we haven’t tried it.
WHAT IS AN OCTOPUS (SCIENTIFICALLY SPEAKING)?
The octopus (plural octopuses, octopodes or octopi) is a cephalopod mollusc in the phylum Mollusca (class Cephalopoda, order Octopoda, family Octopodidae, genus Octopus, species vulgarism, plus more than 100 total species, representing one-third of all cephalopods.
The octopus has two eyes and four pairs of arms (tentacles) and a beak mouth at the center underside of its tentacles. An invertebrate, it has no vertebral column [backbone or spine) and no other skeleton. It most intelligent of the invertebrates.
|