|
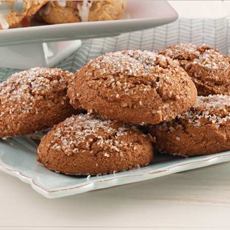
November 21st is National Gingerbread Day…and also a reminder that it’s easy to make gingerbread scones with a $6.95 gourmet boxed mix from King Arthur Flour.
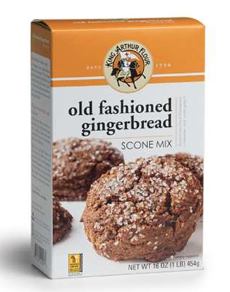
We typically give small gifts to our Thanksgiving guests, and last year it was these scone mixes (this year it’s the Gingerbread Cake and Cookie Mix).
The one-pound box makes 8 to 16 scones, depending on size. The mix is certified kosher by CRC.
They’re whole grain, too, made with white whole wheat flour.
The mix is certified kosher by CRC.
The 1-pound box of mix makes 8 to 16 scones, depending on how you portion them.
And you can use it to make gingerbread loaf, coffeecake, muffins, pancakes, and shortcakes.
Get yours at KingArthurFlour.com.
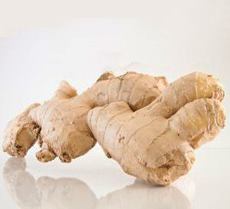
THE HISTORY OF GINGER
Since ancient times, the Chinese and Indians used the ginger root as medicine. Ginger originated in the tropical rain forests of Southeast Asia.
By the first century, it had been introduced in the Mediterranean via India and became a popular spice in Rome. It fell from use with the fall of the Roman Empire fell, to return during medieval times as a spice for baked goods and other sweets.
Ginger has been traded throughout history longer than most other spices. It was valued for its medicinal merits: it is a popular warming spice, a digestive aid, and sometimes used to treat flatulence and colic. Today, ginger is easily accessible in local grocery stores and throughout markets, but back in the 14th century, it cost about the same amount as a live sheep or piece of livestock!
Used as a medicine in medieval times, ginger became a popular holiday spice (it was too pricey to use year-round), most famously in gingerbread cookies.
Ginger and other spices were brought back to Europe by Crusaders who traveled to the Holy Land. In 11th-century northern European countries, it was used to flavor buttermilk drinks and over the next two centuries became used in cooking meats and in ginger pastes.
During the 13th and 14th centuries, Arabs traders voyaging to Africa and Zanzibar planted the rhizomes, spreading the cultivation of the plant.
Many ginger-flavored baked goods have evolved since then, from muffins to cakes. Today, we offer this recipe from King Arthur Flour for gingerbread scones: perfect weekend breakfast and brunch fare throughout the holiday season.
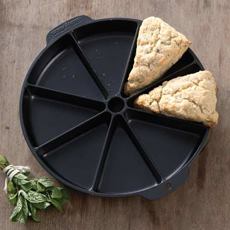
THE HISTORY OF SCONES
You may have heard two different pronunciations for “scone.” The word is pronounced “skahn” in Scotland and Northern England (rhymes with gone) and “skoan” in the south of England (rhymes with own), the pronunciation adopted by the U.S. and Canada.
Which is the authentic one? They both are!
Scones are traditionally connected with Scotland, Ireland, and England, but exactly who deserves the honor of invention, no one knows for sure.
Scones may well have originated in Scotland. The first known print reference, in 1513, is from a Scottish poet. However, in earlier eras, when communications were more limited, the creation of an actual item can have predated the first appearance of printed references by many years.
Centuries ago, there weren’t newspapers that reported on the minutiae of life the way modern news sources do. There were no food columns in the local papers announcing that “McTavish Bakery has created a new griddle-fried oatcake called a scone—now available at 3 Sheepshead Lane.”
In fact, there were few newspapers. Much of the population was not literate. So culinary historians rely on cookbooks and mentions in literature and other printed records. Given the perishability of paper, it is logical that many first-printed mentions of foods and other items may not have survived.
What About The Name?
One claim, probably not the best, says that scones are named for the Stone of Destiny at the Abbey Of Scone, a town upriver from Perth.
|