[1] Is it sparkling coffee or coffee soda? North St. and most other new entries are made from brewed coffee, then carbonated. So: sparkling coffee. Old-school soda is made from flavored sparkling water (photo courtesy North St).
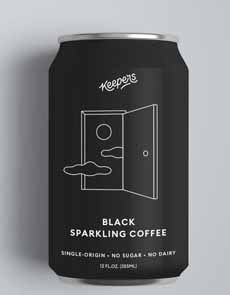
[2] Most sparkling coffee is sold in cans, following the trend in the craft beer industry (photo courtesy Keepers).

[3] Sparkling coffee with lemonade, one of three fruit flavors from Upruit.

[4] Elegant drinking (photo courtesy North St.).

[5] Nitro cold brew coffee, a.k.a. NCB, a.k.a. nitro. It’s available on tap and in cans (photo courtesy Rise)
|
|
With the continued growth of coffee culture in the U.S., it’s no surprise that carbonated coffee beverages have been finding their way onto store shelves.
For National Carbonated Beverage With Caffeine Day, let’s explore two trends: coffee soda, a.k.a. sparkling coffee (bottled with or without sugar) and nitro coffee.
We don’t recall seeing a national-brand coffee soda; the new sparkling coffees tend to be entrepreneurial efforts in their local markets.
New York City may lay claim to the oldest sparkling coffee, although the brand is so old that they call it coffee soda.
Manhattan Special, a bottled espresso soda invented in New York City in 1895, is so strong that it has long been a niche product (we love espresso, but it’s too strong for us!)
It’s brewed espresso, sweetened and carbonated, and very strong. They also make a diet version.
Coffee soft drinks that followed used the soda formula: carbonated water with espresso syrup.
THE NEW SPARKLING COFFEE
But now, there’s a sea change: Coffee cafes are making their own sparklers from brewed coffee, which they then carbonate. Some serve it only in-house, others also bottle/can them.
Matchless Coffee Soda in Nashville makes sparkling coffee from flash-chilled ice coffee sweetened with demerara sugar. (Here’s how to flash-chill, which is delicious iced coffee).
Coffer, from Austin, Texas, is a naturally-fermented carbonated coffee soda. Fermentation adds days to the production process, but results in a greater depth of flavor and mouthfeel.
Two start-ups in Brooklyn, Keepers and Upruit, sparkling coffee.
Keepers offers:
Keepers Citrus Sparkling Coffee, lightly sweetened
Keepers Black Sparkling Coffee, no sweetener (photo #2)
Upruit makes only fruit flavors:
Sparkling Ginger Hibiscus Cold Brew Coffee
Sparkling Meyer Lemon Cold Brew Coffee (photo #3)
Sparkling Tart Cherry Cold Brew Coffee
North St. sparkling coffee (photo #1), available in Australia, uses citrus essential oils and a touch of coconut blossom sugar. They have cocktail recipes made with carbonated coffee, that include Coffee [Old] Fashioned, Coffee Margarita, Coffee Mojitto, Coffee Spritz and Coffee Sour.
If these sound bizarre, they grew out of a local trend for what we like to call the “Coffee Arnold Palmer”: half lemonade, half coffee. Sounds strange, but it works—and works so well that Upfruit is staking its success on it.
You can create your own at home, by blending, say, lemon sparkling water or lemon soda, depending on your desire for sweetness, with brewed coffee.
Or, stir lemon (or other) juice into brewed coffee, with simple syrup if you want sweetener, and top it off with plain or lemon club soda.
You can simply top coffee with club soda, but the latter has a flat affect: You need more carbonation. Try it by creating more carbonation with a SodaStream.
Or, carbonate coffee directly with a DrinkMate.
NITRO COLD BREW COFFEE
Nitro cold brew coffee, “NCB” for short, is cold brew coffee that is charged with nitrogen that creates a rich, creamy head, like a beer (photo #5). Like beer, it is served without ice.
Nitrogen bubbles are smaller in size than those of carbon dioxide, so it isn’t as easy for the bubbles to dissolve. This creates a thicker body and better mouthfeel.
According to Wikipedia, the process originated in 2013 at Cuvee Coffee in Austin, Texas and Stumptown Coffee in Portland, Oregon. Both companies sold the coffee in cans, by 2015.
Its predecessor was the coffee on draft at The Queens Kickshaw in Astoria, Queens, New York: a grilled cheesery with craft beers (alas, now closed). It was created in 2011.
NCB was showcased at a craft beer industry event, the Brewers Association Conference, in 2014. Then came two chains: The Coffee Bean & Tea Leaf and Starbucks, which began nitro sales in 2016.
Now, even DD has it.
If you haven’t tried it yet, today’s the day!
MORE COFFEE
Increase your knowledge of coffee terms in our:
Coffee Glossary
Espresso Glossary
|