THE NIBBLE BLOG: Products, Recipes & Trends In Specialty Foods


Also visit our main website, TheNibble.com.


TIP OF THE DAY: Things To Do With Rice Vinegar For National Vinegar Day

November 1st is National Vinegar Day.

While we’ve written about the different types of vinegar, today we’re focusing on rice vinegar, also called rice wine vinegar though it’s not made from rice wine.

Rice vinegar, made by fermenting rice, is the prevalent vinegar in China, Japan, Korea and Vietnam. Basic rice vinegar ranges from colorless to pale yellow. There are also specialized rice vinegars used in cooking particular Chinese dishes.

Compared to cider vinegar, wine vinegar and distilled white vinegar, rice vinegar is less acidic with a delicate, mild sweetness. Tiny amounts of brown sugar and invert sugar are used in its production. A tablespoon has just 2.7 calories, the same as most other vinegars (balsamic vinegar is higher).
 
 
USES FOR RICE VINEGAR

Rice vinegar is used to perk up or heighten flavors—it’s used to flavor sushi rice—while rice wine is used to add depth or sweetness to a recipe.

Rice vinegar can be used in everyday American cuisine, like these foods:

Cocktails. Balsamic vinegar has been used in cocktail recipes for some time. Rice wine vinegar gives a lift to savory cocktails. Try it in Bloody Marys, Dirty Martinis and cucumber-based cocktails. We like cucumber vodka with a splash of rice vinegar.

Marinades. Substitute rice wine vinegar for any other vinegar in marinades.

Pickling. Substitute half of the white vinegar for rice vinegar. If you like the difference (we do!), use 100% next time. You can try it today with quick pickling (pickled vegetables in just 2 hours!).

Salads & Slaws. Substitute rice vinegar in your salad dressing. Because it isn’t as tart as other vinegars, you can use a 2:1 or 1:1 ratio of rice vinegar to oil. Martha Stewart makes her rice vinaigrette with a 1:1 ration plus Dijon mustard, honey and lime juice (recipe). Definitely use it for fruit salad dressings.

Sautés. Add a tablespoon each of rice vinegar and soy sauce to beef, chicken and vegetable stir-frys.

Stir-Frys. Add a splash of rice vinegar for extra flavor. You can make a stir-fry sauce from 1 cup broth, 2 tablespoons soy sauce, 1 tablespoon sugar and 1 tablespoon rice wine vinegar, whisked together. For a thick sauce, whisk in 1 teaspoon cornstarch and let sit for 10 minutes before adding to the stir-fry.

Vegetables. Substitute a bit of flavored rice vinegar for butter on cooked vegetables, including baked potatoes and French fries (instead of the traditional malt vinegar). The sprinkle-tops on Nakano bottles make this easy.
 
 
NAKANO RICE VINEGARS

Nakano, currently, the #1 selling rice vinegar in the U.S., has a line of natural (no sugar added) and organic rice vinegars. In addition to the classic (plain) varieties, we’re especially attracted to the flavored vinegars, in:

  • Balsamic Seasoned
  • Basil and Oregano
  • Citrus
  • Roasted Garlic
  • Red Pepper
  •  
    The flavored varieties include “splash bottles”—a perforated top under the cap—to shake vinegars on fish, meat, salads, vegetables and anything else that needs a hit of flavor.

    The line is certified kosher by OU, and is available nationwide. FOR MORE INFORMATION visit NakanoSwaps.com.
     
     
    NAKANO RICE VINEGAR

    TYPES OF VINEGAR

    THE HISTORY OF VINEGAR

    HOW VINEGAR IS MADE
     
     
    RECIPE: NUTMEG NANNY’S CITRUS CHICKEN SALAD (Photo #3)

    Ingredients For The Chicken

  • 4 skinless, boneless chicken breast halves
  • 1/4 cup Nakano Citrus Seasoned Rice Vinegar
  • Salt and pepper to taste
  • 1/2 cup olive oil, divided
  • 1-1/4 cup orange juice, divided
  •  

    Nakano Rice Vinegar
    [1] Natural and Original rice vinegars. Natural is made without the traditional bit of sugar (photos courtesy Nakano).

    Nakano Flavored Vinegar
    [2] Two of the flavored rice vinegars: Roasted Garlic and Citrus (photos courtesy Nutmeg Nanny).

    Chicken Grapefruit Salad
    [3] Chicken salad with arugula, avocado and grapefruit in a rice vinegar vinaigrette, from Nutmeg Nanny. The recipe is below.

    Salmon Rice Vinegar Marinade
    Salmon in a ginger-orange marinade with rice vinegar (photo courtesy What To Cook Today).

     
    For The Salad

  • 8 cups mixed salad greens
  • 1 large grapefruit, peeled and sectioned (white or ruby)
  • 1 avocado, peeled and quartered
  • 1/3 cup toasted shelled pistachio nuts
  •  
    For The Salad Dressing

  • 1/2 cup Nakano Roasted Garlic Seasoned Rice Vinegar
  • 1/4 cup orange juice
  • 1/4 teaspoon dry mustard powder
  • Kosher salt and pepper, to taste
  •  
    Preparation

    1. HEAT 1 tablespoon of the olive oil in a heavy skillet until very hot. Quickly sear the chicken on both sides. Pour orange juice and rice vinegar over the chicken; continue cooking over high heat until juice is evaporated and the chicken is glazed.

    2. TURN the chicken once or twice during cooking. When chicken is fully glazed and cooked through…

    3. REMOVE it from the heat and let cool while preparing the salad.

    4. MAKE the salad dressing and set aside. SLICE the avocado and set aside. Slice the chicken. Combine the other salad ingredients and toss with the vinaigrette. Place in a large bowl or on individual plates.

    5. ARRANGE the chicken and avocado slices atop the salad and serve.
     
     
    ALSO CHECK OUT:

  • Layered Taco Salad in Mason Jar
  • Ginger Orange Marinade For Salmon (photo #4)
  •  

    Comments off

    TIP OF THE DAY: Pumpkin Eggnog For Halloween & Thanksgiving

    Thanksgiving Eggnog
    [1] Blender eggnog takes just five minutes (photo courtesy Kitchen Gidget).

    Hood Pumpkin Eggnog
    [2] Even easier option: Buy the eggnog and add your own spirits (photo courtesy Hood Dairy).


    “Eggnog season” conventionally runs from Christmas season through the New Year. But why not celebrate before then with pumpkin eggnog, from the harvest season through Thanksgiving?

    You can start tonight, Halloween.

    The easiest path is to purchase a carton of pumpkin eggnog from Hood, Meadow Gold and other brands (photo #2).

    But in just five minutes, you can make your own (photo #1). Just add the ingredients to a blender and blend away.

    If you don’t want a drink with eggs, consider a pumpkin milkshake or smoothie. There are recipes galore online.
     
     
    RECIPE: PUMPKIN EGGNOG

    This eggnog recipe serves four in 6-ounce glasses. For “just a nip,” You can serve a smaller portion with after-dinner coffee.

    If children are participating, make the recipe without the spirits; then add the bourbon or rum to individual cups.

    Eggnog is one of 12 popular recipes that use raw eggs. If you are concerned about salmonella, check out pasteurized eggs.

    We adapted this recipe from one by Kitchen Gidget.
     
    Ingredients For 3 Cups/4 Servings

  • 2 large eggs
  • 1/2 cup sugar
  • 1/2 teaspoon pumpkin pie spice
  • 1/4 teaspoon vanilla extract
  • 3 tablespoons pumpkin purée
  • Pinch salt
  • 3/4 cup whole milk
  • 3/4 cup heavy cream
  • 1/4 cup bourbon or rum (preferably dark rum)
  •  
    Preparation

    1. ADD the eggs to a blender and process on medium speed for 1 minute. While still processing, slowly add the sugar and blend for 1 additional minute.

    2. ADD the remaining ingredients with the blender on slow; then switch back to medium until thoroughly combined. Taste, and adjust seasonings as desired (more spice [cinnamon, cloves, ginger, nutmeg], more pumpkin purée).

    3. TRANSFER to a pitcher and move to the refrigerator to chill. Before serving, whisk briefly. Garnish with freshly grated nutmeg.
     
     
    THE HISTORY OF EGGNOG

    Eggnog, also spelled egg nog, is a descendant of the milk-and-wine punches that had long been part of European celebrations.

    When the colonists arrived in the Americas, they had access to rum from the Caribbean. It was an even better (and stronger) alternative to the wine.

    Eggnog became a popular wintertime drink throughout Colonial America (President George Washington was quite a fan).

    Here’s more history of eggnog.
      

    Comments off

    TOP PICK OF THE WEEK: The Matzo Project, Delicious Flavored Matzo

    Matzo, variously translated from Hebrew as matzoh, matza, matzah, matztzah and other spellings, is a 3,000-year-old accidental recipe.
     
     
    SOME MATZO HISTORY

    As anyone who knows the story of Exodus will remember, in the time of Moses, Egypt’s pharaoh* finally agreed after much appealing, and then the 10 plagues, to let the enslaved children of Israel go.

    The Israelites left their homes so quickly that they didn’t have time to bake bread for the journey. Instead of waiting hours for the dough to rise, they made an unleavened mixture of flour and water that baked up flat.

    Later, as they celebrated Passover, the commemoration of the Exodus, unleavened matzo was designated the only bread permitted during the eight-day observance.

    The dry, flavorless quality bothers some observant Jews, then and now. Passover matzo is just flour and water, no salt. (That said, matzo tastes similar to Carr’s water crackers, a popular specialty cracker.)

    It’s no surprise that the Hebrew word matztzah (plural matztzoth), literally means “juiceless.” (In English it’s also spelled matza, matzo, and matzoh, among other transliterations from the Hebrew.)
     
     
    MODERN MATZO

    We are one of the group of eaters who loves matzo and eats it year-round (in addition to other crunchy flatbreads like lavash and Swedish crispbread).

    One can now find year-round options from companies like Manischewitz, Streit’s, and Yehuda that include ancient grains, egg, and onion; are unsalted, lightly salted, whole wheat, or gluten-free.

    They’re a step up from saltless matzo, but a great leap forward has been made by The Matzo Project, a line of delightfully flavorful matzos.
     
     
    ENTER: THE MATZO PROJECT

    The Matzo Project was conceived by a woman who had been contemplating improving the flavor of matzo for nearly 20 years. She casually mentioned it to a friend one day and boom! The duo set out to improve “the culturally beloved, but traditionally flavorless box of matzo.”

    They have succeeded grandly, producing super-crunchy, extra-sturdy, very flavorful matzo boards and crackers in:

  • Cinnamon Sugared
  • Everything
  • Salted
  • Specialty flavors like Harissa (exciting!)
  •  
    Each flavor is more delicious than the next, in:

  • Matzo Boards (Everything and Salted)
  • Matzo Chips (Cinnamon Sugared, Everything, Harissa, Salted)
  • Chocolate Matzo Ungapotchkies, matzo clusters dipped in chocolate (currently sold out, alas)
  • The Whole Megillah, a gift box of everything
  • Matzo Ball Mix & Matzo Ball Soup Kit
  •  
    New items will be available soon, including Smatzo, and s’mores matzo crackers.

    The line is certified OU kosher and has a spokesbubbe (grandma spokeswoman), whose presence and advice enliven every package. Here’s ours:

    You don’t have to be Jewish to love The Matzo Project. You just have to love a crunchy, yummy cracker.

      The Matzo Project
    [1] These creative crackers have a spokesbubbe, a spokes-grandma. Here she advises, “Call your mother” (all photos courtesy The Matzo Project).

    The Matzo Project
    [2] The matzo is made in both convention boards and crackers.

    Smoked Salmon On Matzo
    [3] Who needs a bagel? Heap cream cheese and smoked salmon on Everything matzo.

    Matzo Gingerbread House
    [4] Instead of a gingerbread house for the holidays, build a matzo house.

     
    Don’t wait until Passover to buy them or give them as fun gifts. Remember, only that flavorless, unsalted matzo can be made kosher for Passover.
     
     
    SERVING UP THE MATZO PROJECT

    The flavors work as everyday crackers, with cinnamon sugar substituting for a cookie with a cup of coffee or tea.

    Cinnamon Sugared also is delicious for a cheese dessert with goat cheese. And Everything goes with…just about everything.

    All the flavors can be eaten straight from the bag as simple snacks or served with ingredients both humble (hummus) and luxurious (canapés, smoked salmon).

    Buy them online at MatzoProject.com or find a retailer near you.

    ________________

    *The Bible does not name the pharaoh, but scholars place Thutmose II as the pharaoh at the time of the Exodus.


    CHECK OUT WHAT’S HAPPENING ON OUR HOME PAGE, THENIBBLE.COM.


    Comments off

    FOOD 101: Ways To Preserve Food

    Ancient Food Preservation
    [1] Drying meat or fish over a fire (image courtesy Kitchen Of The Future).

    Drying Squash
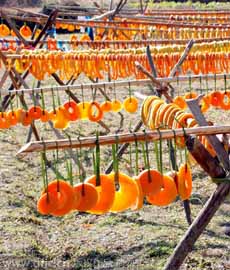
    [2] Drying squash (photo courtesy China Daily).

    Drying Ducks
    [3] Drying ducks; the same technique is used for air-dried hams (photo courtesy China Daily).

    Drying Fruits
    [5] Drying fruits (photo courtesy Brainview).

    Sundried Tomatoes
    [4] Sundried tomatoes are preserved today as they were thousands of years ago (photo courtesy Bella Sun Luci).


    In modern times, businesses and homes use refrigeration and freezing to preserve food. We buy canned, freeze-dried and otherwise shelf-stable (no refrigeration required) foods.

    In the millennia before the invention of canning and the mechanical ice box, people kept food cold with ice and snow, saved during the winter months or brought down from mountaintops. Insulated metal “ice boxes” were available in the 1880s, with blocks of ice delivered by the “ice man.” The home electric refrigerator didn’t arrive until 1930.

    In ancient times, the wealthy could afford to have ice cut from lakes and rivers in the winter, or brought down from the mountaintops in warmer countries, and stored in ice houses for summer use. The oldest known ice house, built by a king in Persia, dates from about 1700 B.C.E. Most other people dug ice pits, lined with straw and sawdust as insulation.

    At the dawn of mankind, people had to learn to preserve food for lean times. Food, whether animal or vegetable, begins to spoil as soon as it is killed or taken from roots, trees or vines. So man had to figure out how to preserve the portion of it that wasn’t needed immediately.

    In hot climates, man dried meat, fish, fruit and vegetables in the sun, removing the moisture that leads to spoilage. In cold climates, he kept food frozen in the ice or packed under snow.

    Other techniques evolved, enabling not only preservation, but a variety of different flavors that have become part of our culinary repertoire.
     
     
    PRESERVING FOOD ENABLED “CIVILIZATION”

    Beyond drying and freezing, other forms of food preservation enabled the formation of communities. Man no longer had to be a hunter-gatherer, consuming what was killed or harvested immediately, but could preserve some of the bounty for later use.

    Preservation techniques were especially needed when man settled down in agricultural communities, around 9500 B.C.E. Food preservation enabled ancient man to set down roots and form a community.

    We still use the techniques that our early ancestors developed. Here they are, in alphabetical order.

    Thanks to the National Center for Home Food Preservation for much of this information.
     
     
    TYPES OF FOOD PRESERVATION

    Canning & Freeze-Drying

    While first alphabetically, canning is one of the newest forms of preservation, developed in France in the 1790s. It uses heat, originally to seal food in glass bottles, inspired by wine in bottles. Based on the success, in 1810 an Englishman applied the concept to tin cans—lighter in weight and not breakable (the history of canning). The next modern technique was freeze drying (see below).

    Curing

    Early cultures used salt to help remove the moisture from foods (called desiccation) which prevents the growth of microorganisms. Salting was the common technique to preserve fish and meats, followed by brining (salted water).

    Drying & Smoking

    Ancient man harnessed the sun and wind to dry meat, fish, fruits and vegetables, with archaeological evidence showing the process used as early as 12,000 B.C.E. Areas that lacked strong sunlight for drying dried and smoked food over a fire.

    Honey & Sugar

    Preservation of fruits in honey or sugar was commonplace in the earliest cultures. The Romans improved on the method by cooking the quince and honey producing a solid texture—the first jams and preserves. In southeast Asia, where sugar originated, in northern climates that lacked enough sunlight to successfully dry fruits, heating fruit with sugar produced what we know know as preserves and chutneys.

    Fermenting

    Evidence from around 5400 B.C.E. indicates that man discovered how to ferment grains into beer. But the process may be much older: It is believed that one of the impetuses for Neolithic hunter-gatherers to settle down to farming was to grow barley to make beer, around 10,000 B.C.E. Grapes and other fruits followed, creating wine. The technique was used to preserve vegetables, turning cabbage into kimchi and sauerkraut, and other pickled vegetables. Fermentation creates more nutritious foods: the microorganisms involved produce vitamins as they ferment. The technique turned less palatable foods into more palatable ones.

    Freezing & Freeze Drying

    Any ancient civilization that had freezing temperatures for at least part of the year used the freezing temperatures to preserve foods, digging holes in the ice or compacting snow over the stash. The use of natural caves for cold storage turned into root cellars and ice houses. Jars and other containers were also placed in cool streams for preservation. In the late 1800s, Clarence Birdseye, who observed Native Americans freezing fish in the ice, perfected the “quick freeze” process. Freeze drying was invented around 1890 for commercial use. But it not brought into consumer consciousness until freeze-dried coffee and NASA’s freeze-dried “astronaut ice cream,” in the 1960s.

    Pickling

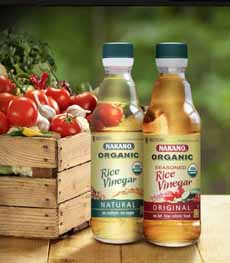
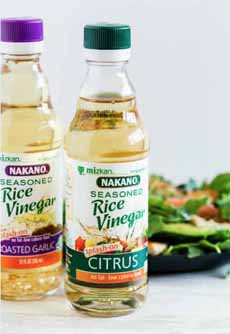
    Pickling is the preservation of food in vinegar or other acid. Vinegar was first created accidentally thousands of years ago, when wine fermented for too long. Evidence of pickled cucumbers dates to around 4,500 years ago in Mesopotamia. Wine, beer and cider can all transformed into vinegar. Foods from olives to fish were brined in a solution of vinegar and water. The ancestor of our popular condiment, ketchup, was an oriental fish brine.

     
    Today, some Americans can, cure, dry, ferment and pickle foods at home; not because they have to, but because they take pride in making their own foods.
      

    Comments off

    RECIPE: Toffee With Pumpkin Seeds

    You may be all set for Halloween, but think ahead to the Thanksgiving crush: hostess gifts, party favors, little extras for your colleagues or friends.

    We like this seasonal recipe by Kirstin Jackson of It’s Not You, It’s Brie. It was shared with us by Go Bold With Butter.

    In this recipe, shelled and salted pepitas (pumpkin seeds) and bits of rosemary are encased in the toffee: a sophisticated rendition of the sweet treat.

    THE NIBBLE is a fan of SuperSeedz, gourmet pumpkin seeds, shelled and flavored.

    Among the nine flavors, these flavors pair especially well with toffee: Cinnamon & Sugar, Coco Joe, Maple Sugar & Sea Salt, Sea Salt and Super Spicy. Learn more and
    get them here.
     
     
    RECIPE: PUMPKIN SEED & ROSEMARY TOFFEE

    Advises Kirstin: “Read through the recipe, have all ingredients, utensils, and candy thermometer ready to go. You’ll be surprised how quickly you’ll need them once things get bubbling.”

    Ingredients

  • 1½ cup salted pepitas, divided
  • 1 stick (1/2 cup), plus 1 teaspoon unsalted butter
  • Additional 1 tablespoon butter for greasing pan
  • 1-3/4 cup white sugar
  • 3 tablespoons water
  • 1 teaspoon molasses
  • 1/4 teaspoon baking soda
  • 1 teaspoon vanilla extract
  • 1 teaspoon minced fresh rosemary
  •  
    Preparation

    1. LINE a sheet pan with a silicone baking mat or parchment paper greased with 1 tablespoon butter. Scatter 2/3 of the pepitas over the bottom of the pan.

    2. PLACE the butter, sugar, water and molasses in a heavy bottomed, medium-sized saucepan and turn heat to medium. Being careful not to over-stir—so the candy won’t form large sugar crystals—stir occasionally to combine the mixture, once the butter melts. Bring to 295°F on a candy thermometer. Once the caramel hits 295°F…

    3. IMMEDIATELY ADD the baking soda, vanilla and chopped rosemary and stir very quickly to thoroughly combine. Next, very quickly pour the caramel over the pepitas on the sheet pan. Use an offset spatula greased with the remaining 1 teaspoon butter to quickly spread the toffee over the seeds. Once cool enough to touch…

    4. POUR the remaining pepitas over the toffee and press them into the candy’s surface. Let cool, then break apart before serving.

      Pumpkin Seed Toffee
    [1] Toffee with pumpkin seeds and rosemary (photo courtesy Kirstin Jackson | It’s Not You, It’s Brie).

    Superseedz
    [2] A trio of Superseedz flavors (photo courtesy Superseedz).

    Pumpkin Seeds
    [3] Pepitas (photo Fun With Foods | IST).

     
    THE DIFFERENCE BETWEEN PUMPKIN SEEDS & PEPITAS

    “Pepitas” means “little seeds of squash” in Spanish. Pepitas and pumpkin seeds are almost the same thing.

    The difference is that pepitas grow shell-less in particular pumpkin and squash varieties.

    Both are very nutritious, containing omega-3 and omega-6 fatty acids, fiber, and a variety of antioxidants. Here are 11 health benefits of pumpkin seeds.


    Comments off

    The Nibble Webzine Of Food Adventures
    RSS
    Follow by Email


    © Copyright 2005-2024 Lifestyle Direct, Inc. All rights reserved. All images are copyrighted to their respective owners.