|
Here’s something different for September 29th, National Coffee Day. It’s strong black coffee (often double espresso or mokka-style) topped with an equal layer of whipped cream. Its name is Einspänner (EYEn-shpay-ner), and the recipe follows.
But first:
> The year’s 25 coffee holidays.
> Affogato recipe and history.
> The different types of espresso drinks.
> The different types of coffee.
> The history of coffee
> The history of espresso is below.
> So is the history of the Einspänner.
WHAT IS EINSPÄNNER COFFEE?
Einspänner, popular in Austria and Germany, originated in Viennese coffee culture in the latter half of the 19th century.
If you speak German, you’ll wonder why the drink is called a “one-horse carriage‡.”
It’s because the drink was created for coachmen who needed a beverage that wouldn’t spill. In the days before take-out cups, containers, and thermos bottles‡‡, the heavy topping of thick whipped cream stopped the coffee from sloshing out of the glass mug.
Einspänner predates by many decades Italy’s affogato, a hot coffee-and-dairy cousin that pours espresso over a cup of vanilla gelato (the difference between gelato and ice cream).
Affogato’s name is equally colorful: It means drowned, a scoop of gelato drowning in espresso. Here’s the recipe.
Both are two-ingredient espresso drinks contrasting hot coffee with cold dairy, plus sweetness from the dairy component.
Einspänner originally used strong coffee: The espresso machine wasn’t produced until the beginning of the 20th century and was for cafes, and the moka pot, for home use, in 1933 (the history of the espresso machine).
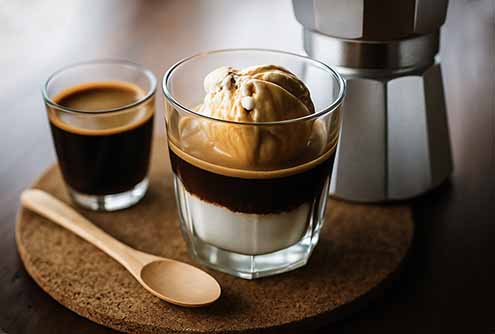
[13] Affogato, espresso with ice cream instead of whipped cream, appeared many decades after the Einspänner. It couldn’t be easier: Pour a shot glass of espresso over a scoop of ice cream (ChatGPT photo).
RECIPE: EINSPÄNNER COFFEE
Prep time is 10 minutes. Thanks to Taste Of Home for the recipe.
Why make your own whipped cream?
Because the whipped cream component is 50% of the drink. While whipped cream in an aerosol can is good for a small garnish, it isn’t good enough for a luscious Einspänner.
But if you just want to give the recipe a quick try, we’ll give you a pass.
Ingredients For 1 Cup
1/2 cup heavy whipping cream
1 tablespoon confectioners’ sugar
1/2 teaspoon vanilla extract
3 ounces brewed espresso (2 shots)m
Optional garnish: cocoa powder
Preparation
1. MAKE the whipped cream. In a large bowl, beat the heavy cream, confectioners’ sugar, and vanilla extract on medium-high speed until stiff peaks form, 3-4 minutes. Transfer the whipped cream to a piping bag fitted with a star tip and chill until ready to use.
2. POUR the espresso into a glass mug. Carefully pipe the whipped cream on top. Be generous; a traditional Einspänner coffee has a 1:1 ratio of cream to espresso.
3. DUST lightly with cocoa powder, if desired. Serve immediately.
Einspänner Coffee Variations
Flavored whipped cream: link
Flavored syrup: If you like your coffee with flavored syrup, add a teaspoon or two of hazelnut, Irish cream, or another favorite to the espresso, and cut the sugar in the whipped cream in half (or omit it entirely).
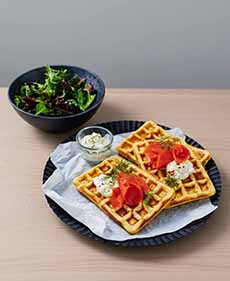
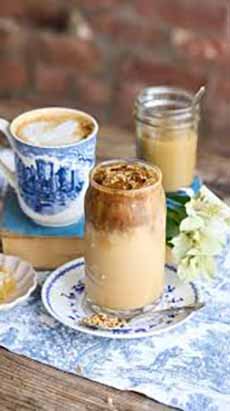
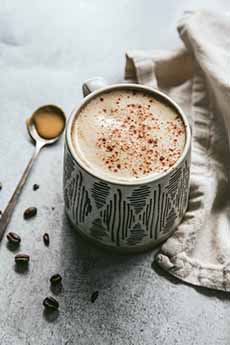
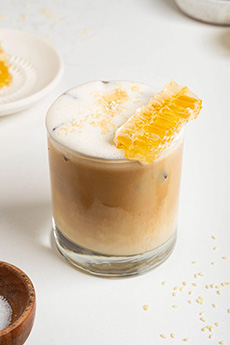
Iced Einspänner coffee (photos #3 and #4). Here’s a recipe.

[14] Coachman with an Einspäanner (ChatGPT illustration).
THE HISTORY OF EINSPÄNNER COFFEE
Einspänner coffee is a Viennese coffee house recipe that originated in Austria during the 19th century. It’s a simple, albeit indulgent drink comprised of strongly brewed espresso topped with a generous (emphasis on generous) amount of sweetened whipped cream.
Similar to a Starbucks cold foam cold brew, an Einspänner coffee is not traditionally stirred together. Instead, the whipped cream and espresso remain in two layers, allowing the hot espresso to blend into the cream as it’s sipped.
Einspänner is derived from the German word for “one-horse carriage,” a vehicle which was prevalent in Vienna at the time of the drink’s invention.
Einspänner was traditionally served in a tall glass with a handle (image #14), and the generous crown of whipped cream was supposed to both help insulate the coffee and prevent it from splashing out while being sipped in a carriage.
However, it is most likely that the coachman drank the coffee while the carriage was stationary, such as while waiting for passengers or during brief breaks.
Aside from a glass with a handle (such as the modern Irish coffee glass), a regular glass was often placed a handled metal holder called a Glasständer (podstakannik in Russian).
Today, the drink is enjoyed around the world. You can even order an Einspänner coffee from Starbucks, where it’s known as an espresso con panna (i.e., the Italian version of this type of coffee that’s served with a little less whipped cream).
If you want yours Einspänner-style, just ask your barista for extra whipped cream.
THE HISTORY OF ESPRESSO
When coffee reached northern Europe in the 17th to 18th centuries, the male population was able to enjoy it in public coffeehouses.
In much of Europe—especially in England and parts of continental Europe—coffeehouses were predominantly male spaces, hubs for political debate, business, literature, and intellectual discussion.
While women were sometimes present as workers—serving coffee, cleaning, or managing—women were usually excluded as customers. The venues weren’t seen as suitable places for “respectable” women.
In England, as well as in the Ottoman Empire from whence coffee spread to Europe, women’s socializing took place more often in domestic or private spaces.
While coffeehouses were male-dominated in France as well, women of status might participate in intellectual life through salons—private gatherings often hosted by other women but including men.
It wasn’t until the 19th century that social norms evolved and coffeehouses transformed into cafés with a broader social function, admitting women—especially in more cosmopolitan cities like Paris, Vienna, and later, London.
By the late 19th century and certainly by the early 20th century, women were regular patrons of cafés, particularly in urban centers.
Until then, women had to enjoy their coffee at home. Coffee was a domestic staple, and women played key roles in brewing it for family members and guests.
Coffee pots, grinders, and associated equipment became common household items from the 17th century onward.
Coffee drinking at home was viewed as refined and hospitable, and women were active participants in the domestic coffee culture. The Kaffeeklatsch (literally “coffee gossip” or “coffee chat”), a gathering of women at someone’s home, did not take place in Britain, where tea service was more ingrained.
But Brewing Was Slow
In early European coffeehouses (and also in the Ottoman Empire), the typical brewing method was to boil or steep ground coffee in a pot, the decant or strain the beverage from the grounds. It then might need to be reheated before serving.
Finally, in the 19th century the Industrial Revolution inspired inventors to develop mechanical solutions for brewing coffee quickly. But it took a while.
1884: Angelo Moriondo of Turin, Italy patented the first known machine that used steam and water pressure to brew coffee quickly. However, his design was meant for bulk brewing rather than individual servings, and it didn’t achieve widespread use.
1901: Luigi Bezzera of Milan, Italy improved on Moriondo’s design by creating a machine that brewed single cups of coffee to order, using steam pressure. His innovation reduced brewing time dramatically and engendered the name espresso, meaning “pressed out” or “express” i.e., fast.
1905: Desiderio Pavoni, also of Milan, purchased Bezzera’s patents, refined the machine, and began manufacturing espresso machines on a larger scale under the brand La Pavoni.
But there was room for improvement. These early machines relied on steam pressure (~1.5 bars), which often gave the coffee a bitter taste.
The Birth Of Modern Espresso
1933: Alfonso Bialetti of Crusinallo, Italy (Piedmont region) invented the Moka pot to make espresso at home: a stovetop device that was affordable, required no electricity, and could make espresso over with any fire source. It is named for the city of Mokha in Yemen, one of the leading areas of coffee production (and also the source of mocha).
1938: Achille Gaggia, also of Milan, revolutionized espresso technology by inventing the first machine that used a spring piston lever to create much higher water pressure (~8–10 bars). His machine produced what we now recognize as espresso: a small, concentrated shot topped with a layer of golden crema.
1940s–1950s: The espresso bar became part of Italian urban life, symbolizing modernity, speed, and social connection. The crema became a mark of quality, and espresso culture spread across Italy.
espresso machines on a larger scale under the brand La Pavoni.
Espresso Goes Global
Post-World War II: Italian immigrants introduced espresso to other parts of Europe, the U.S., Australia, and beyond.
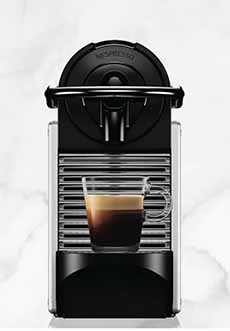
Early 1970s: Gaggia launched the Gilda, one of the first mass-produced electric espresso machines for home use. By the turn of the 21st century, there were many models from which to choose.
1980s–1990s: Specialty coffee shops and chains like Starbucks made espresso available globally.
Early 21st century: Espresso machines for home use, and espresso became the foundation for drinks like cappuccinos, lattes, flat whites, and macchiatos. See our Espresso Glossary for all the variations.
|
|
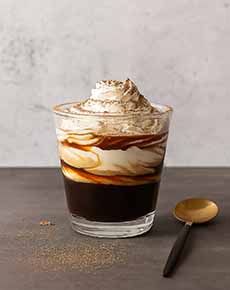
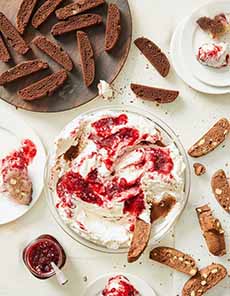
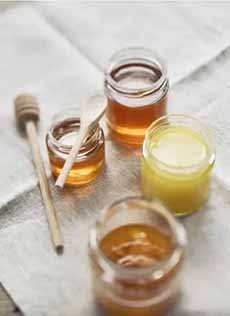
[1] Enjoy an Einspänner after dinner as dessert (or dessert coffee), as a snack, or when you want a big dose of whipped cream (photos #1, #2, and #5 © Sarah Tramonte | Taste Of Home).
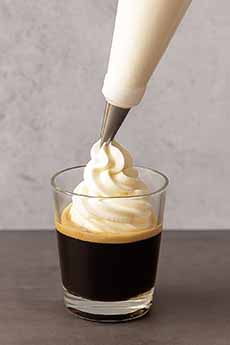
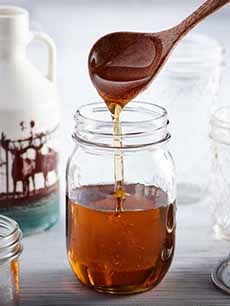
[2] Start with strong coffee or espresso and top with (ideally) homemade whipped cream, piped from a bag.
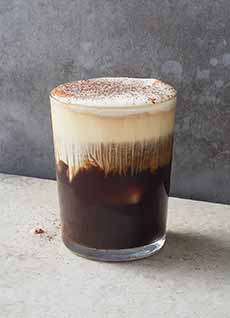
[3] This is an iced Einspänner. Here’s the recipe. You can garnish your hot or iced Einspanner a little…. (photo © Ryan Gardner | New York Times).
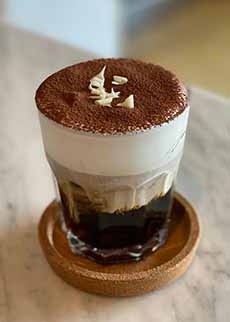
[4] Or go full-on garnish with a coating of cocoa powder or cocoa mix and shaved chocolate (photo © Seungwon Lee | Unsplash).
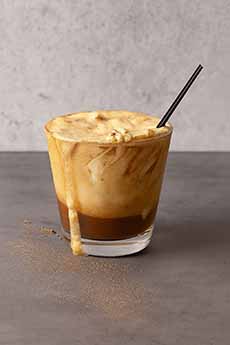
[5] How do you drink it? Any way you want! We like to start with eating the whipped cream from a spoon.

[6] This Glassstander (glass holder), shown holding hot tea, is available on Etsy. See more about this also called the podstakannik in Russian, in the footnote†.
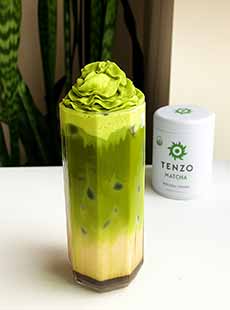
[7] If you don’t drink coffee, make a matcha Einspänner with matcha whipped cream! Here’s the recipe (photo © Tenzo Tea).
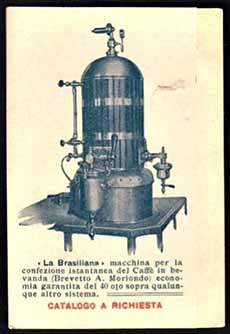
[8] 1884: Angelo Moriondo of Turin, Italy patented the first known machine (photo Public Domain).
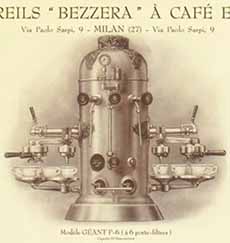
[9] 1901: Luigi Bezzera of Milan, Italy improved on Moriondo’s design by creating a machine that brewed single cups of coffee to order (photo Public Domain).
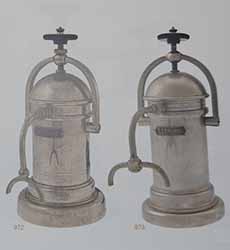
[10] 1905: Desiderio Pavoni purchased Bezzera’s patents and refined the machine. This model is from the 1920s (photo Public Domain).
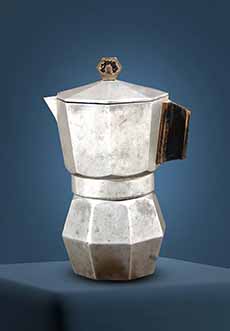
[11] 1933: Alfonso Bialetti invented the Moka pot to make espresso at home (photo Public Domain).
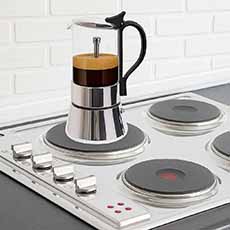
[12] If you need a moka pot, consider one with a glass top so you can watch the coffee perk. We found this handsome modern design on Amazon and liked it so much that we ordered one to replace our classic all-metal version (photo © Mogrecha).
|
|
____________
*Moka pot coffee—also known as stovetop espresso—is a concentrated, robust brew made by passing pressurized steam through ground coffee. It’s a bridge between espresso and drip coffee: more intense than drip coffee, but less concentrated than espresso. It can be slightly metallic or smoky due to the aluminum pot and high heat.
The engineering is simple: Water in the bottom chamber (photo #12) heats and turns to steam, which forces water up through the grounds in the center chamber into the upper chamber. From there, the finished coffee is poured.
The moka pot (photo #11) was invented in Italy in 1933 by Alfonso Bialetti, an Italian engineer and aluminum craftsman. He was inspired by the early industrial steam pressure systems used in laundries, where steam was forced through pipes to clean the clothes.
Adapting the principle for brewing coffee at home, he created a simple, durable, affordable, and portable coffee maker that didn’t require electricity. It works over any heat, including campfires.
The moka pot’s original octagonal aluminum body and black bakelite handle became instantly recognizable and remain largely unchanged today, except colored enameled versions and stylized shiny metal versions are now available.
†The Glasständer, or glass holder, reached its pinnacle with the famous Russian podstakannik, which is the most well-documented type of glass holder in history (the name in Russian means “under the glass.”) It was created in the late 18th century, when drinking tea became common in Russia. The decorative metal holders (photo #6) held thin-walled drinking glasses, allowing people to handle hot beverages without burning their fingers (and also serving as an elegant piece of tableware).
It is believed to have been invented in 1892 by Sergey Witte (1849-1915), then the Russian Empire’s Transport Minister and, later, the first Prime Minister of the Russian Empire. The holders were particularly useful for drinking hot tea on moving trains—where they are still used today.
They moved beyond their purpose practical utensils to art. Just like the samovars that were used for boiling water, the wealthy commissioned expensive podstakanniks made from precious metals with intricate designs, filigree work, and enamel painting.
‡Einspanner comes from the German verb einspannen, which means to harness or to hitch up. Ein = one and spannen = to stretch, tighten, or harness, with -er = a noun suffix indicating the agent or thing that does the action. So literally, Einspanner means “one-harnesser” or “something that uses one harness”—a one-horse carriage.
‡‡The thermos was invented in 1892 by Scottish scientist Sir James Dewar for laboratory use, to store liquefied gases at very low temperatures. He called it a vacuum flask or Dewar flask. His innovation was the double-walled glass container with a vacuum between the walls, which provided excellent insulation by preventing heat transfer through conduction and convection, and silvered the inner surfaces to reduce heat transfer through radiation.
But it wasn’t until 1904 that two German glassblowers, Reinhold Burger and Albert Aschenbrenner, saw the commercial potential and began manufacturing vacuum flasks for everyday use. They founded the company Thermos GmbH and trademarked the name Thermos in 1907 (thermos is Greek for hot or warm). The design became widely popular for keeping beverages hot or cold, and the “thermos” eventually became a generic term for vacuum flasks in many countries.
Here’s more about it.
CHECK OUT WHAT’S HAPPENING ON OUR HOME PAGE, THENIBBLE.COM.
|