THE NIBBLE BLOG: Products, Recipes & Trends In Specialty Foods


Also visit our main website, TheNibble.com.

TIP OF THE DAY: 10 Uses For Croutons & Jumbo Croutons

Jumbo Croutons
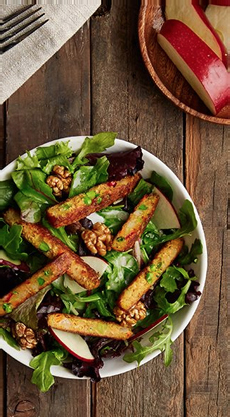
[1] Our idea of croutons on salad (photo courtesy MorningStar Farms.

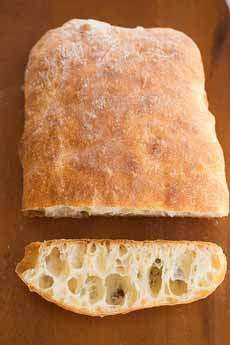
Ciabatta
[2] If you want to bake your own ciabatta, here’s a recipe from Brown Eyed Baker.

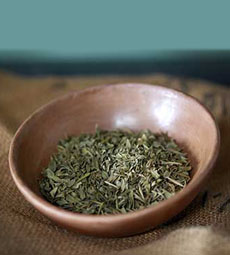
Dried Oregano

[3] Premium dried oregano from Rancho Gordo.


We love good bread. Buttery or cracker-dry, fine or rustic crumb, plain or seasoned, tall or flat, soft or crusty, made with any type of flour, with or without inclusions (cheese, dried fruits, nuts…): All are welcome.

If you’re a bread lover, you’re likely a crouton lover, too. Can there be too many croutons served with salad or soup?

Maybe, but the bar is high.

When we saw this photo from MorningStar Farms, we were decided that our lunch would be salad with a topping of croutons. Big, garlicky ones, like crunchy garlic bread.

You don’t have to toss them on the salad. If you prefer, serve them on the side.

RECIPE: HERBED CROUTONS

You can make croutons in whatever size and shape you like—even using cookie cutters for hearts or other shapes. The ingredients are similar; only the size of the bread varies.

For jumbo croutons, look for an oblong loaf so you can cut biscotti- or mini-biscotti-size slices as shown in the photo. We used a ciabatta loaf.

Preparation

1. PREHEAT the oven to 350°F, with a rack positioned in the center.

2. ADD the oil to a saucepan, along with the the garlic, oregano, basil, thyme, salt and pepper. Simmer for 5 minutes; discard the garlic.

3. TOSS the bread cubes in a bowl toss with the seasoned oil. Spread them onto a jelly-roll pan (a baking sheet with a rim) and bake them for 8 minutes.

4. SPRINKLE the croutons with the parmesan and bake them for another 7 minutes, or until they are golden brown (if you’re not using cheese, simply bake for the additional 7 minutes). Remove from the oven.

5. TASTE a crouton and sprinkle with additional salt and pepper as desired. Cool. Croutons will keep in an airtight container for a week. for tossed green salad.

 
Ingredients

  • 2 large garlic cloves, sliced thin lengthwise
  • 1 teaspoon dried oregano, crumbled
  • 1 teaspoon dried basil, crumbled
  • 1 teaspoon dried thyme, crumbled
  • 1/2 teaspoon fine salt (we used truffle salt—use whatever flavor you have)
  • 1/2 teaspoon freshly-ground pepper
  • 1/2 cup olive oil (substitute butter)
  • 1 loaf of bread of choice: baguette, ciabatta, Italian bread, cut as desired
  • Optional: 1/4 cup finely grated fresh Parmesan
  •  
     
    10 USES FOR CROUTONS

  • Cheese grits/polenta garnish
  • Crouton snack mix (like Chex Party Mix, but with croutons)
  • Green salad garnish
  • Grilled fish garnish or pulsed for a crust
  • Pasta with olive oil, mac and cheese (pulse into coarse crumbs as desired)
  • Sauce thickener
  • Scrambled eggs
  • Soup garnish
  • Stuffing
  • Stuffed* pepper or stuffed tomato garnish
  •  
    Too many croutons? You can pulse them into bread crumbs.

    _______________

    *Stuff with a protein salad: chicken, crab, egg, tuna or shrimp salad.
      

    Comments off

    TIP OF THE DAY: Ice Cream Donuts

    A fun project for a long weekend: ice cream donuts.

    There are two ways to look at them. One requires a donut pan and some fabrication. The other requires nothing but donuts and ice cream.

     
    RECIPE #1: DONUT ICE CREAM SANDWICHES (Photo #1)

    Ingredients

  • Donuts of choice (without frosting or filling)
  • Garnishes of choice: chopped nuts, cookie crumbs, mini-chips, sprinkles, etc.
  • Optional: chocolate chips or chopped chocolate for a chocolate dip
  •  
    Preparation

    1. SOFTEN the ice cream by leaving the container on the counter for 10 minutes or more.

    2. HALVE the donuts. Pile ice cream on the lower half and smooth the edges with a spatula. Add the top donut half.

    3a. ROLL the ice cream in a dish of garnishes. Wrap in plastic and return to the freezer to harden – or –

    3b. MELT the chocolate in a microwave-safe bowl. Dip part of the donut in the chocolate, then in garnishes as desired.
     
     
    RECIPE #2: ICE CREAM DONUTS (Photo #3)

    These donuts have no cakey component; they’re solid ice-cream shaped like donuts. You can add a crumb bottom for some donut effect.

    Ingredients

  • Ice cream of choice
  • Frosting
  • Garnishes of choice: chopped nuts, cookie crumbs, mini-chips, sprinkles, etc.
  • Optional: cookie crumb or cake bottom (we used purchased coffee cake crumbs, which we broke into smaller pieces)
  •  
     
    Preparation

    1. COAT the wells of the pan (photo #2) per manufacturer’s instructions.

    2. SOFTEN the ice cream by leaving the container on the counter for 10 minutes or more.

    3. SPOON the ice cream into the donut wells. Level with a spatula. Add the optional cake or cookie crumbs and lightly tamp down. Place the pan in the freezer.

    4. ASSEMBLE: Invert the pan to remove the donuts. Quickly frost, garnish and serve. Alternatively, just frost and serve the garnishes separately, in DIY fashion.
     
     
    DOUGHNUT VS. DONUT

    An old word for ball was nut; a doughnut is literally a nut (ball) of dough.

      Donut Ice Cream Sandwich
    [1] The easy way: slice a donut, add the ice cream. Paper ‘N Stitch Blog uses glazed donuts with colorful ice creams, like black cherry chip and mint chocolate chip.

    Donut Pan - Wilton
    [2] With a donut pan, you can soften ice cream and fill the circles. Refreeze, then frost and decorate (photo by Hannah Kaminsky, Bittersweet Blog.

    Ice Cream Donuts

    [3] If you invest in a donut pan, you can use it for other things. Check out 101 Donut Pan Ideas.

     
    The term “doughnut” was first used in print in 1809 by American author Washington Irving in his satirical “Knickerbocker’s History Of New York.” Irving wrote of:

    “…balls of sweetened dough, fried in hog’s fat, and called doughnuts, or olykoeks*.”

    These balls, or nuts of fried dough, are what we now call (in a smaller size) doughnut holes.

    Because the center of the cake did not cook as quickly as the outside, the softer centers were sometimes stuffed with fruit, nuts, or other fillings that did not require cooking (think of the chopped onions in the center of a bialy).

    What about the hole?

    Per Smithsonian, a New England ship captain’s mother made a notably delicious, deep-fried doughnut that used her son’s spice cargo of nutmeg and cinnamon, along with lemon rind. She filled the center with hazelnuts or walnuts.

    As the story goes, in 1847, 16-year-old sailor Hanson Crockett Gregory created the hole in the center of the doughnut. He used the top of a round tin pepper container to punch the holes, so the dough would cook evenly.

    He recounted the story in an interview with the Boston Post at the turn of the century, 50 years later.

    He effectively eliminated the need to fill the less-cooked center, and provided an inner cut-out that enabled the dough to be evenly cooked.

    Who changed the spelling to donut?

    The first known printed record of the shortened word “donut” appears (likely an inadvertent misspelling) in “Peck’s Bad Boy And His Pa,” a story by George W. Peck published in 1900.

    The spelling did not immediately catch on. That impetus goes to Dunkin’ Donuts, founded in 1950.

    While donut is easier to write, but we prefer the old-fashioned elegance of doughnut. Take your choice.

    Doughnuts didn’t become a mainstream American food until after World War I. American doughboys at the front were served doughnuts by Salvation Army volunteers. When the doughboys returned, they brought their taste for doughnuts with them [source].

    The name doughboy wasn’t related to the doughnuts, by the way. It dates to the Civil War, when the cavalry unchivalrously derided foot soldiers as doughboys. Two theories are offered:

  • Their globular brass buttons resembled flour dumplings.
  • They used flour to polish their white belts.
  • ________________

    *Olykoek is Dutch for oil cake, i.e., batter fried in oil. While dough was fried the world over, we can thank the Dutch for the sweet balls fried in hog fat that became modern doughnuts.
      

    Comments off

    TIP OF THE DAY: Make Dry Rubs For Meat & Poultry

    Spice Rub For Game
    [1] Take a look at the spices and herbs you own. Look for recipes online or use your own palate to choose what to use on your meat. These are some of the ingredients used in rubs for wild game by Wide Open Spaces.

    Spices
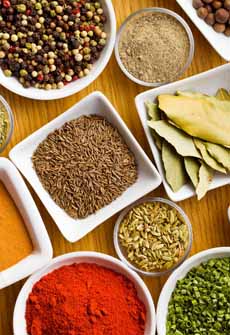
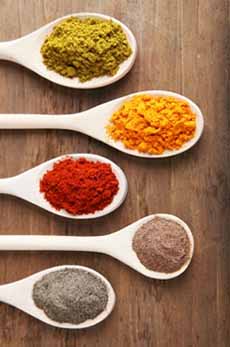
    [2] Pick what you want for your blend. Use smaller amounts of more intense spices (chiles, cumin, garlic, pepper, etc.) and larger amounts of base flavors (oregano, thyme, etc.). Use very small amounts of accent flavors like cardamom, cinnamon, lemon peel and nutmeg (photo courtesy M Magazine).

    Homemade Rubs

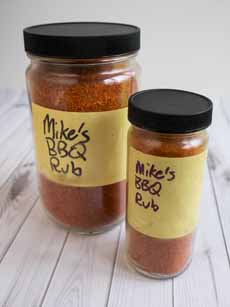
    [3] When you arrive at your signature rub, bottle it and give it as gifts. This one is from Dad Cooks Dinner.


    Just as you can throw together a vinaigrette or a marinade in one-two-three, you can make a rub for meats and poultry.

    Sure, you can buy them: But why pay big bucks for convenience foods when you can make them for pennies with ingredients you already own?

    Take a quick look at your spice shelf. Allspice, chili powder and ground chiles, cinnamon, cumin, garlic powder, lemon peel, mustard powder, nutmeg, onion powder, paprika, sage and thyme all have a place in rubs (although a limit of five or so is best).

    When you mix your own, you can also eliminate the large amount of salt blended into commercial rubs.

    Rubs:

  • Seal the flavor of the meat.
  • Form a tasty crust on the meat.
  • Enhance the color of the cooked meat.
  •  
    Rubs pull moisture from the air, as they draw up the juices from the inside of the meat. This process (osmosis) causes the meat to marinate itself as it cooks.

    They can also be used on fish and vegetables.

    There are two types of rubs:

  • Dry rubs are blends of herbs and spices that are rubbed onto the meat before cooking. The rubs are hand-rubbed, or sprinkled, onto on the surface of meat before it goes onto the the grill.
  • A dry rub is best on food that is cooked faster, at a higher temperature; and on food that probably doesn’t need to tenderize, like shrimp or chicken.
  • Dry rubs are also preferable on steaks and chops. Chefs generally cook them simply with salt and pepper; but if you want to add other touches of flavor, reach for a dry rub.
  • Some of the spices on your shelf are rubs, such as chili powder, curry powder, jerk seasoning and Old Bay; there are numerous rubs in the spices section, reflecting different cuisines (Cajun, Indian, etc.) or foods (barbecue, pork).
  • Rub both sides of the protein. With a whole chicken, rub the inside of the cavity as well.
  • The more time the rub has to react with the meat prior to cooking, the more the flavor it will yield.
  • Wet rubs mix the spices with oil, water or prepared mustard, to spread onto the meat. Pesto is an example of a web rub, although it’s a versatile ingredient that’s also used as a sauce.
  • Any dry rub you have can be turned into a wet rub. When a dry mix combines with the meat juices, it turns into a paste anyway.
  •  
    Today we focus on dry rubs. If you’re grilling this weekend, it’s an opportunity to try different combinations.

    Try different combinations and proportions over time. If you make too much, give it to friends or neighbors.

    Aim for a signature blend for each of your favorite foods: burgers, chicken, steaks, etc. When you have that eureka! moment, you can bottle it as stocking stuffers or house gifts.

    WHAT GOES INTO A RUB?

  • Sweet. White or brown sugar is a common ingredient because it is a flavor enhancer, it helps browning, and with crust formation. No other sweetener can substitute. If you’re concerned about adding sugar, one expert estimates that in a slab of ribs there’s one teaspoon of sugar.
  • Savory. Savory flavors come from amino acids called glutamates, which is why MSG has been a popular flavor enhancer. Green herbs, some spices and garlic, among others, contain glutamates.
  • Spices and herbs. If you’re looking for a certain flavor—curry, sesame, whatever—add it. Paprika is often included as a color enhancer.
  • Spicy. For some sizzle, add some heat. Common additions are black pepper, cayenne or chipotle, ginger, horseradish, and mustard powder.
  •  
    Should you add salt to a rub?

     
    To avoid over-salting, we recommend leaving salt out of a rub, and salting the meat as you normally would. Then apply the rub.

    Note that you cannot judge how a rub will taste when it’s raw. It tastes very very different after cooking.

    When the juices of the meat mix with the herbs and spices and the heat of cooking, they undergo chemical reactions. Thus, a rub may taste too hot when raw, but just right when on top of a piece of cooked meat.

    Similarly, the flavors blend together. People who don’t like a particular spice may not even know that it’s there.
     
     
    RUBS VS. MARINADES

    You don’t use a both a rub and a marinade. Just use one for flavor. If you want to make the meat less tough, a marinade that includes vinegar is better. Otherwise, Pereg Natural Foods advises:

  • Rubs self-marinate the meat, so you don’t have to continue to brush with marinade as the meat cooks.
  • Rubs add a colorful and tasteful crust to the finished meat.
  • Rubs make it easier to control the final flavor of the meat.
  • Rubs are perfect for larger pieces of meat such as spareribs, briskets, and tenderloins.
  •  
    You can apply the rub a few days before you cook the meat, wrap it up in plastic wrap or butcher paper, and place it in the fridge until you’re getting ready to cook (move it to the counter first; don’t put cold meat on the grill).

    Add a generous portion of the rub at first to the meat. After it sits for a few days, add a bit more rub before cooking.

    Ready, set, blend!


    Comments off


    © Copyright 2005-2026 Lifestyle Direct, Inc. All rights reserved. All images are copyrighted to their respective owners.