|
If you like coconut, have you cooked with coconut oil?
We’re not talking about hydrogenated coconut oil, a trans fat long been used in American processed foods, which has been phased out of use over the past few years.
We’re talking extra virgin coconut oil, which is 90% saturated fat but of a type that metabolizes in the body similar to an unsaturated fat. It thus does not increase LDL (bad) cholesterol.
Pressed from the fruit (the “flesh” or “meat”) of the coconut, coconut oil is very popular in India and throughout Southeast Asia. It adds a hint of coconut flavor and aroma to cooked dishes.
If you don’t want the coconut aroma and flavor, you can use refined coconut oil. But since we only use coconut oil for that hint of coconut, why bother when there other neutral oils in the pantry?
At room temperature, coconut oil solidifies but turns liquid as soon as it hits the heat (or if your room is warmer than 76°F). Don’t put it in the fridge: It will turn rock-hard.
You can find liquid coconut oil, which is fractionated coconut oil that has had the good-for-you lauric acid removed so it doesn’t solidify. It stays liquid, even in the fridge. Use it on your hair and skin if you want, but not for cooking.
|
|
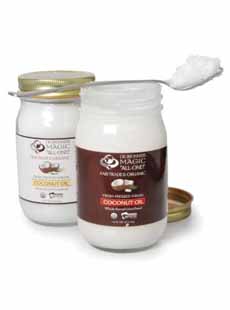
The same coconut oil that is used to cook is also used as a beauty product to make skin soft and hair shiny. Photo of virgin coconut oil—Fair Trade, organic and certified kosher—courtesy Dr. Bronner. |
DIFFERENT TYPES OF COCONUT OIL
When you’re in the store, you may discover a confusing list of options, including extra virgin coconut oil, virgin coconut oil, expeller-pressed coconut oil, the aforementioned liquid coconut oil, and generic products simply called “coconut oil.”
Go with the virgin or extra virgin. According to Health Impact News, they’re the same thing. There’s no industry standard for “extra virgin”; it’s simply better marketing that leverages consumers’ preference for extra virgin oil oil.
Here’s a detailed explanation of the different types of coconut oil.
|
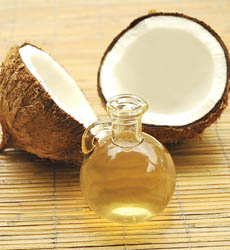
Refined coconut oil is pale yellow in color; unrefined (virgin) coconut oil is white.
Photo courtesy Phu Thinh Co. |
|
WAYS TO USE COCONUT OIL
Manufacturers use coconut oil in candies, cookies, whipped toppings, nondairy creamers and other foods. At home, we use it to add a hint of coconut flavor in:
Baked goods
Sautéed veggies: Brussels sprouts, cabbage, cauliflower, root vegetables, potatoes
Stir fries
Sautéed chicken or fish (if you’re making a breading, use half bread crumbs and half flaked unsweetened coconut)
Stir fries
Marinades
Popcorn drizzle (add flaked coconut and toasted almonds!)
Bread spread (a vegan friend uses it to make delicious cinnamon toast)
Grains, as a butter alternative (we love what it adds to rice, regular and fried)
|
The same coconut oil that is eaten is also used as a beauty product. You can use it to soften skin, shine hair or as a massage oil.
BAKING WITH COCONUT OIL
You can replace other oils or butter at a 1:1 ratio in baked goods. For shortening, replace 1 part with 3/4 part coconut oil.
Solid coconut oil will mix like softened butter with other ingredients are at room temperature; but to be sure to please the gods of baking chemistry, we melt it first.
DIFFERENT TYPES OF COCONUT FOR COOKING, BAKING & DRINKING
Coconut oil is an edible oil extracted from the meat of matured coconuts, which are specifically harvested from the coconut palm. A versatile oil, it is used in both cooking and personal care products. It is liquid at room temperature and solid when cold. Look for cold pressed, organic, virgin coconut oil.
Coconut butter is the flesh of the coconut which has been ground into a butter. It is creamier than the oil, and a popular dairy-free spread.
Coconut flakes are the dried, flaked meat of the coconut. They are our coconut garnish of choice, more impressive than shredded coconut (think grated parmesan cheese vs. shaved parmesan) All shredded/flaked coconut can be eaten raw or lightly toasted, and can be found sweetened and unsweetened.
Coconut water is the clear liquid inside young coconuts, before it hardens into meat. It is high in electrolytes, making it good as a sports drink. Contrary to some claims, there is no evidence that it is better for hydration than water. Look for 100% coconut water without added sweetener for the most healthful drink.
Coconut milk is produced by gating coconut meat. The full-fat version has a rich taste and is used as a dairy milk replacement in foods and for drinking.
Coconut cream is similar to coconut milk, but has had more water removed, giving it a thicker, paste-like texture. It is used to enhance both sweet and savory dishes.
Coconut flour is made by grinding dehydrated coconut meat into [a gluten-free] flour. It can be used instead of wheat flour in baking and cooking, but it doesn’t substitute in equal proportions (the recipe usually needs more liquid).
Dessicated coconut is coconut meat that has been shredded or flaked, then dried.
Shredded coconut is similar to desiccated coconut, but has a coarser texture. It is more toothsome and looks better as a garnish.
|
|