|
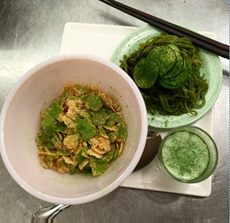
As we close in on Christmas, we like to “Christmas-ize” our food, adding red and green garnishes to everything from scrambled eggs (green and red bell peppers or jalapeños) to desserts (mint leaves and raspberries).
We have fun doing it, looking for a different red and green combination at every meal. For sandwiches, we plate the lettuce and cherry* tomatoes next to the sandwich for presentation purposes, providing a fork so everyone can move them to the sandwich without fingers. Instead of drab green pimento-stuffed olives, we garnish the plate with bright green Castelvetrano olives with strips of pimento.
You can also take the “cookie cutter” approach to savory foods, using your holiday cookie cutters to shape everything from bread (star- or Christmas tree-shaped toast or PB&J, for example). Or use the cookie cutters as molds to shape food (grains, for example) on the plate.
Here’s how we garnished three of our favorite foods: fish/seafood, pasta and sushi.
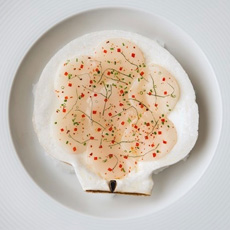
CHRISTMAS TARTARE
It’s easy to garnish any fish dish with pearls of green and red tobiko (flying fish caviar). But in this salmon and tuna tartare recipe, we shaped the tartare into Christmas trees.
You can make the tartare with fish or beef (here’s a beef tartare recipe), or make some of each for a nifty surf and turf first course. The cucumber-base version can be readily picked up from an hors d’oeuvre tray.
Ingredients
Cucumber slices
Waffle potato chips (you can substitute conventional chips)
Tuna tartare and/or salmon tartare (recipe below)
Garnish: chives and/or wasabi tobiko caviar
Optional garnish: slices of yellow grape tomato for top of trees
For The Tartare
1 pound sushi grade tuna or salmon, finely diced
3 tablespoons olive oil
1/4 teaspoon wasabi powder
1 tablespoon sesame seeds, toasted
1/8 teaspoon cracked black pepper
Pinch salt
Preparation
1. BLEND together olive oil, wasabi, sesame seeds, pepper and salt. Add fish and toss until evenly coated.
2. ADJUST seasoning as desired with additional wasabi powder, pepper and/or salt.
3. ASSEMBLE on cucumber and potato chip bases as shown in photo.
RECIPE: CHRISTMAS PASTA
You can make this dish with any pasta, but the curved tortellini and the cubes of cheese are a nice counterpoint.
You can blanch the greens or use them raw; you can serve the dish hot or at room temperature (like pasta salad).
Ingredients
Tortellini (any filling)
Sundried tomatoes (marinated in oil to soften)
Mozzarella (regular or smoked)
Baby spinach, baby arugula or other greens, washed and patted dry
Optional: grated or shaved Parmesan
Dried herbs: oregano, parsley, sage, thyme
Extra virgin olive oil or flavored olive oil (basil, chile, rosemary, etc.)
Salt and freshly-ground pepper to taste
Optional garnish: basil or chives
Optional garnish: pine nuts
|
|

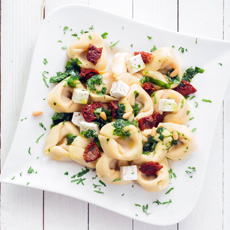


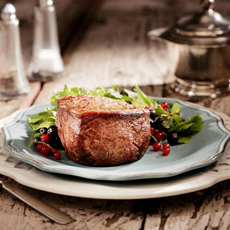
TOP PHOTO: Tuna tartare Christmas trees; photo courtesy Bemka. SECOND PHOTO: Tortellini from Bella Sun Luci. THIRD PHOTO: Use red and green tobiko (flying fish roe) as a simple garnish; photo Melody Lan | THE NIBBLE. FOURTH PHOTO: Dried cranberries and pistachio nuts on a goat cheese log, at MoreThanHungry.com. BOTTOM PHOTO: Filet mignon with a red and green salad from Double Ranch.
|
Preparation
1. COOK the pasta and blanch the greens, as desired. While the pasta cooks, cube the mozzarella. Have all other ingredients ready to add.
2. DRAIN the pasta. Return to the empty pot and add the other ingredients (except garnish), adding just enough olive oil to help bind the ingredients. Toss to blend. Taste, and add salt and pepper as desired.
3. PLATE, garnish and serve.
|