|
National Doughnut Day is celebrated on the first Friday of June, but there’s an even better reason to make doughnuts on the third Sunday: Father’s Day.
If Dad loves doughnuts, get up an hour earlier and bake a batch for his breakfast.
Yes, bake them—no frying required with these cake-like doughnuts from King Arthur Flour.
To bake doughnuts you’ll need a doughnut pan to hold their shape. If you don’t want to invest in one (they’re $16.95 at King Arthur Flour), see if you can borrow one.
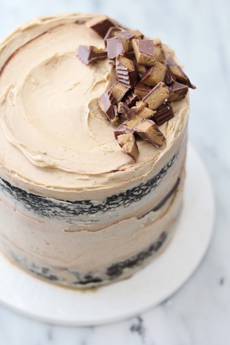
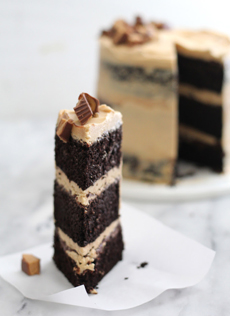
You can serve them plain, with a sugar coating or with a chocolate glaze.
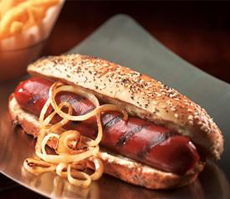
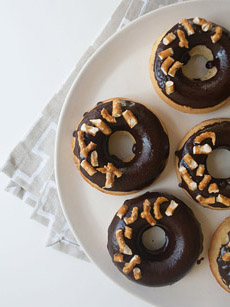
What could be better? We added crisp, chopped bacon to top the doughnuts from King Arthur Flour.
RECIPE: BAKED DOUGHNUTS, CAKE-STYLE
Prep time is 20 to 30 minutes; bake time is 15 minutes; icing time is 5 minutes, then a few minutes to let the icing set.
Ingredients For 12 Doughnuts
2/3 cup Dutch-process cocoa
1-3/4 cups unbleached all-purpose flour
1-1/4 cups light brown sugar
1 teaspoon baking powder
Optional: 3/4 teaspoon espresso powder (substitute instant coffee)
1 teaspoon baking soda
3/4 teaspoon salt
1 cup chocolate chips
2 large eggs
3/4 cup milk
2 teaspoons vanilla extract
2 teaspoons white or cider vinegar
1/2 cup (8 tablespoons) melted butter (substitute 1/3 cup vegetable oil)
For The Optional Sugar Coating
1 tablespoon granulated sugar
1/2 teaspoon cocoa powder
For The Optional Chocolate Icing
1 cup good chocolate bar*, chopped (substitute chocolate chips)
4 tablespoons milk or half-and-half
|
|
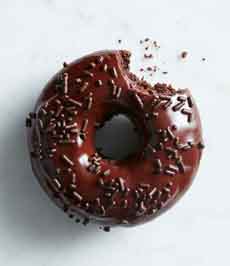
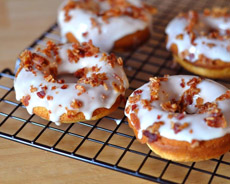
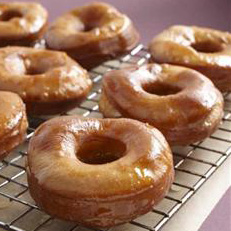
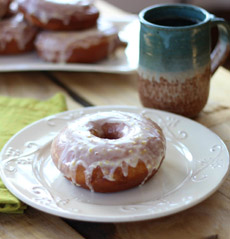
Top: It’s easy to bake doughnuts (photo courtesy King Arthur Flour). Center: We added chopped bacon as a garnish (photo courtesy d’Artagnan | Facebook). Bottom: Don’t want chocolate? These apple cider doughnuts pre-date chocolate in history (photo Karo Syrup). |
|
Optional garnish: crumbled bacon, chopped nuts, dragées, pretzel pieces, sprinkles, etc.
Plus
Doughnut pans
______________________
*If your palate knows great chocolate, a good bar (Chocolate, Dove, Green & Black’s, Godiva, Guittard, Lindt, Perugina, Scharffen Berger, etc.) is better than chips—unless you use Guittard chocolate chips, our favorite.
|
Top: For a lemon glaze, add a teaspoon of lemon juice and grated peel to the icing (photo courtesy GoBoldWithButter.com). Bottom: Another sweet-and-salty doughnut, topped with pretzels (photo courtesy ACozyKitchen.com). |
|
Preparation
1. PREHEAT the oven to 350°F. Lightly grease the wells of two standard doughnut pans. If you don’t have two pans, just bake the batter in two batches.
2. WHISK together the cocoa, flour, sugar, baking powder, espresso powder, baking soda, salt, and chocolate chips in a large mixing bowl. Set aside.
3. WHISK together the eggs, milk, vanilla, and vinegar in a large measuring cup or medium-sized mixing bowl. You may notice some curdling of the milk, which is normal.
4. ADD the wet ingredients, along with the melted butter or vegetable oil, to the dry ingredients, stirring to blend. There’s no need to beat the batter; just make sure everything is well-combined. Spoon the batter into the prepared pan(s), filling them between 3/4 and full.
5. BAKE the doughnuts for 12 to 15 minutes, or until a toothpick inserted into the center of one comes out clean. Remove the doughnuts from the oven; after 30 seconds, loosen their edges, turn the pan upside down over a rack, and gently let the doughnuts fall onto the rack.
5a. For sugar-coated doughnuts, immediately shake the doughnuts in 1 tablespoon granulated sugar; add 1/2 teaspoon cocoa powder to the sugar for an additional touch of chocolate.
6. COOL the doughnuts completely before icing. Combine the chocolate chips and milk or half-and-half in a microwave-safe bowl or measuring cup. Heat until the half-and-alf is steaming and starting to bubble. Remove from the microwave, and stir until the chips have melted and the icing is smooth.
7. DIP the top of each doughnut in the icing; or spread icing over the top. Garnish as desired.
A BIT OF DOUGHNUT HISTORY
Although dough was fried in oil as far back as ancient Rome, food historians generally credit the invention of deep-fried yeast doughnuts to Northern Europeans in Medieval times. The word “doughnut” refers to the small, round, nutlike shape of the original doughnuts—the hole came later. “Donut” is an American phonetic rendering from the 20th century.
|
|
Doughnuts were introduced to America in the 17th century by Dutch immigrants, who called them oliekoecken, oil cakes (i.e., fried cakes). In the New World, the doughnut makers replaced their frying oil with lard, which was plentiful and produced a tender and greaseless crust.
Other immigrants brought their own doughnut variations: The Pennsylvania Dutch and the Moravians brought fastnachts to Lancaster, Pennsylavnia and Winston-Salem, North Carolina, respectively; the French brought beignets to New Orleans.
The word “dough-nut” first appeared in English in the 17th century. The word evolved from dough-nut to doughnut to donut. The airy, yeast-leavened dough-nuts (like Krispy today’s Kremes), were joined by cake doughnuts, leavened with baking powder or baking soda (like Dunkin Donuts).
By 1845, recipes for “dough-nuts” appeared in American cookbooks. Chemical leavening (baking powder) was substituted for yeast to produce a more cakelike, less breadlike texture; and inexpensive tin doughnut cutters with holes came onto the market.
Why a hole? For efficiency, the cooked doughnuts were staked on wooden rods.
The Dawn Of National Doughnut Day
Spell it doughnut or donut, the holiday was created in 1938 by the Salvation Army, to honor the women who served donuts to servicemen in World War I (at that time, it was called the Great War).
|
|