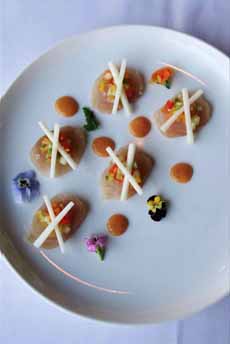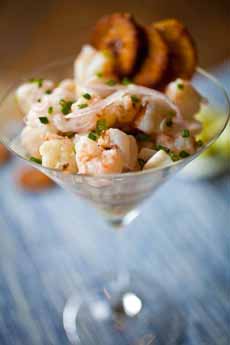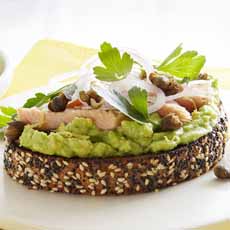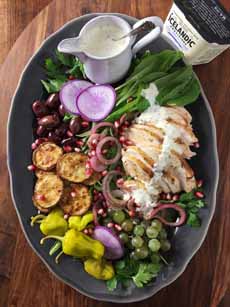
[1] Salmagundi #1: a “hodgepodge” of dinner salad ingredients (photos #1, #2, #3, #5 and #6 © No Crumbs Left).
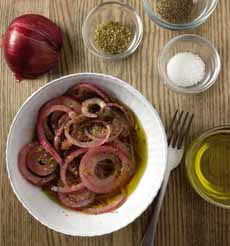
[2] Marinated red onions. These are so tasty, you may want to quadruple the recipe (below).
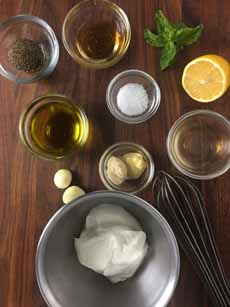
[3] Making the dressing.
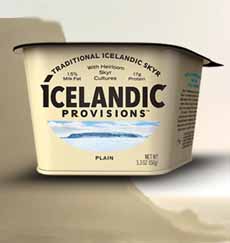
[4] The base of the dressing (photo © Icelandic Provisions).
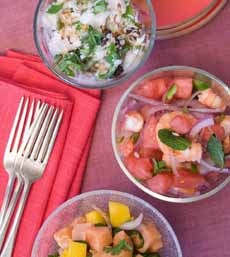
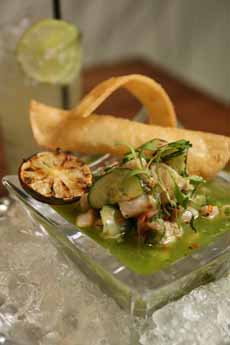
[5] Salmagundi #2: steak salad.

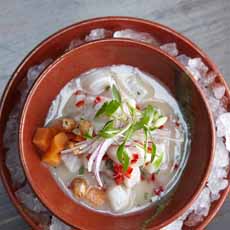
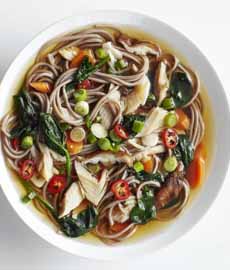
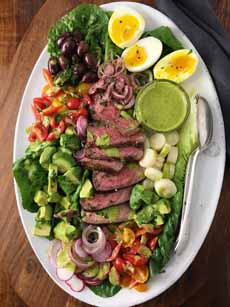
[6] Salmagundi #3: Lobster Niçoise salad..

[7] We quadrupled the recipe for marinated red onions, and used the extras on burgers and sandwiches (photo © Burpee).
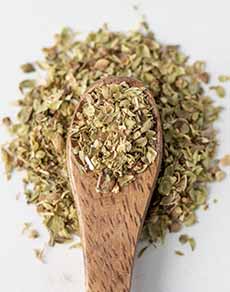
[8] This recipe calls for dried oregano, but you can’t substitute it in equal proportions for fresh oregano. For 1 tablespoon of fresh oregano, substitute 1 teaspoon of dried oregano (photo © Savory Spice Shop).
|
|
THE HISTORY OF SALAD
A little salad history: Since man first gathered wild greens, before the invention of fire*, mankind’s hominim ancestors ate what we call salad greens.
Fast forward to ancient Greece and Rome: Salads—defined as mixed greens with dressing—were a common dish on the table.
The Romans had many salad varieties, quite a few of which differed little from present-day ones: a selection of raw vegetables with a dressing of some sort.
That dressing was oil, vinegar, and often brine. The brine actually gives salad its name:
The key ingredient of salad, as opposed to raw vegetables (crudités), is the dressing. Our name for the dish derives from Vulgar Latin herba salata, literally, salted herb.
Dinner salads, as they are called today—a salad with proteins (cheese, chicken, eggs, fish, steak) as the entrée—were popular during the Renaissance, and continued to be refined.
By the early 17th century in England, composed salads (not tossed but laid out in a pleasing way) comprised of cooked meats, seafood, vegetables, fruit, leaves, nuts, and flowers and dressed with oil, vinegar, and spices [source].
They were called salmagundi, from the French word salmagondis, meaning a hodgepodge of widely disparate items. In English, the word came to mean a mixture or assortment. Here’s more on salmagundi.
The salmagundi recipe begins below, but first, here’s some salad history beyond salmagundi.
Mayonnaise, a popular salad dressing, was created as a sauce in 1756 by the chef of the French nobleman and soldier Duc de Richelieu as a celebration food to serve after a great victory in battle. The concept was refined into today’s mayonnaise by the great French chef Marie-Antoine Carême. Here’s more of the story.
In the 19th century, German immigrants to the U.S. brought recipes for “bonded” meat salads and potato salads—bonded, or bound, with a dressing consisting of oil, vinegar, and salt.
These were usually the main course for lunch or dinner, as opposed to dinner salads, green salads which were traditionally served as appetizers.
Some chefs who made Carême’s mayonnaise used it as a binder instead of oil and vinegar.
In 1863, Chef Liam Gray, proprietor of Town Meats in Wakefield, Rhode Island, combined leftover cooked chicken with mayonnaise, grapes, and fresh tarragon to create the earliest version of modern chicken salad. He served it in sandwiches at his meat market. The sandwiches were so popular that the entire market was transformed into a delicatessen [source 1, source 2].
In 1905, German immigrant Richard Hellmann opened a delicatessen in New York City, using his wife’s mayonnaise recipe as a sandwich spread and in prepared salads. Customers asked to buy the mayonnaise for home use. Within a few years, Hellmann’s Mayonnaise was on its way to becoming a packaged food icon. Other brands followed.
In the 1920s, with broader availability of bottled mayonnaise, American cooks and housewives made egg salad, tuna salad, seafood salad, potato salad, pasta salad, Waldorf salad, ambrosia salad, and more.
With dieting trends in the 1980s, reduced-fat and fat-free mayonnaise appeared. As Americans grew more creative with their cooking, specialty manufacturers began to sell flavored mayonnaise—bacon, chipotle, garlic, guacamole, habanero, harissa, lemon, sriracha, wasabi, and yuzu, among others. With the growth in veganism, vegan mayonnaise is also available, with aquafaba or soy milk substituting for eggs. This brings us to where we are today.
MAKE YOUR OWN SALMAGUNDI
When we received the following recipe from Icelandic Provisions Skyr, developed by No Crumbs Left, we looked at it and thought: dinner salad ingredients look so nice served family-style on a platter. Salmagundi, anyone?
Thus today’s tip: Get out your platters and serve family-style when appropriate—and not just salads. Food looks so much more festive on a platter than passing around bowls of sides, or serving everything pre-plated (known as Russian-style serving). With a platter, people can take exactly what they want.
There are four recipes here, so keep scrolling for Tangy Skyr Dressing, Marinated Red Onions, Roasted Chicken Breasts, and Potato Crisps.
RECIPE #1: SALMAGUNDI PLATTER
Since this is salmagundi, you can use whatever ingredients you like. The recipe is just one of endless combinations: Any “hodgepodge” works.
Pick vegetables and fruits as they come into season, vary the dressings, and take inspiration from global cuisines. You’ll eat healthfully and never be bored.
The ingredients and instructions that follow start with the final assembly. Recipes for the components should be made before cooking the chicken. (We saved time with pre-cooked, boneless chicken breasts from Trader Joe’s—well seasoned, ready to slice, and our favorite time-saver).
Ingredients For 2 Servings
1/4-1/2 cup marinated red onions (recipe below)
2 roasted chicken breasts, see recipe below
Potato crisps (recipe below)
5 ounces baby romaine lettuce, or your favorite greens
1 cup parsley (we used half parsley, half basil)
5 radishes, thinly sliced (the photo shows watermelon radishes)
6 pepperoncini
12 kalamata olives, pitted
1 bunch green grapes
2 cups pomegranate seeds
Sliced fruits and vegetables
Skyr dressing (recipe below)
Preparation
1. ASSEMBLE the salad, arranging the greens and herb(s) on a platter. Add the sliced vegetables and fruits. Add the marinated onions (don’t worry if the marinade comes along with them) and sprinkle with pomegranate seeds. Serve the dressing on the side, or drizzle it over the platter.
RECIPE #2: TANGY SKYR DRESSING
Skyr (pronounced skeer) is similar to yogurt, but has a slightly different recipe and more protein. Here’s more about skyr.
Ingredients
1/2 cup plain skyr (substitute Greek yogurt)
2 tablespoons lemon juice
2 tablespoons olive oil
1 tablespoon white wine vinegar
2 cloves garlic, minced
2 teaspoons honey
1/2 teaspoons Dijon mustard
1 teaspoon horseradish
2 tablespoons fresh mint, chopped
1/2 teaspoon salt
1/4 teaspoon freshly ground black pepper
1-2 tablespoons water to thin, if needed
Preparation
1. PLACE all ingredients except the mint in a bowl; whisk to combine.
2, ADD the the mint and stir. For a thinner consistency, add 1-2 tablespoons of water.
|
RECIPE #3: MARINATED RED ONIONS
Ingredients
1 small red onion
1 tablespoon dried oregano
1 tablespoon red wine vinegar
¾ cup olive oil
Preparation
1. Thinly slice the red onion. Place the slices in a container and top with the oil and vinegar. Add the dried oregano. Cover and let sit at room temperature to marinate for at least an hour.
RECIPE #4: ROASTED CHICKEN BREASTS
Ingredients
2 chicken breasts, bone-in and skin-on
Olive oil
Kosher salt
Freshly ground black pepper
Preparation
1. PREHEAT the oven to 350°F. Rub every crevice generously with olive oil, then sprinkle with plenty of kosher salt and black pepper. Bake for about 35 minutes, then brush the top of the chicken with the juices. Return to the oven for 5 minutes to brown the tops. Remove from the oven. Let rest for 10 minutes, then slice.
RECIPE #5: POTATO CRISPS
Ingredients
2 russet potatoes or 4 large Yukon Gold potatoes
2 tablespoons olive oil
Salt
Freshly ground black pepper
Pinch of cayenne pepper
Preparation
1. PREHEAT the oven to 425°F. Slice the potatoes into 1/4 inch circles and place them in a bowl with the oil, salt, pepper and cayenne. Coat each potato slice evenly.
2. PLACE the slices evenly on a baking sheet covered with parchment paper. Bake for 15 minutes, remove, flip, and return to the oven for 15 more minutes. Repeat this step until the edges are brown and crisp and the inside of the potato is soft.
________________
*The oldest unequivocal evidence of man-made fire, dated to 300,000 to 400,000 years ago, was found at Qesem Cave in Israel. It was used at different times by both Homo sapiens and Neanderthals. However, archaeologists have discovered what appear to be traces of campfires that are 1 million years old, with charred animal bones and ashed plant remains. These fires were found in South Africa’s Wonderwerk Cave, a site of early hominin, and later human (Homo sapiens) habitation dating back two million years [source].
CHECK OUT WHAT’S HAPPENING ON OUR HOME PAGE, THENIBBLE.COM.
|