|
Pimento cheese, long known as a Southern specialty, has been called the caviar of the south.
Yet it was actually a Northern invention: a blend of sharp cheddar with cream cheese, chopped pimento and seasonings.
Here’s the history of pimento cheese, from Robert Moss, a Southern food historian.
No matter which side of the Mason-Dixon line gave birth to pimento cheese, we’re glad it’s here. It was our mom’s favorite way to serve cream cheese, and when we were young that was easy: Philadelphia Brand sold pimento cream cheese.
While Philly is out of the pimento cheese business, you can find other brands on the shelf; or make your own with the recipe below.
IS IT PIMIENTO OR PIMENTO?
Pimiento (pim-YEN-toe) is the Spanish word for a particular sweet chile pepper similar to a red bell pepper. It’s heart-shaped, about 3 to 4 inches long by 2 to 3 inches wide.
Pimiento is the pepper used to make paprika, and is stuffed into green olives. Its flesh is sweet, succulent and more aromatic than that of the red bell pepper.
Pimento is often bought in jars or cans. Other subspecies are jarred as well, and labeled either with the subspecies (“roasted red piquillo pepper”) or a generic “roasted red peppers.”
But look around and you may find freshly-harvested pimentos: They’re in season from late summer through early fall.
Now to answer the question: Is it pimento or pimiento?
Pimiento is the Spanish spelling, pimento is the Portuguese spelling. According to the Merriam-Webster dictionary, the primary spelling is pimiento, with pimento as a variation.
For English speakers, it’s easier to pronounce by leaving out the “i”; but the choice is yours.
HOW TO SERVE PIMENTO CHEESE
The versatile spread can be served at breakfast, lunch, dinner, and for hors d’oeuvre and snacking.
From pimento mac and cheese to cheeseburgers to the pizza rolls recipe below, you can substitute pimento cheese anywhere a soft cheese is used.
Here are 20-plus ways to use it, plus a recipe for new-style pimento cheese, substituting mayonnaise for the original cream cheese..
We prefer the original cream cheese-based pimento cheese, used in the pepperjack pimento cheese recipe below.
Pepperjack? What happened to the cheddar?
Jack cheeses are often substituted for the cheddar, and some people use white cheddar. We’ve used Cabot’s Hot Habanero Cheddar or Horseradish Cheddar instead of sharp cheddar.
Just a thought: For for harvest season and Halloween, the more orange the color, the better.
Want even more variety? Here are different pimento cheese recipes from Southern Living.
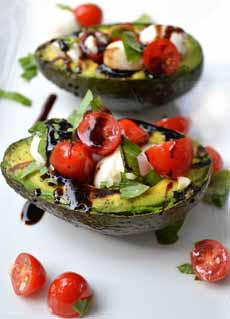
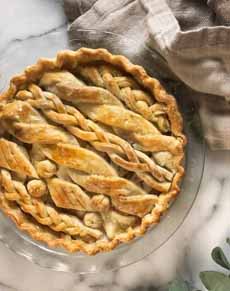
RECIPE #1: PEPPERJACK PIMENTO CHEESE SPREAD
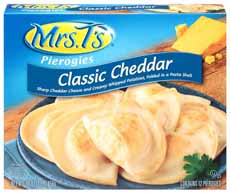
This recipe (photo #4) from Bev Cooks, does double duty as a spread with toasts or crackers. She also uses it in mini pizza rolls.
These are particularly nice to serve with beer, wine or cocktails.
Thanks to Organic Valley cream cheese for sending us the recipe.
Ingredients For 1-1/2 Cups
1-1/2 cups (6 ounces) shredded pepper jack cheese (substitute sharp cheddar)
1/2 cup (2 ounces) shredded white cheddar cheese
4 ounces cream cheese, softened
1 jar (4 ounces) diced pimentos, drained
5 dill pickle slices
2 tablespoons dill pickle juice
1 tablespoon pickled jalapeño juice, optional
1 tablespoon mayonnaise
Toasted baguette slices or crackers
|