|
Today’s tip: Get to know farmer cheese.
We grew up on it: Our grandparents loved it, our mother loved it and we’re in love with its milky freshness, too.
For eating at breakfast, for crostini, for a cooking cheese, it’s a tangier option to ricotta: Middle Europe versus Italy.
This tip is all about farmer cheese, including a new discovery: Lifeway Probiotic Farmer Cheese (below), tangy and gut-friendly.
WHAT IS FARMER CHEESE?
Farmer cheese or farmer’s cheese is a simple, fresh (i.e., unaged), cow’s milk cheese that’s the “child” of cottage cheese.
The texture is much drier than cottage cheese and the curd is tiny, such that the dry, tiny curds are molded into loaves and sliced.
Farmer cheese is made by pressing most of the moisture (whey) from cottage cheese. Baker’s cheese is essentially the same product.
Farmer Cheese History
Farmer cheese originated on farms as another way to use milk left over after skimming the cream for butter.
First, cottage cheese was made and the remaining moisture (whey) pressed out of it, causing the cheese to become dry and crumbly.
Two main styles evolved:
A fresh cheese similar to cottage cheese.
A semi-soft version cured for a short time.
Our experience is with the fresh version.
Once a staple of Middle European cuisine, farmer cheese was brought to the U.S. by Ashkenazi Jewish immigrants, who first made it at home.
> Here’s a recipe to make farmer cheese.
Any commercial cheese producer can make it; but few do, since it has fallen out of fashion. It can be hard to find outside of strongholds of Jewish cuisine.
The difference between farmer cheese and its closest “relatives”:
Cottage cheese: The fresh, drained curds of slightly soured, pasteurized milk. The whey is drained from the curds, and the remaining curds are known as cottage cheese.
Press out more whey and you get farmer cheese, firm with tiny curds.
Pot cheese: Drained longer, cottage cheese becomes a drier-curd product known as pot cheese.
Aged farmer cheese: In Canada, the term “farmer’s cheese” refers the semi-soft cured variety. Like fresh farmer cheese, it is a white cheese that does not have a rind. It is firm, mild, milky and buttery in flavor, and can be used in a similar fashion to colby or cheddar.
What Is Fresh Cheese?
Farmer cheese belongs to the category of fresh cheeses: cheeses that have not been aged, or are very slightly cured, have a high moisture content and are usually mild with very creamy taste and soft texture.
Fresh cheeses may be made from all types of milk, and are generally ready to eat in a few hours.
Examples include chèvre (goat cheese), cottage cheese, cream cheese, farmer cheese, feta, mascarpone, mozzarella, pot cheese, ricotta and quark.
International versions, among others, include paneer (very similar), kesong puti from the Philippines, queso blanco from Latin America (more solid, like feta) and twaróg, Polish farmer cheese.
Farmer cheese, like all fresh cheeses, should be consumed within a week or so, unless it’s pre-packaged and sealed for a longer shelf life.
WAYS TO USE FARMER CHEESE
Our favorite use is right from the package, as a spread on bagels, crusty rustic bread and any type of toast—with or without jam.
Next is as a base for berries or fruit salad, with a dollop of yogurt or sour cream on top (maybe a little honey).
And then, there are:
Blintz and crêpe filling: flavored with cinnamon, sugar and vanilla (or other flavor profile).
Cheesecake.
Cheese pierogies.
Dip, mixed with mayonnaise or sour cream.
Grain bowls and salad bowls; dotted onto green salads as a garnish.
Green salad or roast vegetables: a crumbled garnish.
Noodle kugel (noodle pudding): another Jewish delight that incorporates cottage cheese or farmer cheese.
Pancakes: ricotta in the batter makes them fluffier.
Pasta: bowties tossed with farmer cheese, parmesan and black pepper.
Spread: on bread, crackers, crostini.
Substitute: for cotija, paneer or ricotta.
Sandwich: in pita or on toast with lettuce, tomatoes, cucumbers, olives and plain or pickled sliced onions.
Whipped spread: sweet or savory, add to a food processor with your ingredients of choice. The whipped spread can also be used as a sauce.
White pizza.
Farmer cheese can be blended with puréed or finely diced fruits, or made savory with herbs or cooked, puréed or finely diced vegetables.
Mixed with sweetener and baked (fruit optional), it is similar to ricotta cheesecake.
Baked farmer cheese was sold for years, in several flavors, at our local specialty market, until the producer retired. Alas.
But it’s easy enough to recreate at home.
> Here’s a basic recipe for baked farmer cheese.
LIFEWAY PROBIOTIC FARMER CHEESE
We recently discovered Lifeway Farmer Cheese, made by the company that’s the number-one producer of kefir in the U.S.
High in calcium, it is certified gluten free, OU kosher, and is rBST-free.
It has more moisture (is less firm) than the few brands of farmer cheese we know.
The main difference between Lifeway brand and other farmer cheese brands is that it has the probiotic heritage of the company’s kefir.
It’s naturally up to 99% lactose free, because it’s cultured.
Probiotic. Lifeway Farmer Cheese is made with 12 different live and active probiotic cultures. They are cultured after pasteurization to ensure 100% live and active.
Salt-free. No salt is added. We never buy the salt-free farmer cheese of other brands; they’re too bland. But the probiotic tanginess of Lifeway is so flavor-forward, you don’t notice the missing salt.
There are three varieties:
Lifeway Farmer Cheese is a cultured soft cheese with a distinctive, tangy flavor. It has 140 calories per 4-ounce serving, 6g fat and 16g protein.
Lifeway Farmer Cheese Lite has 120 calories per 4-ounce serving, 4g fat and 16g protein.
Lifeway Farmer Cheese Fat Free has 100 calories per 4-ounce serving, 1g fat and 16g protein.
> Here’s more about Lifeway Farmer Cheese.
FARMER CHEESE RECIPES
You can substitute farmer cheese for ricotta in many recipes. Here are some simple recipes that let farmer cheese shine.
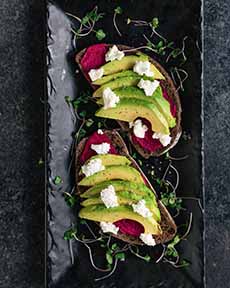
Beet Spread With Avocado & Farmer Cheese
Cajun Shrimp Toast With Farmer Cheese
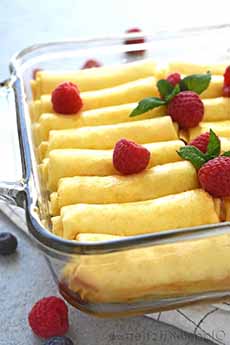
Crêpes With Farmer Cheese (Nalisniki)
Farmer Cheese Cake (Zapekanka)
Farmer Cheese Doughnuts
Farmer Cheese-Filled Cookies(Sochniki)
Farmer Cheese Pancakes (Syrniki)
Puff Pastry Cheese Turnovers
Ratner’s Cheese Blintzes
Roasted Carrot & Maple Toast With Farmer Cheese
Scrambled Eggs With Chives & Farmer Cheese On Sourdough Toast
Sweet Noodle Kugel With Farmer Cheese
Sweet Pea & Mint Farmer Cheese Crostini
Tahini Maple Toast With Apples & Farmer Cheese
|
|
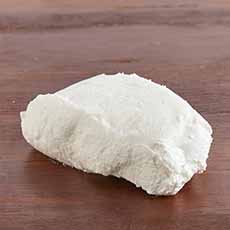
[1] Farmer cheese: pressed from cottage cheese, it’s drier with a tiny curd (photo © Zabar’s).

[2] Ready for breakfast: a bagel packed with farmer cheese, bacon, eggs and avocado (photos #2 through #7 © Lifeway Foods).
[3] Lunch time: beet spread and sliced avocado on pumpernickel toast.
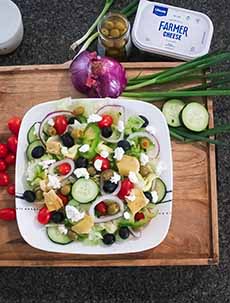
[4] Lunch time: Cucumber salad and cherry tomato salad with red onion, artichoke hearts and olives, garnished with dabs of farmer cheese.
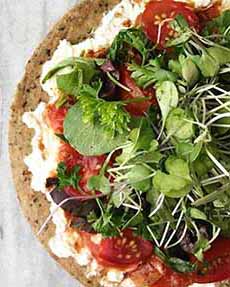
[5] Margherita pizza: tomatoes and basil with farmer cheese instead of mozzarella.
[6] Fruit bowl with farmer cheese.
[7] A snack plate of cantaloupe, salame, toasts and scoops of farmer cheese garnished with freshly-ground pepper and extra virgin olive oil.
[8] Crepes filled with sweet farmer cheese. Here’s the recipe from Olga In The Kitchen (photo © Olga In The Kitchen).
[9] How about a farmer cheese cake, for breakfast, dessert or snacking? Here’s the recipe from Mom’s Dish (photo © Mom’s Dish).
|