|
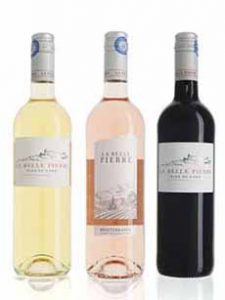
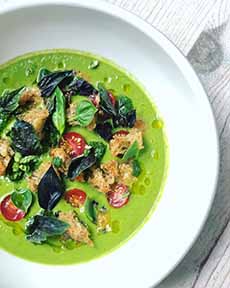
[1] The Roussillon commune produces red, white and rosé wines, plus sweet wines (photo #2) (photo courtesy Wine Goblet).
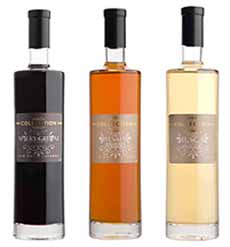
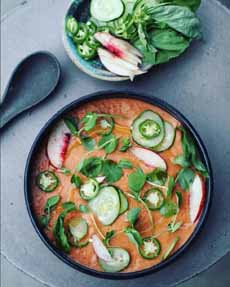
[2] The sweet wines of Roussillon, vins doux naturels, are also available in the “three colors.” They’re often referred to by their initials, VDN, and indicate naturally sweet wines (photo courtesy Vignerons Catalans).
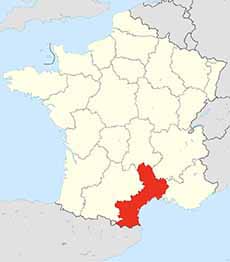
[3] Languedoc-Roussillon, an administrative region of France that combines the communes of Languedoc and Roussillon. Compared to the small size of Roussillon, Languedoc is one of the world’s largest wine regions (photo Wikipedia Commons).
|
|
If you’re a wine drinker, you’re no doubt familiar with the French wine communes (regions) of Beaujolais, Bordeaux, Burgundy and Champagne.
How about Alsace and the Côtes du Rhone?
And then there’s Roussillon (roo-see-YONE), a region not well known among American wine buyers*.
While exports to the U.S. market are steadily increasing, and the U.S. is Roussillon’s fourth-largest export market, most people we know have yet to try a bottle—or to even know that it exists.
That’s even though Roussillon produces delicious wines at affordable prices—many in the $18 range. Thus, our Top Pick Of The Week is the wines of Roussillon.
THE COMMUNE OF ROUSSILLON
The area, in southern France, is nestled between Spain, the Mediterranean Sea, and two mountain ranges: the Pyrenees and the Corbières (photo #3).
It’s the sunniest wine region of France, with more than 320 days per year of sunlight and ideal temperature variations.
Heavy autumn rains fill the water tables and enable the vines to find abundant moisture during the hot summer months.
In other words, Roussillon is a land “blessed by the gods” for winegrowing.
Roussillon is a small community of some 1,500 people, as opposed to the neighboring commune of Languedoc, another wine region with a population of some 2.5 million. (The two areas were combined into the Languedoc-Roussillon administrative region in the late 1980s.
Roussillon’s unique geology and microclimates enables cultivation of 24 authorized grape varieties.
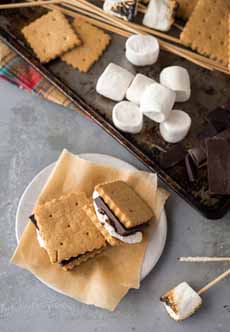
The grapes produce red, white and rosé wines, both still (photo #1) and sweet (vins doux natureles, or fortified sweet wines, photo #2).
These are quality wines: There are 15 PDO wines (Protected Designation of Origin) and 3 PGI wines (Protected Geographical Indication) wines (here’s an explanation of these designations).
The first vines may have been planted by the Greeks as far back as the fifth century B.C.E., by Corinthian sailors who had wine-making skills [source].
These vineyards, along with some areas of Languedoc and Provence, are among the oldest planted vineyards in France [source].
VINS DOUX NATURELS
You know about dry red wines and dry white wines, but how about sweet wines?
Vins doux naturels, often referred to as VDNs, are fortified sweet wines—very high quality, and costlier than most of the still wines.
Fortified wines, which are made in many wine-growing regions worldwide, have grape brandy added to the wines. This gives them a higher alcohol content (about 17%-20% A.B.V.†) and a longer shelf life after the bottles are opened.
Fortified wines can be either be dry or sweet. The fortified wines of Roussillon are sweet (doux).
|
We are huge fans of vins doux naturels: as an apéritif, with entrées like lobster, with a cheese course or as a dessert wine.
These wines also pair beautifully with spicy international cuisines, such as the sweet-and-sour or savory-sweet dishes of Chinese, Indian and cuisines.
HEAD TO THE WINE STORE
The only way to get to know Roussillon wines is to head to a wine store and discuss the available options with a knowledgeable clerk.
Red, rose, or white; still or sweet: It’s time to get to know these wines.
Some of our favorites are below. By the way, if your store only has wines from the Languedoc, be wary. While wines are improving there, the region has long been known for average wines.
FOR MORE INFORMATION, VISIT WINESOFROUSSSILON.COM.
WINES WE LIKE
Red Wines: IGP Côtes Catalanes, Les Vignerons De Tautavel Vingrau, Le Cirque ($18); AOP Côtes Du Roussillon Villages Lesquerde, Domaine De-Bila-Haut, L’Esquerda ($26)
Rosé Wine: AOP Côtes Du Roussillon, Res Fortes ($23)
Sweet Wines: AOP Banyuls, Domaine Vial Magneres, Al Tragou ($87); AOP Rivesaltes Ambré, Terrassous, Hors D’Âge 18 Ans ($49)
White Wine: IGP Côtes Catalanes, Domaine Majas ($18)
________________
*France’s other wine-producing regions include Jura, Languedoc, Loire Valley and Provence
†A.B.V. is alcohol by volume. Double the A.B.V. to get the proof. For example, an 80-proof spirit is 40% A.B.V.
|