THE NIBBLE BLOG: Products, Recipes & Trends In Specialty Foods


Also visit our main website, TheNibble.com.


TOP PICK OF THE WEEK: Kurobuta Ham, The Best Ham

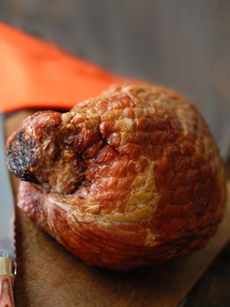
Kurobuta ham has been called the world’s best ham. It‘s also known as the Kobe beef of ham, because of the fine intramuscular marbling that makes the meat melt-in-your-mouth tender.

While Kurobuta (koo-row-BOO-tuh) ham isn’t quite as pricey as Kobe beef, it is a special-occasion luxury.

Snake River Farms, a Kurobuta producer, has created a more affordable “Mini Karver,” a three-pound ham that serves four as a main course or more as an appetizer ($40.00).

Try one this Easter, or any time you hunger for great ham. It’s also the best Easter gift, with all due respect to chocolate bunnies and buttercream eggs.

Read the full review.

  • Cuts and types of ham.
  • The history of ham.
  • Ham and ham glaze recipes.
  • Ham trivia quiz #1.
  • Ham trivia quiz #2.
  •  
    Three pounds of ham perfection. Photo courtesy Snake River Farms.


    Comments off

    Tofu Chocolate Mousse Recipe For National Chocolate Mousse Day


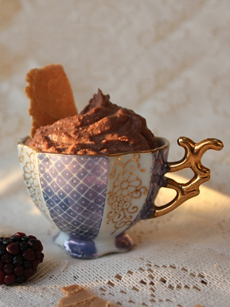
    [1] A chocolate mousse alternative that can be vegan (photos #1 amd #3 © House Foods).

    A dish of Chocolate mousse garnished with blackberries
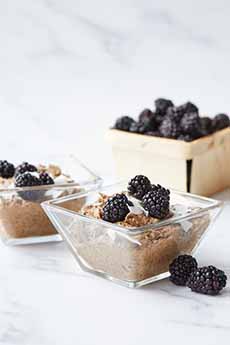
    [2] Garnish the mousse with fresh berries, such as blackberries (above) or raspberries (photo © American Heritage Chocolate).

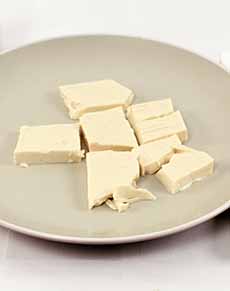
    Cubes of House Foods Silken Tofu on a plate
    [3] House Foods Soft Tofu (photo © Calorie Friend).

    A package of House Foods organic soft tofu
    [4] A package of organic Soft Tofu.

      Allergic to eggs? Lactose intolerant? Vegan? Cholesterol-averse?

    You can still celebrate National Chocolate Mousse Day, April 3rd, by substituting soft tofu.

    While traditional mousse recipes use heavy cream and eggs (high in calories and cholesterol), House Foods America provides a healthier and vegan-optional alternative for you to celebrate National Chocolate Mousse Day.

    House Food’s Soft (Silken) Tofu is a flavorless ingredient that can transform itself into any flavor or texture (find more recipes on the company’s website).

    The House Foods line is certified kosher by OU.

    The recipe below delivers a smooth texture that, when blended with semi-sweet chocolate, milk or coconut milk, vanilla, cinnamon and cardamom, creates a luscious dessert that tastes just as indulgent as the traditional version.
     
     
    > The history of chocolate mousse.

    > Julia Child’s classic chocolate mousse recipe.

    > More delicious tofu recipes.

    > The history of tofu.
     
     
    RECIPE: TOFU CHOCOLATE MOUSSE
     
    This recipe serves 4-6, and takes only 15 minutes to prepare.

    Ingredients

  • 1 package (14 ounces) soft tofu
  • 3/4 cup semi-sweet chocolate chips
  • 1/4 cup of milk (can substitute coconut milk)
  • 1/2 tablespoon vanilla
  • 1-1/2 teaspoon ground cinnamon
  • 1 teaspoon ground cardamom
  •  
     
    Preparation

    1. Open the tofu package and strain out the water. Remove tofu and blend in blender until smooth.

    2. With the stove on low or simmer, melt the chocolate chips and milk in a pot, stirring until smooth. Add the tofu mixture and stir until it is blended evenly with the chocolate.

    3. Stir in the vanilla, cinnamon and cardamom. Quickly remove from the heat, cool in a large bowl or in individual serving dishes, and set in fridge until the mixture becomes mousse-thick.
     
     
    Variations

    You can add your own personal twist to this recipe:

  • Top the pudding with toasted slivered almonds or other nuts, coconut shavings, or cocoa powder.
  • Or, try these 12 mousse garnishes.
  • For a spicy Mexican chocolate mousse, replace the 1 teaspoon of ground cardamom with 1/2 teaspoon of chile powder.
  • Add a half teaspoon of agave nectar for an even sweeter pudding.
  •  


    CHECK OUT WHAT’S HAPPENING ON OUR HOME PAGE, THENIBBLE.COM.


    Comments off

    PRODUCT: Gluten-Free Pizza From Bold Organics & Mozzarelli’s

    With the increased consumer interest in gluten-free products, we find ourselves tasting more of them. Our rule of thumb with any special-diet product is: It’s got to be so good that anyone would enjoy it, and not notice that it’s meant for people on a restricted diet.

    Last week our Top Pick was My Dad’s gluten-free cookies. Now we have two new items to add to our gluten-free roster: delicious pizzas.

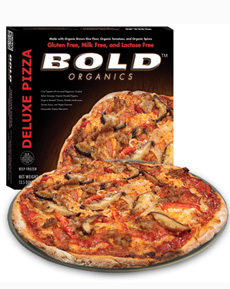
    Frozen Gluten-Free Pizzas From Bold Organics

    The Bold Organics pizza line is not just gluten-free: It’s milk-free (no lactose, casein or whey), egg-free, peanut- and treenut-free.

    It not only tastes like conventional pizza; it’s better than many of the other frozen choices in the supermarket, even the ones made with traditional wheat and dairy.

     
    All of the flavor, none of the gluten (or other
    allergens). Photo courtesy Bold Organics.
     
    These are individual pies, approximately eight inches in diameter. The number of servings is listed as two—for two five-year-olds, perhaps, but you’ll know that when you see the size of the box. Just count on one pizza per adult.

  • The crust has a nice texture, only slightly softer than the crispy thin-crust style we’re used to in New York City. If you like it extra crispy (we do), you’ll want to cook it a bit longer than instructed.
  • The cheese, largely made of soy, is also impressive. It tastes like authentic cheese and has a nice melty, stretchy texture, like regular pizza cheese.
  • In addition to good basics of crust and cheese, obvious care is taken with all the other ingredients. The sauce, made with organic tomatoes, spices and herbs, is flavorful and has just a touch of heat. Organic vegetables and nitrite/nitrate-free meats are used on the topped varieties.
  •  
    These tasty pizzas are available in four different flavors:

  • Vegan Cheese (plain—we like to buy this one and add our own toppings)
  • Veggie Lovers (onions, red peppers, shiitake mushrooms)
  • Meat Lovers (uncured pepperoni and sausage)
  • Deluxe (all the meat and vegetables above)
  •  
    Bold Organics pizzas retail from $6.99 to $10.29. They’re being rolled out at retail locations around the country this month, with representation in Whole Foods and increased presence overall expected later this year. See the company website to view a store locator.

    The line is certified by Organic Certifiers, the Non GMO Project and the Celiac Sprue Association.


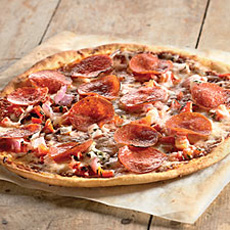
    Put your favorite toppings on a great
    gluten-free crust. Photo courtesy
    KingArthurFlour.com.
     

    Fresh Gluten-Free Pizza Crusts

    If you want the crust only, we highly recommend the ones made by Mozzarelli’s. These are the same folks who make My Dad’s gluten-free cookies.

    Mozzarelli’s is a gourmet pizza emporium in New York City. Conventional and gluten-free pizzas are available. We’ve been there and really enjoyed it.

    The crust is made from rice flour, corn starch, potato starch, potato flour and tapioca flour. Unlike Bold Organics, it does contain nonfat dry milk and eggs, so it’s not a vegan product.

    It is, however, delicious. Each crust comes in a disposable/recyclable pan.

     
    The company also sells Better Crumbs, gluten-free bread crumbs.
     
    Pizza Party Idea

    Ask each guest to bring a different topping to share. Then set up a pizza-making table and let guests create their own combinations before you pop the pizzas into the oven.


    Comments off

    RECIPE: Beer Battered Grilled Cheese & Bacon Sandwich

    Betty Crocker Kitchen has announced the winner in its second annual Betty Bracket. This showdown of 16 sweet and savory beer party food recipes competed to be served at the College Football Playoff National Championships.

    America has spoken: Beer Battered Grilled Cheese Sandwich was the winner. You can enjoy it during the national championship game, tomorrow.

    This recipe makes two sandwiches. The beer of choice is pale ale, but you can substitute what you have on hand.
     
     
    BEER BATTERED GRILLED CHEESE & BACON SANDWICH RECIPE

    Ingredients

  • 6 slices hickory-smoked bacon
  • 4 slices rustic white bread
  • 2 slices provolone cheese (3/4 oz each)
  • 2 slices Cheddar cheese (3/4 oz each)
  • 1 egg
  • 3/4 cup pale ale
  • 1/4 cup all-purpose flour
  • 1/4 teaspoon chipotle chile powder
  • 1 tablespoon butter
  •  
    Preparation

    1. COOK bacon in a 12-inch nonstick skillet until crisp; drain on paper towel.

    2. PLACE 1 slice provolone cheese, 3 slices bacon and 1 slice Cheddar cheese atop each of two of the bread slices. Top with remaining bread slices.

    3. HEAT griddle or skillet over medium-high heat, or to 375°F.

    4. BEAT egg, beer, flour and chile powder in a shallow bowl with fork, until smooth. Dip each sandwich into the batter, giving it a few seconds on each side to absorb the batter. Drain excess batter back into bowl.

    5. MELT butter on hot griddle. Place sandwiches on griddle. Cook 3 to 4 minutes on each side until golden brown. Serve immediately.

     
    [1] True comfort food (photo © Betty Crocker).

    Amber Ale
    [2] Cook with some pale ale, and have the rest with your sandwich (photo © Ambrose Beer & Lobster | Facebook).


    Comments off

    TIP OF THE DAY: Moist Vs. Dry Cooking Methods

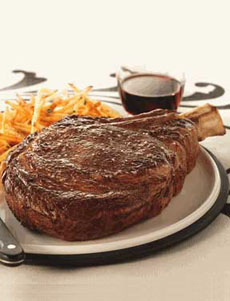
    You cook a rib-eye steak with dry heat. Here
    are the other rules of moist versus dry
    cooking. Photo courtesy AllenBrothers.com.

      Today, Chef Johnny Gnall provides some tips on moist versus dry cooking. His report follows. If you have questions or suggestions for tips, email Chef Johnny.
    All cooking methods are not created equal. Each has its time and place, but they are not interchangeable. You certainly wouldn’t boil a ribeye steak, and I hope you wouldn’t try to deep fry spinach.

    Different foods require different levels of heat to cook, as well as different methods by which that heat is applied. Straying too far from the ideal method can leave you with dried-out fish, mushy vegetables or chewy meat.

    MOIST VS. DRY COOKING METHODS: HOW,
    WHEN, & WHY

    Cooking methods are generally split into two categories: moist heat and dry heat. Within these groupings there are a number of methods with varying degrees of intensity and specific vehicles, and each comes with its own set of limits.

  • Moist heat refers to cooking with water or other liquid.
  • Dry heat is often as literal as it sounds, but also encompasses cooking with oil or some other fat (water and fat, in a culinary sense, are basically opposites).
  •  
    What follows is a comprehensive breakdown of each cooking method, its ideal uses and things to keep in mind when applying it. These are by no means unbreakable rules. No doubt, culinary masterpieces have been created by thinking outside the box (or the pot, the oven, the grill…). But they’re good guidelines for a home cook to follow.

    MOIST COOKING METHODS

    BOILING is one of the harshest methods of cooking. It is typically limited to dense and hearty foods like potatoes or other root vegetables. Boiling something more delicate, like a zucchini, would most likely reduce it to smithereens, both from the heat and the agitation from the bubbles.

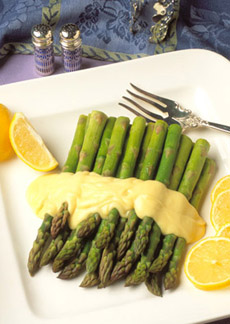
    BLANCHING, though still performed in boiling water, is typically done for a shorter, punctuated amount of time, and then immediately followed by an ice bath. Asparagus, for example, is typically blanched for three to four minutes; the ice bath helps it keep its vibrant green color (you can always gently reheat the vegetables later). Blanching is a great way to get an exact amount of doneness while preserving attractiveness.

    SIMMERING is achieved when you see small bubbles consistently rising to the surface of a liquid on the stove (as opposed to the large bubbles of boiling). This is typically the way to reduce sauces and cook soups. Simmering allows you to achieve high temperatures in your broth or sauce, but is more gentle than boiling. You usually have to play with the heat to get a simmer just right, so be patient. Even once you think you have it nailed, watch your pot for a minute to make sure.

    POACHING is officially achieved between 160°F and 180°F. Tiny bubbles form at the bottom of the pan and rise intermittently to the surface. Poaching is the way to go for particularly delicate items like a poached egg. Most fish or seafood that are cooked in liquid are typically poached.


    BRAISING is a wonderful way to cook meats and hearty vegetables. The food is covered about three quarters of the way with liquid; the liquid is used to both cook and flavor the dish. Braised meats become pull-it-apart tender and are infused with all the aromatics of whatever they are cooked in. The technique creates wonderfully complex flavor profiles in both the braising liquid and the meat and vegetables. After the food is cooked, you can continue to reduce the braising liquid at a simmer to concentrate the flavor and create killer sauces.

    STEWING is simply braising a variety of different foods together. The most familiar is perhaps a combination of potatoes, carrots, onions and parsnips, and a braised meat, cooked together.

    STEAMING is arguably the most delicate cooking method, and ideal for most vegetables. Bamboo steamers are cheap, long-lasting and easy to use, and many stock pots also come with a steamer insert. Simply boil water, place food in the steamer and cover. Vegetables typically take two to five minutes or so. Steaming is extremely healthy as it uses no fat and leeches the least amount of nutrients from the food.

     
    Asparagus is blanched, then treated to an ice bath. It can be warmed briefly in the microwave before saucing (here, with Hollandaise sauce) and serving. Photo courtesy California Asparagus Commission.
     

    SAUTÉING utilizes a wide pan (what some might call a “frying pan”) and a bit of fat, typically butter or oil. You want just enough fat to cover the bottom of the pan and conduct heat to evenly cook the food, but not so much that the meat or vegetables are soaking in it. Sautéing is usually done best by starting on high heat, getting the pan very hot to achieve a nice sear, and then lowering the heat.

    PAN FRYING also involves a frying pan, but one with high sides to control spattering. Fill the pan with 1-2 inches of oil and, with the pan set over medium high heat, get the oil to the point at which a pinch of flour instantly sizzles. This type of cooking works well for croquettes as long as you roll them around to cook evenly; and for anything thin or short, like a breaded fish filet or veal scallops.

    DEEP FRYING is pretty much what it sounds like. You’ll need a pot with high sides (I like to use a stock pot) and a candy thermometer. You need to keep the oil between 325°F and 375°F, depending on what you’re frying; it may take some patience and fiddling with the flame. Three to six inches of oil should work with most foods; but as a general rule of thumb, make sure the food can sit submerged with about an inch of oil above and below it. With almost everything you deep fry, golden-brown and crispy is a pretty good indicator of doneness. It’s often a good idea to drop a tester of whatever you’re frying (one piece, tossed in at the beginning) to get a good sense of frying time.

    DRY COOKING METHODS

    ROASTING & BAKING Roasting and baking are the same thing: cooking in an oven. The former label is typically used in savory cooking and the latter in pastry; the rest is semantics. Baking is arguably the driest of dry heats, so keep that in mind when deciding what kind of food you will cook in the oven. While most anything can cook at 350°F—from meats to casseroles to veggies—higher heat will often help form color and crispness. Keep an eye on things, though, as foods cooked at higher heat can dry out over longer periods of time.

    BROILING is cooking under very high, direct heat. This is often a way to finish a dish covered in cheese (think French onion soup), as the intense heat quickly gets the cheese brown and bubbly. You can also cook thinner cuts of meat and fish, like flank steak, under a broiler. If you watch them carefully, starting at 10 minutes or so, broiling large-diced raw potatoes tossed in oil can produce a nice, caramelized crust that gives way to a soft inside. Beware the broiler, however, as it may not be in top shape in older ovens and can be difficult to control, leaving you with burnt food and a kitchen full of smoke.

    GRILLING Ah, grilling: Synonymous with summertime barbecues, grilling is the absolute best way to give your food a rustic, pleasantly charred accent. I will always go with wood or charcoal over gas, as you often get more smokiness from the actual burning matter. To get perfect grill marks, make sure your grill is searing hot and well conditioned with oil, then place your product on it, pressing gently to ensure its surface is flush. Wait about ninety seconds (or less if you’re grilling something more delicate like vegetables), then rotate it 90 degrees. Wait about a minute, then flip and repeat.

    Are you inspired?

    Pick a different technique every night and go through them all.


    Comments off

    The Nibble Webzine Of Food Adventures
    RSS
    Follow by Email


    © Copyright 2005-2024 Lifestyle Direct, Inc. All rights reserved. All images are copyrighted to their respective owners.