THE NIBBLE BLOG: Products, Recipes & Trends In Specialty Foods


Also visit our main website, TheNibble.com.

TIP OF THE DAY: 10+ Holiday Garnishes

Many people are so accustomed to the same old parsley or watercress garnish. It’s easy to create special touches can you use for the holidays. The majority can be used with either drinks or dishes of food, savory or sweet.

We like festive red and green garnishes and star shapes. Consider:

  • Carambola (star fruit) slices (it’s greenish yellow; combine with a sprinkle of pomegranate arils for plate garnishes or notch for the rims of glasses)
  • Caviar: green- and red-colored golden whitefish caviar or green and red tobiko (flying fish roe)
  • Champagne grapes or red currants
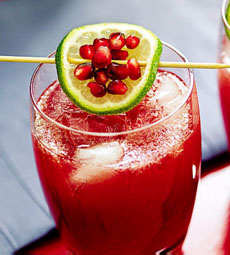
  • Pomegranate arils on a slice of lime or kiwi
  • Red and green grapes: clusters, threaded, scattered, or on picks
  • Red cherry or grape tomatoes, halved on a cucumber slice or placed on top of baby arugula or spinach
  • Red radish slices atop cucumber slices
  •   Christmas Garnish
    A lime with pomegranate arils can dress drinks or plates of food. Photo courtesy Danny Meyer.
  • Rosemary sprigs, plain or stems threaded with whole cranberries
  • Sprinkled dried cranberries and green pistachios
  • Star shapes cut from fruits and vegetables (use a small star cookie cutter)
  • Whole cranberries (thread them with green grapes of popcorn as platter garnishes)
  •  
    For Desserts

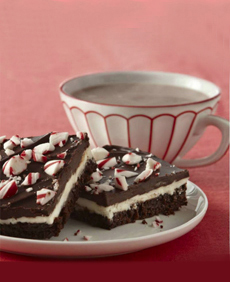
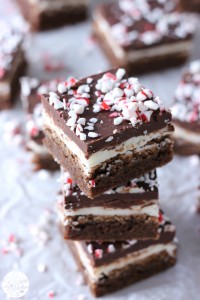
  • Crushed candy canes
  • Frosted grapes
  • Raspberries or strawberries and mint leaves
  •  
    Other ideas? Please share!


    Comments off

    RECIPE: Sausage Sliders & Winter Lager

    Sausage Sliders

    Samuel Adams Winter Lager Tap
    TOP PHOTO: The National Pork Board recommends these sliders with your lager. BOTTOM PHOTO: Samuel Adams Winter Lager, in bottles, cans and on tap.


    December 10th is National Lager Day; the entire second week in December is Lager Beer Week. Here’s a special slider recipe from the National Pork Boardto go with your lager.

    The recipe combines the retro appeal of deviled eggs with the modern fondness for sliders, although the recipe makes an egg salad instead of a filling for hard-boiled egg white halves.

    You can make the sliders for brunch, lunch or game day snacking.

    Don’t like sausage patties? Substitute bacon, Canadian bacon or thick-sliced ham for the sausage. Don’t like cilantro? Use baby arugula or watercress.

    Prep time is 20 minutes, cook time is 20 minutes.

    RECIPE: SAUSAGE & DEVILED EGG SALAD SLIDERS

    Ingredients For 8 Servings

  • 8 breakfast pork sausage patties (about 12 ounces total), about 3 inches in diameter*
  • 6 large eggs
  • 2 tablespoons mayonnaise
  • 1 tablespoon chopped fresh chives
  • 1 tablespoon Dijon mustard
  • 1 teaspoon sriracha or other hot chili sauce, or more to taste
  • Salt
  • 2 cups cilantro sprigs (leaves and tender stems)
  • 8 soft dinner rolls, split horizontally
  • Optional garnish: gherkins or olives (with toothpicks)
  •  
    *If you can’t find ready-made patties, shape 12 ounces of loose breakfast sausage into eight 3-inch patties. Or substitute bacon, Canadian bacon or thick-sliced ham.

     
    Preparation

    1. PLACE the eggs in a medium saucepan and add enough cold water to cover by 1 inch. Set over high heat and bring to a boil. Cover, remove from the heat, and let stand 15 minutes. Meanwhile…

    2. COOK the sausage patties in a large skillet over medium heat, until browned and cooked through (2 to 3 minutes per side). Transfer to a paper towel-lined plate and cover loosely to keep warm.

    3. DRAIN the eggs and transfer to a bowl of ice water. When cool enough to handle, peel and coarsely chop the eggs. In a large bowl, combine the chopped eggs, mayonnaise, chives, mustard and sriracha. Season with salt, taste and adjust seasonings as desired. Set aside.

    4. ARRANGE the cilantro sprigs on the bottom halves of the rolls. Top with the sausage patties, egg salad and top halves of rolls. Add the optional olive or gherkin and serve.

    NOW FOR THE LAGER

    We’ll publish an article on winter beers on the first day of winter, but here’s an advance preview of winter lager. Numerous craft breweries make them.

    The easiest one to find is Samuel Adams Winter Lager; but also look for Mustang, Wolverine, Stark and possibilities from y your local breweries.

    You’ll also find “Christmas ale” or seasonal beers and ales from other brewers that are similar: brewed with winter spices (cinnamon, orange peel, maple syrup, nutmeg or whatever the brewer favors). A quick search turned up beers from Blue Moon, Brooklyn Brewery and Great Lakes Brewing Co.

    Other beer types are also “wintrified,” including the fancifully named Abominable Ale from Hopworks, Old Man Winter White Ale from Southern Tier Brewing, Brrrr Red Ale from Widmer Brothers and Siberian Night Imperial Stout from Thirsty Dog.

    But it’s National Lager Day. We raise a glass to the German and Bohemian immigrants who brought lagering to the U.S.A., which previously had only ale†. The first lager brewmaster appears to have been one John Wagner from Bavaria, who arrived in Philadelphia in 1840, carrying with him a supply of lager yeast. The rest is history.

    †Yeast that enables lagering was not discovered until the 1700s, believed to have been unwittingly transported on a ship from South America. The written record on ale dates to ancient Mesopotamia.


    Comments off

    RECIPE: Christmas Ornament Cookies

    If our recent article on making Christmas tree ornaments from dehydrated fruit didn’t appeal to you, how about cookie ornaments? Unlike dried citrus, you can eat the cookies when you take down the tree.

    This is a recipe for people who want to hone their decorating techniques. Marian, cookie decorating expert and author of the blog Sweetopia, has created a tutorial to guide you. Follow her easy steps and master the art of marbling (also called feathering or swirling).

    To marble, you simply add one or more colors of icing to a base coat and then drag a toothpick through the icing to create a marbled effect. Check out the step-by-step decorating instructions

    If you’ve made cookies like these before you, you know that all you need are time and patience. It gets easier with every batch.

    Bonus: You can use the marbling technique on cakes, cocktails with foam top layer, and of course, cappuccino and latte.

    These are gingerbread cookies, but if you prefer, you can make shortbread or chocolate shortbread cookies. Prep time is 25 minutes, and cook time is 15 minutes. Determine in advance how many colors of icing you want to use.
     
     
    RECIPE: MARBLED ORNAMENT GINGERBREAD COOKIES


    Christmas Ornament Cookies

    Hang these ornament cookies on the tree, and eat them when the tree comes down (in theory). Photo courtesy GoBoldWithButter.com.

     
    Ingredients For 30 Cookies

    For The Cookies

  • 1 cup (2 sticks) plus 2 tablespoons unsalted butter
  • 1 cup packed dark brown sugar
  • 3 teaspoons ground cinnamon
  • 3 teaspoons ground ginger
  • 1 teaspoons ground cloves
  • 2 large eggs
  • 1 cup molasses
  • 6-1/2 cups (800 grams) all-purpose flour
  • 1 teaspoon salt
  • Optional: 1 teaspoon baking powder*
  •  
    For The Royal Icing

  • 3/4 cup (6 ounces) warm water
  • 5 tablespoons meringue powder (if not vanilla flavored, add 1 teaspoon clear vanilla extract†)
  • 1 teaspoon cream of tartar
  • 2-1/4 pounds (about 5-2/3 cups) powdered sugar
  •  
    For Decorating

  • Christmas ornament cookie cutters
  • Piping bags
  • Piping bag couplers
  • #2 piping tips
  • Icing bag ties or rubber bands
  • Toothpicks
  • Ribbon
  •  
    *Omit the baking powder if you do not want cookies to spread/rise.

    †Clear vanilla extract is a flavoring used when you don’t want vanilla to discolor a light icing. It is not “real” vanilla extract. Rather, it is flavored with vanillin, which is used to make artificial vanilla extract.


    Ornament Cookies

    /home/content/p3pnexwpnas01 data02/07/2891007/html/wp content/uploads/gingerbread ornament step2 GBWB 230

    Christmas Cookie Ornaments
    The three steps to decorating ornament
    cookies. In the third photo, a toothpick is
    used to drag the icing up and down, as
    shown by the arrows. Photos courtesy Go
    Bold With Butter.


    Preparation

    1. PREHEAT the oven to 350°F. Cream the butter and brown sugar in the bowl of an electric mixer fitted with the paddle attachment, on medium speed, until fluffy. Mix in the spices, then the eggs and molasses. Reduce the speed to low.

    2. WHISK together in a separate bowl the flour, salt, and baking powder. Add to butter mixture, and mix until just combined.

    3. FORM the dough into a disk shape and wrap it in plastic. Refrigerate until cold, about 1 hour.

    4. ROLL the out dough on a lightly floured work surface or between 2 sheets of parchment paper to about 1/4-inch thick. Cut out the shapes with cookie cutters and cut a small hole in the top of each cookie for the ribbon.

    5. PLACE the cookies approximately 2 inches apart on baking sheets lined with parchment paper. Refrigerate until the dough is firm, at least 15 minutes and up to 1 hour.

    6. BAKE the cookies until lightly golden, 12 to 14 minutes. Let them cool on the sheets on wire racks.

    7. MAKE the royal icing. In the bowl of an electric mixer fitted with the paddle attachment, add the warm water and meringue powder (and the clear vanilla extract if necessary). Whisk by hand until frothy and thickened, about 30 seconds. Add the cream of tartar and whisk by hand for 30 seconds more.

    8. ADD all the powdered sugar at once. Using the lowest speed, mix slowly with the paddle for 10 minutes. The icing will become thick and creamy.

    9. DIVIDE into portions to tint with food colorings. As necessary, thin the icing with small amounts of warm water to reach the desired consistency.
     
    DECORATING WITH ROYAL ICING

    1. BEGIN by piping an icing outline around each cookie. Use a piping bag fitted with a coupler and #2 tip.

    2. LET the outline dry for a few minutes to create a solid border. You’ll be able to see the border somewhat when the icing dries, so alternately you could fill or flood your cookie in right after piping the outline. Once you’ve filled the whole cookie…

    3. SHAKE it gently left to right on your work surface, to help smooth the icing out.

     
    4. ADD your second (or more) layer or color of icing. Work as quickly as you can before the icing sets.

    5. TAKE a toothpick and drag it through the icing, drawing S-like shapes. Each combination of colors creates another look. Just by changing the way you set up your lines and drag the toothpick, completely different designs emerge.

    6. DO as much decorating as you like. Once the marbled icing has set (at least 15 minutes), pipe the icing at the top (crown) of the ornament, representing (use grey or gold). Let that set and pipe a few line details as desired.
     
    IMPORTANT NOTE

    Don’t be intimidated by the piping. You don’t have to make perfectly marbled cookies like an expert baker. You can make abstract swirls, polka dots or whatever you like.


    CHECK OUT WHAT’S HAPPENING ON OUR HOME PAGE, THENIBBLE.COM.


    Comments off


    © Copyright 2005-2026 Lifestyle Direct, Inc. All rights reserved. All images are copyrighted to their respective owners.