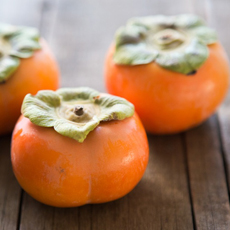
Fuyu persimmons can substitute for summer
tomatoes. Top photo by Jirkaejc | IST.
Bottom photo courtesy Good Eggs | San
Francisco.
|
|
Eating seasonally, a practice that has always existed in culinary meccas like France and Italy (and existed everywhere by default prior to modern transportation and food technology), is an idea that’s been promulgated for some 40 years in the U.S., first by chef and restaurateur Alice Waters. The the “farm-to-table” movement and subsequent awareness of sustainability and carbon miles continue to underscore the need to change the on-demand desires of American consumers.
Instead of asparagus in winter, for example, the idea is to substitute seasonally available leeks, broccolini or broccoli rabe.
Instead of longing for fruits that aren’t in season, reach for those that are: apples, cactus [prickly] pear, cherimoya, dates, grapefruits, kiwifruit, mandarins (clementines, tangerines and others), papaya, oranges, passion fruit, pears, persimmons, pomegranates.
Seek them out not only as hand fruit, but to substitute in recipes for out-of-season fruits.
WINTER SUBSTITUTES FOR SUMMER FRUITS
Some do better when frozen than others, and fruits, frozen at their peak, are an option. But if you want fresh-to-fresh, here are some good substitutes:
Berries: pomegranate arils
Cantaloupe: kiwifruit, mango, papaya
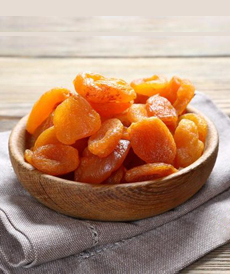
Cherries: raspberries, dried cherries
Honeydew: green grapes, kiwifruit
Peaches: mangoes
Pineapple: cherimoya
Tomatoes: persimmons, radishes, red bell peppers or pimentos*
Watermelon: red grapefruit
|
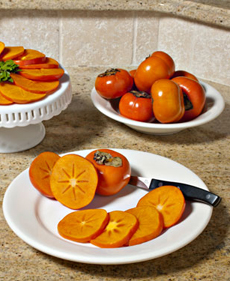
SUBSTITUTE PERSIMMONS FOR TOMATOES
Perhaps the most missed fruit or vegetable is the fresh tomato, a staple of salads and sandwiches. Hannah Kaminsky of Bittersweet Blog, residing in the produce capital of America, writes:
“Even in balmy California, farmers market tables once straining under the weight of plump tomatoes and juicy peaches look comparatively sparse, bearing dusty tubers and hearty greens instead.
“I’d never dream of making classic tabbouleh† in winter, when only mealy tomatoes shipped halfway across the globe can be found in markets.”
Her solution: Substitute persimmons for bland imported tomatoes. The recipe is below.
“It makes perfect sense the moment you taste the persimmons in this light salad” Hannah notes. “Their juicy, meaty texture and natural sweetness are an excellent substitution.” She adds even more seasonal produce to the standard tabbouleh recipe:
“Pomegranate arils lend tart, crunchy bursts of flavor. And while parsley could be the sole herbaceous element, I felt compelled to toss in those unloved green carrot tops that are all too often discarded, rather than savored as they should be.”
You can substitute persimmons for tomatoes in any vegetable salad.
You can try them on sandwiches; although we prefer jarred roasted red bell peppers (pimento or pimiento*), sundried tomatoes in olive oil (drained) or plumped in water, or peppadews.
|
|
RECIPE: WINTER TABBOULEH
Ingredients For 4-6 Servings
1/4 cup bulgur wheat
1/4 teaspoon turmeric
1/2 cup vegetable broth
1 Fuyu persimmon, peeled, stemmed and chopped
1 cup fresh parsley, minced
1-1/2 cups carrot tops, minced (or substitute parsley)
2 tablespoons red onion, finely chopped
Optional: 1/3 cup pomegranate arils
2-3 tablespoons lemon juice
2-3 tablespoons olive oil
Salt and freshly-ground black pepper, to taste
Preparation
1. COMBINE the bulgur, turmeric and vegetable broth in a small saucepan and place over low heat. Stir well and bring to a boil. Cover, turn off the heat, and let stand for 15-20 minutes until all of the liquid has been absorbed. Let cool slightly. Meanwhile…
|
|

Eat seasonally: Substitute persimmons for tomatoes in winter salads. Photo by Hannah Kaminsky | Bittersweet Blog.
|
2. PREPARE the fruits and vegetables accordingly, and toss them together in a large bowl. Add the cooled bulgur, followed by the lemon juice, olive oil, salt and pepper. Taste and adjust flavors according to personal preference.
3. COVER and chill for at least 2 hours before serving to allow the flavors to marry.
WHAT ARE PERSIMMONS?
In the late 1880s, the first persimmon arrived in the U.S., brought by a naval commander returning to Washington D.C. from Japan.
Here’s more about persimmons, including how to enjoy them at every meal of the day.
*What is a pimento? Also spelled pimiento (a variation of the Portuguese spelling; pimento is Spanish), the pimento is a heart-shaped variety of Capsicum annuum, the same genus and species as the familiar red bell pepper. Its flesh is sweet, succulent, and more aromatic than that of the red bell pepper. Pimento is what is used to stuff green olives, and is ground into paprika. The standard pimento measures 3 to 4 inches long and 2 to 3 inches wide. Some varieties of pimento are actually hot. In the U.S., they are typically sold pickled, as hot cherry peppers. Don’t confuse pimento with pimenta, which we know as allspice and is also called the Jamaica pepper, and myrtle pepper.
†Classic tabbouleh ingredients are bulgur wheat, parsley, tomato and onion, dressed with olive oil and lemon juice.
|
|