THE NIBBLE BLOG: Products, Recipes & Trends In Specialty Foods


Also visit our main website, TheNibble.com.

RECIPE: Beef Cacciatore

Beef Cacciatore
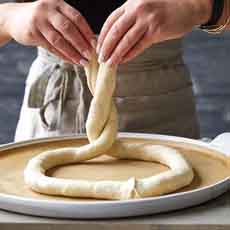
[1] Beef cacciatore: Hearty food for a cold day (photo courtesy Touchwood Editions).

Fig Balsamic Vinegar Lucero
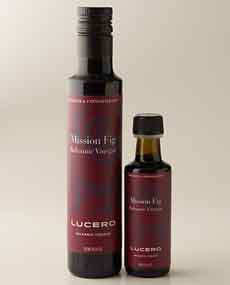
[2] Fig is one of several flavors of Lucero fruit-infused balsamic vinegars.

Italy Recipes For Olive Oil & Vinegar Lovers
[3] The cookbook “Italy: Recipes For Olive Oil & Vinegar Lovers,” from which the Beef Cacciatore recipe is excerpted (photo courtesy Touchwood Editions).


It’s freezing across 75% of the country today: a day for hearty fare like this braised rump roast (photo #1).

That’s why we were glad that we already had the ingredients for this delicious roast, and didn’t have to set foot outdoors.

The recipe is excerpted from Italy: Recipes for Olive Oil and Vinegar Lovers, by Emily Lycopolus, photography by D.L. Acken (photo #3). It was reprinted by Lucero Olive Oil with the permission of TouchWood Editions.

If you can lay your hands on some fig balsamic vinegar for the recipe (photo #2), you get even more of a rich sweetness than with plain balsamic. You also need an ovenproof, flameproof roasting pan.

Most of us know cacciatore only as chicken cacciatore. When you check out the history of chicken cacciatore, below, you’ll understand why there was no beef cacciatore until the affordable beef of the 20th century and beyond.
 
RECIPE: BEEF CACCIATORE

Ingredients For 4-6 Servings

  • 3–4 pounds beef rump roast
  • 2 tablespoons chopped fresh rosemary leaves
  • Sea salt and ground black pepper
  • 1 large yellow onion
  • 2 cups button mushrooms*
  • 4 garlic cloves
  • 3 tablespoons extra virgin olive oil, preferably robust style (e.g. Tuscan EVOO†)
  • 1 can (28 ounces) whole plum tomatoes
  • 2 cups beef stock
  • 3/4 cup fig dark balsamic vinegar (substitute regular balsamic)
  •  
    Preparation

    Slow cooker instructions are below.

    1. PREHEAT the oven to 350°F. Rinse the beef with hot water and pat it dry. Season with the rosemary and salt and pepper, and let sit for 5 minutes. Meanwhile…

    2. CHOP the onion, slice the mushrooms, and crush the garlic cloves with the flat side of a knife, keeping the cloves whole.

    3. HEAT the ovenproof, flame-proof pan over high heat on the stove top and drizzle in the olive oil. Sear the roast on all sides. Don’t rush the searing, but allow the meat to brown fully and evenly, including the ends. Remove the roast from the pan and turn the heat to medium.

    4. PLACE the onion and garlic in the pan and sauté them in the beef drippings. If the pan is dry, add 1 tablespoon of olive oil. Sauté until just translucent, then add the mushrooms and cook until the mushrooms start to soften, 3–5 minutes.

    5. POUR the juice from the tomatoes into the pan and stir to gently scrape off any bits from the bottom of the pan. Gently crush the tomatoes in your hands before adding them to the onion-mushroom mixture. Continue to sauté the mixture for 3–5 minutes, just until the tomato juices begin to reduce and the sauce starts to thicken.

     
    6. REMOVE the pan from the stove. Nestle the roast into the mushroom mixture. Pour in the beef stock and the balsamic vinegar and cover tightly with a lid or foil.

    7. BAKE until the internal temperature of the roast reaches 160°F, about 1-1/2 hours. Let the roast sit for 10–15 minutes before carving. Serve with a spoonful of braised mushrooms on the side.

    For slow cookers: Place the roast in the bowl of the cooker, cover with the mushroom mixture, and pour in the balsamic and stock as directed. Cover and cook for 6–8 hours on low. Let sit for 15 minutes before carving.
     
     
    CACCIATORE HISTORY

    Most of us are familiar with Chicken Cacciatore (cah-cha-TAW-ray), which is an Italian country dish. Beef would have been a luxury.

    Cacciatore means hunter, so the dish is “hunter-style” (in Italian, it’s pollo alla cacciatora). The game that the hunter brought home was braised in olive oil with garden vegetables—a light tomato sauce with garlic, herbs, onions and bell peppers, plus wild mushrooms and a bit of wine (white wine in the north, red wine in the south).

    The family’s chickens got the same treatment as game. Chicken cacciatore had been called a “hunter’s solace,” with poultry from the yard or purchased at the market replacing the pheasant or hare that got away. The wild mushrooms were foraged in the forest by the hunter, so he didn’t come home empty-handed.

    The dish has its roots in in central Italy in the Renaissance, and has many variations, both there and throughout the country. One of the more unusual is salamino cacciatore, made with a small salame. Remember, back in the day, in most homes there wasn’t a kitchen stocked with more food than could be eaten short-term, or a market down the street loaded with options. If you had it, or found it, you used it.

    Here’s a classic recipe for Chicken Cacciatore.

    Beef has never been a major food source in Italy, and even today, it’s pricey (that is, even pricier than elsewhere). That’s why “Beef Cacciatore” never joined the standard culinary repertoire.

    ________________

    *We love mushrooms, so doubled the amount and included a blend of cultivated wild mushrooms, so we had mushrooms enough for a “side.”
    †A robust olive oil, as opposed to a delicate or medium profile, has a bold flavor, a balanced bitterness, and a peppery finish. Tuscan varietals like Frantoio and Leccino—or Tuscan blends—tend to be robust in style.
      

    Comments off

    FOOD FUN: Peanut Butter Sandwiches With Bacon & Banana For National Peanut Butter Day

    January 24th is National Peanut Butter Day; March 1st is National Peanut Butter Lover’s Day. April 2nd is National Peanut Butter & Jelly Day.

    We’re obviously a PB-loving nation.

    It won’t take you long to make this PB…and B…and B sandwich. That’s peanut butter, bacon and banana.

    The recipe comes from King’s Hawaiian, one of our favorite supermarket breads. It’s slightly sweet, a cousin to challah.

    The recipe was developed by Chef Neens from Ono Yum restaurant in Carlsbad, California.

    Here’s our review of King’s Hawaiian bread, a NIBBLE Top Pick Of The Week.

    You can make a two-slice sandwich or a triple decker (photo #1). It’s even more fun if you have a large round cookie cutter, but you can make these sandwiches old style (just regular slices of bread).

    Prep time is 10 minutes, plus 5 minutes to cook the bacon.
     
     
    PB & B & B SANDWICH (PEANUT BUTTER, BACON & BANANA)

    Ingredients Per Sandwich

  • 1 banana, mashed
  • Peanut butter to taste
  • 1 strip bacon, cooked and chopped
  • 2 or 3 slices King’s Hawaiian Original Sweet Sliced Bread or other choice
  • Optional: 1 circle cookie cutter
  •  
    Preparation

    1. CUT circles from each slice of bread. This de-crusts the bread for a great presentation, as well.

    2. SPREAD the peanut butter on the bottom slice, and add the chopped bacon.

    3. SPREAD the mashed banana evenly over the top slice. If you’d like a third layer, spread more peanut butter on the top slice, with any leftover bacon or banana. Stack and enjoy with a side of fresh berries.


    Peanut Butter, Banana & Bacon Sandwich [1] Have you made a PB & B & B sandwich before? It’s easy…and so yummy (photo courtesy Kings Hawaiian).

    King's Hawaiian Sliced Loaf
    [2] This slightly sweet bread adds a lift to your PB sandwich (photo courtesy King’s Hawaiian).


    Comments off

    RECIPE: Chocolate Peanut Butter Cheesecake

    Chocolate Peanut Cheesecake Recipe
    [1] Sink your teeth into this chocolate peanut butter cheesecake (photo © Plugra).

    Peanut Butter On Spoon
    [2] Use your favorite creamy peanut butter (photo © Jif).

    Chopped Chocolate
    [3] The better the chocolate you use, the better-tasting the outcome will be (photo © Nothin’ But Foods).


    National Peanut Butter Day is January 24th. We’ve had many flavors of cheesecake in our time, but never one with peanut butter. There’s a first time for everything, and you’ll find a chocolate peanut butter cheesecake recipe below. (July 23rd is National Peanut Butter & Chocolate Day.)

    And this cheesecake is not just peanut butter: It’s a “peanut butter cup,” with a layer of chocolate.

    The recipe is from Jack McDavid, Chef/Owner of Jack’s Firehouse in Philadelphia (located in a 19th-century firehouse).

    Prep time is 45 minutes, bake time is 1 hour plus cooling and refrigeration for 12 hours or overnight.

    > Here’s a second Chocolate Peanut Butter Cheesecake recipe.

    > There are more peanut butter recipes below.

    > The history of chocolate.

    > The history of peanut butter.

    > The history of cheesecake.

    > The history of the peanut butter cup.

    > The year’s 12 peanut butter holidays.
     
     
    RECIPE: CHOCOLATE PEANUT BUTTER CHEESECAKE

    Ingredients
     
    For The Crust

  • 2 cups breadcrumbs or crust of choice (graham cracker, e.g.)
  • 1/4 cup sugar
  • 2 tablespoons butter, room temperature
  •  
    For The Filling

  • 2-1/2 pounds cream cheese
  • 3 eggs
  • 1-1/2 cups sugar
  • 1-2/3 cups bittersweet chocolate, roughly chopped
  • 2/3 cup creamy peanut butter
  • 4 tablespoons butter, room temperature
  •  
    Preparation

    1. MAKE the crust. Place the crust ingredients in a food processor until smooth. Press into a 9″ springform pan and refrigerate until ready to use. Preheat the oven to 350°F.

    2. MAKE the filling: Place chocolate and butter in a double boiler over simmering water, stirring occasionally until smooth.

     
    3. PLACE the cream cheese, sugar, and eggs in a bowl and beat until creamy. Separate the cheese mixture into 2 equal parts. Add the peanut butter to one-half and blend well. Add the chocolate to the other half and blend well.

    4. POUR the chocolate mixture into the springform pan. Pour the peanut butter mixture on top.

    5. BAKE for 1 hour. To tell if your cheesecake is done, gently shake the cheesecake. If it looks nearly set and only a small circle in the center jiggles slightly, it is done. The center will firm up as it cools. Do not use a knife to check doneness.

    6. TURN OFF the oven and allow the cake to cool for 1 hour in the oven, with the door cracked open. Then remove it from the oven and let the cake cool completely on the counter, to room temperature.

    7. COVER and chill the cheesecake in the fridge for 12 to 24 hours, but serve it at room temperature. Remove it from the fridge about 1 hour before serving. If you like, slice the cheesecake while it’s still cold, to make slicing easier. Use a knife dipped in hot water.
     
     
    MORE PEANUT BUTTER RECIPES

  • Chocolate Peanut Butter Cheesecake #1 (recipe above)
  • Chocolate Peanut Butter Cheesecake #2 With Caramel Corn Topping
  • Chocolate Peanut Butter Fried Ice Cream
  • Easy Peanut Butter Fudge
  • Easy Peanut Butter Ice Cream
  • Flourless Peanut Butter Chocolate Chunk Cookies
  • Fun Peanut Butter Sandwich Recipes
  • Gourmet Ants On A Log
  • Peanut Butter & Jelly Rice Krispie Treats
  • Peanut Butter Cake With Malted Peanut Butter Ice Cream & Candied Bacon
  • Peanut Butter Dessert Ravioli
  • Peanut Butter & Jelly Oatmeal
  • Peanut Butter Freezer Fudge With Chocolate Chips
  • Triple Peanut Butter Cookies
  • Spicy Peanut Butter Sauce & Marinade
  • Waffle PB&J Ice Cream Sandwich
  • 18 Chocolate & Peanut Butter Recipes
  •  


    CHECK OUT WHAT’S HAPPENING ON OUR HOME PAGE, THENIBBLE.COM.


    Comments off


    © Copyright 2005-2026 Lifestyle Direct, Inc. All rights reserved. All images are copyrighted to their respective owners.