|
We’ve lived in New York City our whole life but had never heard of Grandma Pizza. Maybe it’s because we didn’t have an Italian grandmother.
According to King Arthur Flour, which has a wealth of baking knowledge (and lots of delicious recipes):
A New York City staple, Grandma Pizza has its origins in the homes of America’s Italian ancestors.
Baked in a large, square pan at high heat after a relatively short final proofing time, the crust is wonderfully crispy and denser/thinner than traditional Sicilian-style pizza.
Preparing the dough the day before ensures a fresh-from-the-oven pie in less than an hour, once you’re ready to bake and serve.
They’ve given us the recipe, below.
Grandma Pizza is served in thick, square slices with crispy edges, similar to Sicilian-style pizza, yet different.
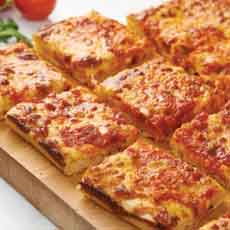
Unlike the soft, thick crust of Sicilian-style pizza, Grandma Pizza is closer in depth and texture to regular pizza crust (photo #2).
It’s thicker and crispier than regular pizza crust, delivering the best of both worlds: a crisp base and a chewy middle.
> The history of pizza.
> Forty different types of pizza.
OPTIONAL INGREDIENTS
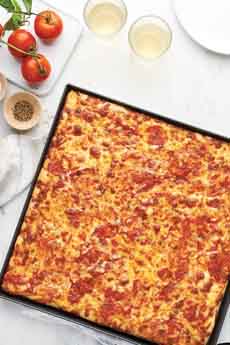
Pizza Pan. This pizza is baked in a “Grandma-Style” pizza pan, 14″ x 1″ (photo #1). You can substitute an 18” x 13” baking sheet.
King Arthur Flour sells the pan and the dry ingredients in a bundle, as well as separately.
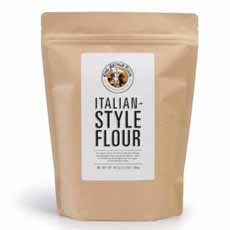
Italian-Style Flour. For this recipe, the bakers used Italian-style flour (photo #3), their version of Italian “00” (that’s zero zero), which refers to the grind of the flour. It’s exceptionally fine-textured.
Italian-Style flour is lower in protein and “mellower,” per the KAF team. “It yields the friendliest, gentlest dough to work with: supple, smooth, and easy to shape.”
The resulting baked goods are light, airy, and have a crisp snap to the crust. It’s ideal for pizza, flatbreads, focaccia, and crackers. Try it in delicate pasta recipes like gnocchi and lasagna.
You can buy it here, or substitute unbleached all-purpose flour.
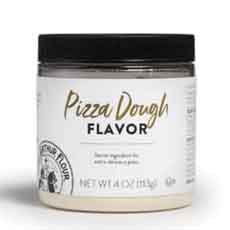
Pizza Dough Flavor. The recipe also uses Pizza Dough Flavor, a powder that’s added to the dough. The main ingredients are cheddar cheese powder and garlic powder*.
Ready to bake?
RECIPE: GRANDMA PIZZA
Prep time is 20 minutes, and bake time is 12 to 15 minutes. The dough needs to rise for 4 hours, but you can make it the day before and let it rise overnight.
Evidently, Grandma didn’t add toppings (what—no fresh basil?), but you can add whatever you wish. Because the pizza gets sliced into squares, you can position different toppings on different squares—or at least, different rows.
You also can offer DIY toppings: Fill ramekins with basil, chiles, olives, pepperoni, etc. and let everyone customize their slices.
Ingredients
2 cups Italian-Style Flour OR 1-3/4 cups unbleached all-purpose flour
2 cups unbleached all-purpose flour
1 tablespoon Pizza Dough Flavor
1-1/4 teaspoons salt
2 teaspoons instant yeast
1-1/4 cups lukewarm water
2 tablespoons olive oil, plus additional oil for greasing the pan
Toppings of choice
|
|

[1] Grandma used an all-purpose pan to make pizza at home (all photos © King Arthur Flour).
[2] Forget those triangular slices: It’s so much easier to cut squares.
[3] Lower in protein and mellower than traditional Italian 00 flour, it creates baked goods that are light, airy, and have a crisp snap to the crust. It’s ideal for crackers, flatbreads, focaccia, and of course, pizza. Also try it in delicate pasta recipes like gnocchi.
[4] King Arthur Flour’s Pizza Dough Flavor adds a punch to pizza crusts and Italian breads. Customers say this addition is worth every cent.
|
For The Topping
3 cups shredded mozzarella cheese
1-1/4 cups tomato or marinara sauce, store-bought or homemade
Preparation
1. MAKE the crust: Combine all the ingredients in a large bowl. Mix and knead—by hand, mixer, or bread machine—to form a smooth, elastic dough. Place the dough in a large bowl (at least 5 quarts), cover the bowl with plastic wrap, and place in the refrigerator for at least 4 hours or up to 24 hours.
2. ASSEMBLE and bake the pizza: Position a rack in the bottom third of the oven and preheat the oven to 500°F. Add about 2 tablespoons of olive oil to a grandma-style pizza pan or an 18” x 13” baking sheet, and spread it around to coat the pan. Note: It’s best to use a dark pan for this recipe, to achieve a crust with a crispy bottom and edges. Lighter pans will result in a softer crust.
3. TURN the dough out into the pan, gently deflating it as you stretch it to the edges and corners. If the dough starts to shrink back, cover it with lightly greased plastic wrap, and let it rest for 10 minutes before resuming the stretching.
4. COVER the dough and allow it to rest for 30 minutes until it has puffed slightly.
5. TOP the crust with the cheese, spreading it all the way to the edges of the pan. Then dollop or spread the sauce over the cheese. Bake the pizza in the bottom third of the oven for 12 to 15 minutes, until the cheese is bubbly and the crust is golden.
6. REMOVE the pizza from the oven and allow it to cool for 5 to 10 minutes before cutting into squares; serve hot. Refrigerate any leftover pizza well wrapped; reheat individual slices in a 325°F oven for 5 to 10 minutes.
Here’s to you, Grandma!
________________
*Other ingredients are yeast extract, maltodextrin, lactic acid powder, lecithin and silicon dioxide. We haven’t tried it, but those who have are real fans. Check out the Amazon reviews (but buy direct from King Arthur Flour—it’s cheaper there).
|