
[1] [2] It’s a Christmas Martini (photos courtesy World Market). [3] You can find actual rose and purple cauliflower heads at farmers markets, but at this time of year, you may have to color your own with beet juice. Here’s a recipe for pickled cauliflower and beets from The Galanter’s Kitchen. [4] Castelvetrano olives are the greenest, for Christmas garnishing. [5] Fresh dill, along with rosemary, are the two most Christmasy herbs: They look like evergreens (photo courtesy Burpee).
|
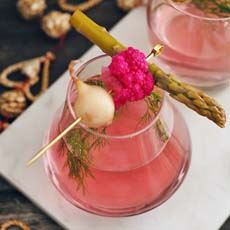
|
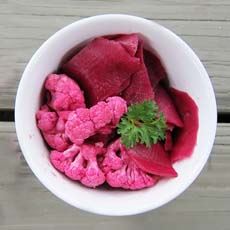
Is there such a thing as a Christmas Martini?
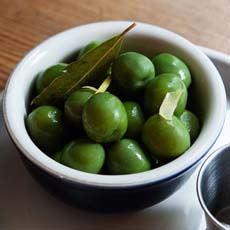
According to us: Yes!
We’re not talking a peppermint “Martini” garnished with candy canes, but a real, savory vodka/gin-and-vermouth cocktail as its creators intended it to be (here’s the history of the Martini).
We adapted this Dill Martini recipe from WorldMarket.com and gave it more holiday spirit.
If you switch the evergreen-like dill to chive or other herb and perhaps make all the pickles red or pink, you can serve this as a Valentine Martini as well.
RECIPE: CHRISTMAS MARTINI
Ingredients Per Drink
2 ounces vodka
1/2 ounce pickle brine*
Splash of dry vermouth
1 teaspoon mustard seeds
Large sprig of fresh dill
Beet juice
Ice
For The Garnish
Cauliflower floret pickled in brine and beet juice†
Fresh grape tomato
Baby radish, pickled or not
Pimento-stuffed green olive or pitted Castelventrano olive (it’s bright green)
Whole baby beet (from can or jar, regular or pickled)
Cocktail pick
________________
*If you make pickled vegetables, you can use your homemade brine.
*If you aren’t using beets, you can buy a bottle of beet juice (delicious!) at a natural- or health-food store.
________________
Preparation
1. PICKLE the vegetables as desired and make the cocktail pick.
2. COMBINE the vodka, pickle brine, vermouth mustard seeds, and fresh dill in a cocktail shaker. Shake and pour into a glass.
2. ADD enough beet juice until you get the color you want (an assertive blush as in the photo is a good start).
3. ADD ice to the shaker along with the contents of the glass. Shake well, strain into a coupe or Martini glass and garnish with the vegetable pick.
HOW TO MAKE PICKLED VEGETABLES
It couldn’t be easier to make “quick pickles”: just the vegetables, vinegar, spices and two hours to marinate.
You can pickle just about any vegetable, and you can also pickle fruits: from grapes to sliced fruits.
Use your favorite spices in the brine. Look at your spices for inspiration: allspice, bay leaf, crushed red peppers, dill seed, juniper berries, mace, mustard seed, and peppercorns are all contenders. Pickled vegetables never met a spice they didn’t like. We often add a touch of nutmeg.
For the brine, use cider vinegar or other vinegar (you can use half vinegar and half salted water if you like). To color white veggies like cauliflower red, add beet to the brine. Be sure the brine covers the tops of the vegetables.
You can add sugar and or salt to the brine; but make a batch without them first. It’s healthier, and it will let the flavor of the spices shine through.
Pickles will be ready in just two hours; although you can keep them in the fridge for a few weeks (trust us, they will eaten quickly).
Since these pickled vegetables aren’t sterilized in a water bath, they need to be kept in the fridge. Eat them within two weeks (more likely, they’ll be gone in two days).
If you’re excited about pickling, pick up a book on the topic. The Joy Of Pickling, first published in 1999, is now in its second edition.
You may find yourself making classic bread-and-butter and dill pickles, pickled beets and kimchi.
Check out our Pickle Glossary for the different types of pickles.
|