|
World Egg Day was established in 1996 and is celebrated on the second Friday in October.
Since the dawn of the hunter-gatherer, eggs have played a major role in feeding mankind around the globe. They one of nature’s highest quality, and most affordable, sources of protein.
Since this is a global celebration, we’re featuring one of our favorite global recipes with eggs.
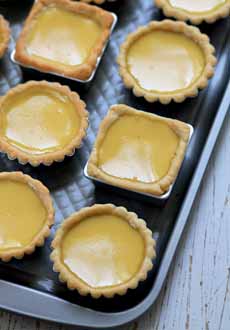
No, it’s not egg drop soup (we published an egg drop soup recipe last year). It’s a favorite Cantonese dessert made with eggs: Hong Kong egg tarts.
Walking around the streets of Hong Kong or any Chinatown elsewhere, you’ll see these popular tartlets* through the windows of bakeries.
Whenever we hit New York City’s Chinatown for a dim sum brunch, we look forward to a dessert of Hong Kong Egg Tarts. We like them so much, we buy extras to take home.
The recipe is below.
THE HISTORY: WHAT ARE HONG KONG EGG TARTS?
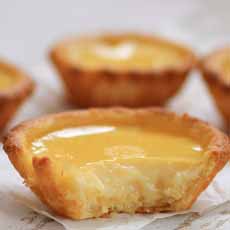
Egg tart, dan tat in Cantonese, is sweet tart pastry crust filled with egg custard. It’s essentially fusion food, since custard was created in northern European dairying countries.
Hong Kong egg tarts (also called Chinese egg tarts, but that’s too nonspecific a term given the variety of regional cuisines), are related to Portuguese egg tarts.
The concept arrived in Hong Kong during the 1940s—from, some sources believe, the neighboring island of Macau, which had been colonized by the Portuguese.
According to more likely sources, the egg tart first appeared in Guangzhou (Canton) in the 1920s [source].
There, the local chefs, inspired by western fruit tarts, filled tart pastry with egg custard. As butter was very costly, they used lard crusts instead of making puff pastry.
At the time, there was tough competition between department stores in Guangzhou. To attract customers, the chef of each department store would invent a new dim sum or dessert weekly; hence the initiative that produced these first Chinese egg tarts.
A few decades later, in the 1940s and 1950s, many chefs migrated to Hong Kong and brought the recipe with them.
Portuguese egg tarts—pasteis de nata—scents the custard with cinnamon, in a puff pastry crust. Here’s a recipe.
Both versions taste best when freshly baked and still warmed. Even when we warm the take-out tarts we bring home from Chinatown, they’re a shade less heavenly than those we eat on the spot.
Yet, they’re so easy to make that they can be whipped up to serve regularly at brunch, or with tea and coffee breaks.
In fact, we’re making them both on Saturday and Sunday to serve at brunch. We’ll double the recipe but only cook half on each day.
If you have a source for very good tart or tartlet shells, you can substitute them. The texture isn’t “Hong Kong,” but the overall taste is good.
You can buy Clearbrook Farms’ tartlet and mini-tart shells at Sur La Table, Walmart and elsewhere. We always keep a few boxes in the pantry. You can fill them with berries, pudding, cream cheese and preserves, ice cream, etc. when you need a quick dessert or teatime treat.
|