THE NIBBLE BLOG: Products, Recipes & Trends In Specialty Foods


Also visit our main website, TheNibble.com.


FOOD 101: Baking Powder History (Where Would We Be Without It?)

Buttermilk Biscuits
[1] Fluffy biscuits need baking powder (photo of buttermilk biscuits © Robyn Mackenzie | Fotolia).

Banana Bread Pancakes
[2] There would be no fluffy pancakes without baking powder. Here’s the recipe for these Banana Bread Pancakes from The Baker Chick (photo © The Baker Chick).

Clabber Girl Baking Powder
[3] Baking powder from Clabber Girl, one of the original brands still going strong—it’s the number-one seller in the U.S. (photo courtesy Handle The Heat).

Tablespoon Of Baking Powder
[4] A tablespoon of baking powder. Here’s how to tell if your baking powder and baking soda still have potency, from Still Tasty (photo © Still Tasty).

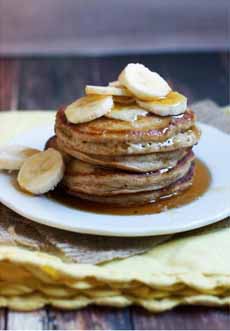
  May 14th is National Buttermilk Biscuit Day. Head to your grocer’s refrigerator section to buy a tube, or make buttermilk biscuits from scratch.

Either way, these high-rising biscuits, along with tall layer cakes and fluffy pancakes, owe their height to baking powder. When first patented in 1856, it was a revolutionary product.

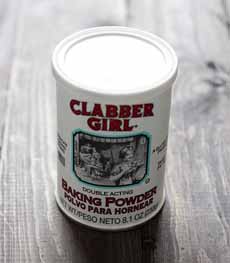
Baking powder is a dry chemical leavening agent, a mixture of an alkaline sodium (e.g. bicarbonate) and a weak acid salt (e.g. cream of tartar).

When combined with a liquid, the acid-base reaction releases carbon dioxide into the batter or dough, which increases the volume and lightens the texture. This is the definition of a leavener: a substance that creates this chemical reaction.

It was so important to cooking, that a vicious battle for brand domination in America arose in the latter half of the 19th century. Read about it in Baking Powder Wars: The Cutthroat Food Fight that Revolutionized Cooking.
 
 
BEFORE THE INVENTION OF BAKING POWDER

According to a review of the book in Extra Crispy, which begins its story in 1700s colonial America, the mark of a woman’s cooking skill was the quality of her bread. Was it soft or leaden?

Bread was a large component in Colonial meals. A woman who couldn’t bake a good loaf was not a good woman, wife or mother.

Yet, housewives had only wild yeast for leavening—an ingredient used since the dawn of baking.

However, it required that the wild yeast fly through the window and settle on the dough. Commercial yeast from the Fleischmann Brothers would not be sold until 1868 (the history of yeast).

Desperate housewives experimented with other household options.

  • Smelling salts were hard to dissolve.
  • Ammonia raised the bread, but made the food smell like…ammonia. And so forth, with no success.
  •  
    One day in the late 1700s, some Native Americans shared the technique of leavening bread using pearl ash or pearlash, potash, carbonate of potash, salts of tartar and soda ash. These are the chemical compound potassium carbonate.

    Scoop out the ashes from the fireplace (or use other burned plant material), soak them in water and you get a dilute form of lye. This mixture was used to make soap and gunpowder.

    It turned out to be the best-so-far leavener for baking.
     
     
    BUT WE’RE EATING LYE?

    Some readers will recognize potassium carbonate as the base ingredient of lye. For those wondering about how people can eat lye:

    It works in dilute forms (low concentrations) and is used to make other food products. Olives are traditionally brined in lye water. Pretzels get a lye bath, as do hominy, ramen and nixtimalized corn/masa that is used to make tortillas. The Scandinavian specialty, lutefisk, is soaked in water and lye. O.K.

    However, pearl ash wasn’t perfect. It didn’t dissolve that easily, and wasn’t good for batters that contained ample fat (butter or oil).

    There, it generated a soapy taste, which was no surprise since soap was then a combination of lye solution and fat. So the search continued.
     
     
    THE BIRTH OF BAKING POWDER

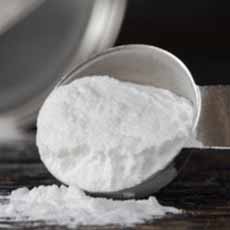
    Let’s start with baking soda, the chemical compound sodium bicarbonate.

    We know that as far back as 3500 B.C.E., the ancient Egyptians used a form of it (natron, primarily comprised of sodium carbonate) as a soap-like cleaning agent and in the mummification process.

    Sodium bicarbonate expanded in use: to brush teeth, to wash laundry, as an antacid and more. More recently, it has been turned into a deodorant for self, and fridge and cat litter.

    It’s also a main ingredient in fire extinguishers, which is why consumers are told to dump baking soda on grease fires.

    In 1843, baking soda crossed over to food.

     
    Alfred Bird, a British chemist, used it as the base to make the first baking powder leavener for his wife, who was allergic to yeast [source].

    Around the same time, Dr. Austin Church, an American medical doctor from Connecticut, developed his own version. In 1946 he joined with his brother-in-law John Dwight, who had his own Cow Brand of “aerated salt,” called Dwight’s Saleratus. Salertus is a combination of pearl ash had carbonic acid, which creates potassium bicarbonate.

    The brand eventually became Arm & Hammer Baking Soda.The familiar logo of Vulcan’s* flexed right arm holding the hammer wasn’t added until 1878, after an earlier family venture, Vulcan Spice Mills, which used a similar logo [source].

    Baking powder is a combination of baking soda, also a leavener (sodium bicarbonate), mixed with an acid salt, usually cream of tartar, and cornstarch (as a thickener).

    Baking powder was not just an American phenomenon. It was commercially launched in England in 1843 by Alfred Bird (better known for his invention of Bird’s Custard, an egg-free powder that was reconstituted with water).

    In 1856, a Harvard chemistry professor, Eben Horsford, developed an improved baking powder under the Rumford name, using monocalcium phosphate, a compound he patented. By 1896, the U.S., population 76 million, was using some 120 million pounds of baking powder annually.
     
     
    WHAT ABOUT EGG WHITES?

    French chefs used whisk-whipped egg whites to add lightness to baked goods like sponge cakes, and other foods like mousse.

    But unless you had major upper arm muscles, you waited until the end of the 19th century, when mechanical egg beaters were invented. (The first U.S. patent was in 1859, with an improved version patented in 1870. Cooks had to wait until 1908 for the first electric mixer.)
     
     
    BAKING SODA VS. BAKING POWDER

    Baking soda and baking powder are the two modern leaveners. They’re not interchangeable; they have different additives and strengths. Here’s the difference.
     
     
    FOOD TRIVIA: STALE BREAD

    Because modern food preservatives did not exist, bread quickly became stale.

  • Recipes like bread pudding, bread salad (panzanella) and French toast softened stale bread in liquid.
  • Stale bread was also used to make bread crumbs and to thicken soups like gazpacho.
  • According to the book, some families scrubbed the walls with their rock-hard bread crusts.
  • ________________

    *Vulcan is the Roman god of fire and metalworking. He came to be known as a symbol of industry. Variations of the arm and hammer are used by other companies, universities, and organizations in the U.S. and Europe. It’s on the state flag of Wisconsin and the symbol of the Socialist Labor Party of America. Here’s the history of the arm-and-hammer image.
      

    Comments off

    FOOD 101: Fruit Cocktail History

    May 13th is National Fruit Cocktail Day.

    We’re all familiar with cans of fruit cocktail from Del Monte, Dole and Libby’s. But who first created it, and why is it called “cocktail?”

    First: There is no alcohol in a conventional fruit cocktail. So why is it called fruit cocktail, instead of simply fruit salad?

    There’s a second definition of “cocktail,” as in shrimp cocktail: “An appetizer made by combining pieces of food, such as fruit or seafood.”

    However, the smart money says that when you’re selling canned fruit, “fruit cocktail” sounds more exciting than “mixed fruits.”

    While fruit cocktail is sold canned, it can be made fresh and served in a coupe glass or other stemmed glass, where it puns on an alcoholic cocktail. Serve fresh fruit salad in a stemmed glass, tossed with some Grand Marnier—one of our mother’s favorite preparations, garnished with a fresh mint leaf—and it’s even more so.

    The USDA actually stipulates the ingredients in canned fruit cocktail. It must contain grapes, peaches, and pineapples; optional maraschino cherries and other fruits are permitted. The percentages are dictated [source]:

  • 30% to 50% diced peaches, any yellow variety
  • 25% to 45% diced pears, any variety
  • 6% to 16% diced pineapple, any variety
  • 6% to 20% whole grapes, any seedless variety
  • Few to no cherry halves, any light sweet or artificial red variety
  •  
    The original fruit cocktail sat in a sugar syrup. More recently, with consumer demands for less sugar, lower-sugar varieties are available in natural fruit juices (“no sugar added,” although fruit juice has natural sugar).

    The difference between fruit cocktail and fruit salad is that the latter contains larger pieces of fruit, while fruit cocktail is diced into like-size pieces.
     
     
    THE HISTORY OF FRUIT COCKTAIL

    Who first named this childhood delight?

    Well: According to ancient Greek philosopher Plato, necessity is the mother of invention.

    The canning industry generally agrees that fruit cocktail was developed as a way make use of the fruit scraps left when bruised or otherwise damaged fruits could not be used in canning.

    Fruit cocktail has been a staple of the canned fruit industry since at least the 1940s, and was one of the most popular products Del Monte produced at the plant, from 1941 until the plant’s closure in 1999.

    What company first came up with the mix of fruits, and named the result “fruit cocktail”, is not absolutely certain.

    Here are the contenders:

  • 1893: Canner J.C. Ainsley of Campbell, California began marketing a canned “fruit salad” in 1893, under the Golden Morn label. According to the Campbell Historical Museum, the fruit salad contained cherries as well as diced fruits. The name was not fruit cocktail; however, the Golden Morn Fruit Cocktail Label below, from the San Jose Museum, purports to be from 1920.
  • 1930: Herbert Gray of San Jose’s Barron-Gray Packing Company. A 1958 article in the journal Canner and Packer, “100 Years of Canning in the West,” credited Gray with invention of fruit cocktail in 1930. Gray himself restated this in an interview with the San Jose Mercury News in 1969.
  • 1938: Calpak’s “new” Fruit Cocktail debuted under the Del Monte label in 1938.
  • TBD: Food science academics give credit for fruit cocktail to Dr. William V. Cruess, a pioneer in the field and professor at U.C. Berkeley from 1911 until 1954. Dr. Cruess’ research focused on the use of fruit culls (culling out the bruised and damaged) and by-products.
  •   Del Monte Fruit Cocktail
    [1] Del Monte Fruit Cocktail, in the modern “no sugar added” recipe. You can still buy it in its original sugar syrup (photo courtesy Del Monte).

    Fruit Cocktail Cupcakes
    [2] Fruit cocktail as a cupcake topper. Here’s the recipe from Yummy.

    Ambrosia Fruit Salad
    [3] Ambrosia, a retro fruit salad popular at ladies’ lunches. It adds mini marshmallows, sliced bananas, shredded coconut and sour cream (the modern take is vanilla yogurt or, eek, Cool Whip) to fruit cocktail. Here’s the recipe from Taste Of Home.

    Fruit Cocktail Fluff
    [4] The advent of Marshmallow Fluff engendered this version of ambrosia. Here’s the recipe from The Kitchen Is My Playground.

     
    It may be that Herbert Gray or Del Monte read his recommendations in a trade article.

    Whomever the father of fruit cocktail may be, consumers were introduced to the product as a stylish dessert suitable for formal dinner parties and entertaining (source).

    In the 1930s, canned foods were appreciated for their convenience and did not have the “not as good as fresh” association that evolved in the 1970s, thanks to the proselytizing of Alice Waters and the evolution of “California cuisine.”

    Take your pick!
     
     
    USES FOR CANNED FRUIT COCKTAIL

    We’re big on fresh fruits and vegetables, but we keep some cans of each in the pantry to use “in a pinch.”

    We admit to keeping canned pineapple chunks in case we run out of fresh melon for our morning cottage cheese or plain yogurt. And there’s always a can of no-sugar-added fruit cocktail for when we’re having a fruit attack, but have no fresh fruit.

    We took a quick survey and found that others we know use canned fruit cocktail:

  • In yogurt.
  • As a sauce for ham.
  • As a topping for frozen yogurt or sorbet.
  • Chopped and added to plain salsa for a quick fruit salsa.
  • As a stuffing for avocado halves.
  • Tossed into dump cake or muffin mix (here’s a recipe for fruit cocktail coffee cake).
  • Added to Stovetop Stuffing.
  • Used to make sweet and sour chicken or pork.
  •  
    And of course…

  • Added to Jell-O.
  •  
    Golden Morn Fruit Cocktail label
    [5] Golden Morn Fruit Cocktail label, ca. 1920 (photo courtesy San Jose Museum).


    Comments off

    TIP OF THE DAY: How Chefs Are Using Pickles

    Pickled Beet Crostini
    [1] Pickled beets and blueberries on goat cheese crostini (photo courtesy Rick’s Picks).

    Pickled Radishes
    [3] Pickle radishes and layer sour with spicy (here’s the recipe from Simple Delicious Food).

    Homemade Pickles
    [2] Pickle any fruit or vegetable you like (photo courtesy Typhoon).
    DIY Pickling Book
    Basic pickling is easy (here’s how). But if you want ideas on how to layer herbs and spices, get a book like this.

      Pickles and sauerkraut have been consumed in America for centuries, along other sour foods such as buttermilk, sour cream, sourdough bread, vinegar, and tart fruits like grapefruits, kumquats, lemons and limes.

    But sour has grown even more in favor over the past few decades with kefir, kimchi, kombucha, plain yogurt, tamarind and tart cherry juice becoming everyday foods.

    This week, Flavor And The Menu, a magazine and website for creative chefs, highlights how chefs nationwide are using the humble pickle.

    And by pickle, we mean pickled anything. In the U.S. “pickles” evokes pickled cucumbers; but elsewhere in the world, any pickled vegetable is a “pickle.”

    And, happy news: You can pickle anything in an hour. These are called quick pickles, but you can leave them in the brine as long as you like (days, weeks…).

    Our favorite things for quick pickling: apples, asparagus, beets, carrots, cauliflower, green beans, onions and pears. And for burgers and sandwiches, garlic cloves.
     
     
    NEW WAYS TO USE PICKLES

    1. PAIRED WITH CHICKEN

    With the continued popularity of fried chicken, chefs have paired pickles as a flavor strategy. The subtle sour contrast complements anything fried or fatty (that’s why cornichons are paired with pâté).

    Beyond pickled vegetables with chicken, Fellow restaurant in Los Angeles serves buttermilk and pickle juice-brined chicken sandwiches paired with aged cheddar, oven-roasted tomato, dill pickles and iceberg lettuce on sourdough bread.

    2. PICKLED FRUITS

    Our taste buds love the counterbalance of sweet and sour. Creative kitchens are now brining any and all fruits, from berries to apples and pears to mangos and melons.

    Taiwanese-American restaurant Win Son in Brooklyn tops its butter-grilled shrimp cake with pickled pineapple, layered on a mian tuan bun.

    3. SPREADS & DIPS

    Adding a tangy element to a creamy dip or spread adds an extra hit of flavor on burgers, fish sandwiches or anything fried.

    At Wilshire restaurant in Santa Monica, California, pickled aïoli is slathered on the brioche burger bun, adding special flavor to the cheeseburger layered with aged cheddar, caramelized onions and house-made pickles.

    4. VEGETARIAN

    Consumer demands for more plant-based dishes has led to innovation on the menu. Pickling offers a major flavor boost to vegetarian menu items.

    At Bar Annicka in Brooklyn, the entrée of charred cauliflower is accompanied by a pickled beet pâté, blackened cabbage and garlic confit.

    5. SURPRISING HITS OF FLAVOR

    Adding a pickled ingredient where one might not expect it is one of the charms of accenting with pickles.

    Freebird Kitchen & Bar in White Plains, New York serves a side dish of roasted Brussels sprouts with pickled shallots, for a surprising spike of flavor.

    6. THE CRUDITÉ PLATE

    Crudité platters have been advanced with everything from baby vegetables to unusual varieties: They are now joined by pickled vegetables.

    In fact, Canon restaurant in Sacramento serves an entire pickled crudité plate: a variety of house-pickled seasonal veggies served over crushed ice.

    7. THE CHEESE PLATE

    The sourness of pickles complements the fattiness of cheese. Take the tip from the previous tip and serve pickled vegetables with your cheese plate.

     
    8. COCKTAIL PICKLES

    Pickle juice adds a modern tang to cocktails. The White Heat, served at Jordan Hotel’s Sliders in Sunday River, Maine, combines cucumber-infused vodka, pickle juice, peppadews and olives.

    9. ICE CUBES

    We’ve long advocated pickle slices in ice cubes for Bloody Marys, and saving pickle brine to freeze into ice cubes.

    Pickles are becoming more of a player on restaurant drink menus. The flavors of pickle brine provides a slow melt of sour, as at Milk Money Bar & Kitchen in Ft. Lauderdale, Florida.

    You don’t need to make the ice cubes of 100% pickle juice. In fact, try that to see if it’s too strong for you.

    Instead, make the cubes one-third or one-half pickle juice.
    And if you find yourself wanting to do more and more pickling, get a book!

    We don’t have the time or space to “put up” pickles in jars, but we do make quick pickles every week.
      

    Comments off

    RECIPE: Apple Rose Mini Pies

    If you’re considering what to bake for Mother’s Day, how about these pretty mini pies for Mother’s Day, or for National Apple Pie Day (May 14th)?

    We received the recipe from My Baking Addiction, a site with such tempting recipes that you’ll want to make them all.

    Currently featured on the home page are Banana Oatmeal Cookies, Marshmallow Treat Cupcakes, Rosé Cheesecake and Rumchata Cheesecake Pudding Shots.
     
     
    RECIPE: INDIVIDUAL APPLE ROSE PIES

    Ingredients

  • 1 teaspoon apple pie spice*
  • 1 standard pie crust (make or buy)
  • 6 Honeycrisp apples, thinly sliced (substitute Granny Smith)
  • Juice of 1/2 lemon
  • 1/2 cup brown sugar
  • 3 tablespoons unsalted butter
  •  
    Plus

  • 3-inch round cookie cutter
  • Muffin tin
  •  
    ________________
    *Make your own apple pie spice with 1 tablespoon ground cinnamon, 1 teaspoon allspice, 1 teaspoon ground nutmeg, 1/2 teaspoon ground cloves and an optional dash of cardamom. These ingredients are very similar to pumpkin pie spice, which often contains some ginger. You can use them interchangeably.
     
     
    Preparation

    1. PREPARE the pie dough as instructed (here’s a pie crust recipe if you need one). Once ready, roll out on a lightly floured surface. Using a 3-inch cookie cutter, punch out rounds of dough. Gently press the rounds into muffin tin wells.

    2. GENTLY TOSS the sliced apples in the lemon juice.

    3. PLACE the brown sugar, spice and butter in a small saucepan over medium-low heat. Stir and cook until the butter is melted, the sugar dissolved and the apples cooked through, about 4-5 minutes. Pour the mixture over the apples slices.

      Mini Rose Apple Pie

    Pie Spice Mix

    Homemade apple pie is always a treat, but this recipe raises the bar (photos courtesy My Baking Addiction).

     
    4. GENTLY coat the apples (we used our hands); then let sit for 10 minutes. Strain the apples slices and discard the liquid. Heat the oven to 350°F.

    5. FORM the roses: Arrange 6-8 apple slices in a straight row, with each slice overlapping the next to create a 12-inch line. Starting with one end, gently roll the apples (see a video on how to roll roses) (here’s another one). Transfer each rolled apple onto an individual pie crust.

    6. REPEAT until all the pie crusts are filled. Place the tin in the oven and bake until the crust is golden and apples have cooked, about 30 minutes.
     
     
    ©2018 MY BAKING ADDICTION.


    Comments off

    PRODUCT: Sourdough Hot Dog Buns Kit

    Sourdough Hot Dog Buns

    New England Style Hot Dog Buns

    Sourdough Hot Dog Buns

    New England Hot Dog Buns Rolls
    New England-style sourdough hot dog buns from King Arthur Flour.

      For the fast-approaching grilling season (in the Northeast, it begins unofficially with Memorial Day Weekend), here’s a way to impress your guests and enjoy your hot dogs even more:

    Sourdough hot dog buns.

    You can bake them easily with King Arthur Flour’s kit, which includes:

  • Sourdough starter
  • Baker’s Special Dry Milk*
  • SAF brand yeast
  • Potato flour
  • New England hot dog bun pan (makes ten 5½” buns)
  • Recipe and tips
  •  
    Get the kit for yourself or as a gift.

    You also need a hot dog bun pan, available from King Arthur Flour and elsewhere. (Note that these are New England-style hot dog rolls with straight edges, as opposed to classic rounded edges. The technique for the latter is at the end of the article.)

    The result is hot dog buns that are just as soft and moist as the packaged ones, with so much more flavor.

    If you already have a pan and just want the recipe, here it is.

    Prep time is 20 minutes, total rising time is 1.75 to 2.5 hours, bake time is 20 minutes to 23 minutes.

    But first: the difference between buns and rolls.
    ________________

    *This special dry milk has extra-fine granules that provide For more flavor, tenderness, nutrition and freshness.
     
     
    RECIPE: SOURDOUGH HOT DOG BUNS

    Ingredients For 10 Buna

  • 1/2 cup ripe (fed) sourdough starter
  • 1 cup lukewarm water
  • 2 1/2 cups unbleached all-purpose flour
  • 1 1/2 teaspoons salt
  • 2 tablespoons sugar
  • 4 tablespoons unsalted butter, softened
  • 1/4 cup Baker’s Special Dry Milk or 1/3 cup nonfat dry milk
  • 1/4 cup potato flour
  • 3/4 teaspoon instant yeast
  •  
    Preparation

    1. WEIGH out the flour; you’ll find its weight by toggling to “ounces” at the top of the ingredient section above. Or measure it by gently spooning it into a cup, then sweeping off any excess.

    2. COMBINE all the ingredients, and mix and knead by hand, mixer, or bread machine set to the dough cycle, adding more flour or water if necessary to make a soft, smooth dough.

    3. PLACE the dough into a lightly greased bowl, cover, and allow it to rise at warm room temperature until it’s nearly doubled in bulk, 60 to 90 minutes. While the dough is rising, lightly grease a hot dog bun pan.


    4. TRANSFER the dough to a lightly greased work surface, gently deflate it, and stretch it until it’s about 15″ long and 6″ wide. Place the dough into the pan, stretching it to the edges.

    5. LET the dough rise for 45 to 60 minutes, until it comes to within 1/2″ of the top of the pan. Towards the end of the rising time, preheat the oven to 350°F.

    6. GREASE a baking sheet, and place it on top of the risen buns. Put the covered buns into the oven, weighing the baking sheet down with something heavy and oven-safe (a cast iron skillet works well).

    7. BAKE the buns for 18 minutes, remove the weighted baking sheet, and bake for 2 to 5 minutes longer, if necessary to brown the buns. Remove the pan from the oven and cool the buns in the pan for 5 minutes. Turn them out onto a rack, rounded side up, to cool completely.

    8. SLICE each bun down the middle vertically, without cutting through the bottom; then cut between the buns to separate them.
    You can store the buns wrapped in plastic for several days; freeze for longer storage.
     
     
    BAKING TIPS

  • Need sourdough starter? You can purchase and feed King Arthur Flour’s sourdough starter; or create your own starter.
  • To make regular (not New England-style) hot dog buns without a special pan:
     
    1. DIVIDE the dough into 10 equal pieces (if you have a scale, each piece will weigh about 2 3/4 ounces), and form each piece into a cylinder 6″ in length.

    2. TRANSFER the buns to a parchment-lined baking sheet. Flatten the buns slightly (dough rises more in the center, so this will give them gently rounded tops), then allow to rise for 60 to 90 minutes, until puffy.

    3. BAKE in a preheated 350°F oven for 15 to 20 minutes, until lightly golden brown and a digital thermometer inserted into the center of one bun reads at least 190°F. Note that buns baked without a hot dog bun pan will have a more uneven texture, with smaller and larger gas bubbles on the inside. The buns may have a speckled appearance due to those gas bubbles under the surface.


  • Comments off

    The Nibble Webzine Of Food Adventures
    RSS
    Follow by Email


    © Copyright 2005-2024 Lifestyle Direct, Inc. All rights reserved. All images are copyrighted to their respective owners.