|
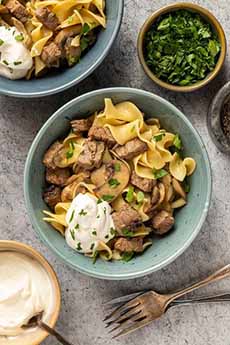
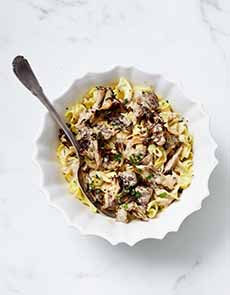
[1] A super-easy version of Beef Stroganoff. The recipe is below (unless otherwise indicated, photos are © Taste Of Home).

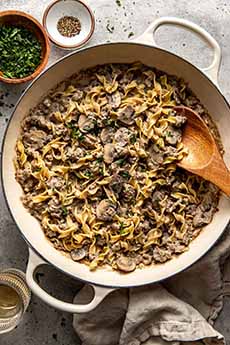
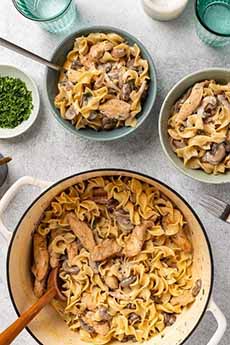
[2] In this version, the beef and noodles are mixed together in the pot. Here’s the recipe (photo © The Real Food Dieticians).
[3] You can make Beef Stroganoff in a crockpot or Instant Pot. Here’s the recipe.
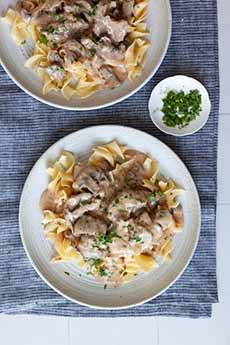
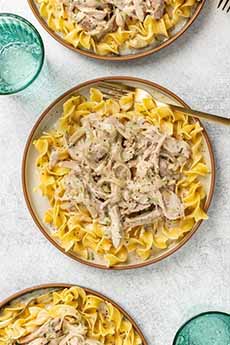
[4] Very classy: This version is made with beef tenderloin (the cut that yields filet mignon). Here’s the recipe (photo © Bon Appetit).
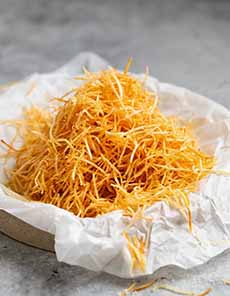
[5] The thinnest fries possible are pommes paille, translated literally as straw potatoes. As you can tell, it’s a lot easier to cook noodles Here’s a recipe (photo © Recipe Tin Eats).
[6] Count Pavel Stroganoff (1772-1817), portrait by Jean-Laurent-Mosnier, 1808 (age 34). Here’s more about him (Public Domain image).
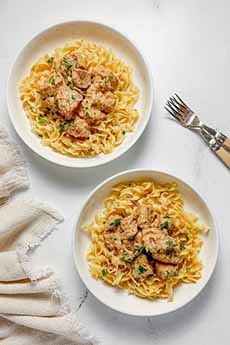
[7] It doesn’t have to be beef. This is Chicken Stroganoff. Here’s the recipe.
[8] And Turkey Stroganoff (the recipe).
[9] And Pork Stroganoff (the recipe).
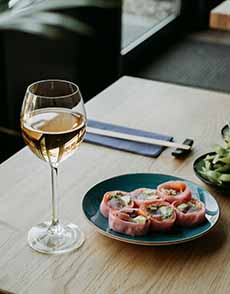
[10] Pinot Noir, a perfect red for Beef Stroganoff (photo © Kym Ellis | Unsplash).
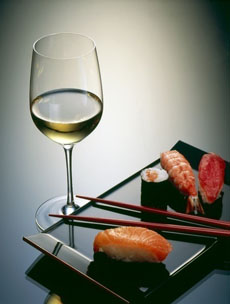
[11] Prefer a white wine? Chardonnay is one of four excellent choices (photo © Zwiesel Glas).
[12] Want to feel festive? Open a bottle of Champagne or other sparkling wine (photo © Champagne Bureau).
|
|
September 21st is National Beef Stroganoff Day. We can’t believe that in all the years of publishing The Nibble, we’ve never included a recipe. After all, when we graduated from the college dorm long ago, it was one of our go-to recipes for entertaining. It sounded so sophisticated and after all, it came from the kitchens of Russian aristocracy.
Before we get to the recipe we’ll begin with a bit of Stroganoff history (the name is also transliterated from Cyrillic as Stroganov). But first:
> The year’s 25+ beef holidays.
> The different cuts of beef: a photo glossary.
Below:
> The easy recipe.
> More Stroganoff recipes.
> Wine pairings with Beef Stroganoff.
> Popular Russian dishes served in the U.S.
> The short list of Russian food holidays celebrated in the U.S.
THE HISTORY OF BEEF STROGANOFF
While the exact inventor is debated, the dish likely emerged in the 1850s-1860s from the kitchens of the Stroganoff/Stroganov family‡, influential nobles who were prominent from the 16th through 19th centuries. One account credits French chef Charles Brière, who worked for Count Pavel Aleksandrovich Stroganov (photo #6), with creating the recipe around 1861.
Russian aristocrats would often hire French cooks but retain their palate for the tastes of the homeland. According to the cookbook A Taste of Russia, the original beef Stroganoff recipe derived from a basic French recipe using mustard to season beef. The chef incorporated Russian sour cream and named the creation after his employer.
That original Russian Beef Stroganoff was quite different from most recipes of today. It consisted of thin strips of beef sautéed with mustard and served in a sauce made with bouillon and sour cream—but notably without the mushrooms or onions which were integrated into later recipes.
Plus, the creamy beef was often served alongside fried potato straws (pommes paille—photo #5) rather than over noodles or rice, as is done today.
The dish gained international recognition when it was featured in cookbooks of the late 19th century. A recipe appeared in “A Gift to Young Housewives” by Elena Molokhovets in 1871, helping to establish it in Russian culinary tradition.
The spread of the recipe to other countries accelerated during the 20th century, particularly after Russian émigrés fled during the Revolution and both World Wars, bringing their culinary traditions with them.
American and European cooks began to add mushrooms, onions, and various seasonings that weren’t part of the original recipe.
In the U.S., the dish became especially popular in the 1950s and 1960s, served over egg noodles rather than the difficult-to-make straw potatoes.
Another time-saver was a can of condensed mushroom soup, an ingredient which became a staple in American home recipes to make quick sauces†.
Today, Beef Stroganoff exists in countless variations worldwide, from elegant French-influenced versions to hearty American casseroles made with yes, Campbell’s Cream Of Mushroom Soup.
Personally, we prefer a fine recipe like this one, with a few tablespoons of Cognac or wine. But we took it up a notch with morels instead of button mushrooms.
There’s more about the Stroganoff family in the ‡footnote.
RECIPE: EASY BEEF STROGANOFF
This is a super-quick recipe that takes shortcuts, yet delivers the basic flavors. Essentially, you save time cooking the beef by purchasing a chunk of cooked roast beef from the deli and cubing it yourself. (You can also use any other meat you have on hand—chicken, pork, etc.).
Plus, the sour cream is not mixed into the sauce but used as a garnish, so people can stir in as much or as little as they like.
There are numerous Stroganoff recipes and variations below if you prefer something more classic.
Ingredients For 2 Servings
If you prefer, you can substitute a pound of ground beef and cook it prior to adding it in step 3.
Prep time is 10 minutes and cook time is 15 minutes.
2-1/2 cups uncooked egg noodles (substitute egg-free)
1/3 cup sliced fresh mushrooms
1/3 cup chopped onion
1 tablespoon olive oil
1/2 to 1 teaspoon minced garlic
1-1/4 cups reduced-sodium beef broth
6 ounces unsliced deli roast beef, cubed
1/2 teaspoon each dried thyme and marjoram
1 tablespoon soy sauce
1/8 teaspoon pepper
Garnish: sour cream and minced fresh parsley
Preparation
1. COOK noodles according to package directions.
2. SAUTÉ the mushrooms, onion, and garlic in oil in a large skillet until tender.
3. ADD the broth, roast beef, herbs, soy sauce, and pepper and bring to a boil. Reduce the heat and simmer, uncovered, for 10 minutes.
4. DRAIN the noodles; stir into skillet. Top with sour cream and parsley and pass a bowl of sour cream for those who want more.
MORE STROGANOFF RECIPES
Barley Risotto & Beef Stroganoff
Beef Stroganoff Sandwiches
Broccoli & Ham Stroganoff
Crockpot Beef Stroganoff (photo #3)
Ground Beef Stroganoff (photo #2)
Hamburger Stroganoff
Meatball Beef Stroganoff
Paprika Chicken Stroganoff
Pork Stroganoff (photo #9)
Pressure Cooker/Instapot Ground Beef Stroganoff
Round Steak Stroganoff
Sausage Stroganoff
Slow Cooker Ground Beef Stroganoff
Slow Cooker Chicken Stroganoff (photo #7)
Slow Cooker Turkey Stroganoff (photo #8)
Spaghetti & Meatballs Stroganoff
Stroganoff Soup
Tenderloin Beef Stroganoff (photo #4)
WINE PAIRINGS WITH BEEF STROGANOFF
The key to pairing wine with Beef Stroganoff is balancing the cream sauce’s richness with wines that have good acidity and complementary rather than competing flavors. Although Beef Stroganoff is rich, its flavors can be delicate.
Red Wine Pairings
Côtes du Rhône & Other Rhône Blends: The earthy, herbaceous notes of these wines work wonderfully with mushrooms and providing plenty of body to stand up to the beef.
Chianti Classico: Moderate tannins and brings good acidity complements the dish.
Pinot Noir: The most elegant choice, its medium body and bright acidity cut through the cream sauce while complementing the beef (photo #10).
White Wine Pairings
Champagne or Crémant: The bubbles and acidity cleanse the palate beautifully between rich bites (photo #12).
Chardonnay (Oaked): These wines have richness that matches the beef. A white Burgundy or quality California Chardonnay works especially well (photo #11).
Grüner Veltliner: This classic from Austria provides herbal, peppery notes that complement the dish while its crisp acidity cuts through the richness.
Viognier: Often little known in the U.S., this French white delivers aromatic complexity with a fuller body that can handle a rich cream sauce. The floral notes of the grape add to the experience.
RUSSIAN DISHES IN THE U.S.
While Beef Stroganoff is the most popular Russian dish embraced by Americans (and vodka the main beverage), other Russian dishes have found fond fans in the U.S.
Blini, pancakes originally made with buckwheat. Smaller sizes were served with caviar, smoked fish, or pickled herring, and standard sizes served as wrappers for minced meat, mushrooms, cabbage, onions, or leftover stews. Blini have been Americanized into versions made with regular wheat, and also used with sweet toppings like berries and cream. Like French crêpes, they can be filled with sweet or savory fillings and in Russia, eaten simply with sour cream.
Blintzes, are thin crepes that are filled with sweetened cottage cheese or fruit, or savory fillings such as meat or potato.
Borscht, beet soup, with versions for summer (typically vegetarian) and winter (typically with beef).
Caviar, black roe from sturgeon, red from salmon. In earlier centuries, caviar was cheaper than fish, the same price as butter, and affordable by common people. By the end of the 19th century, as demand grew, it became affordable only by the wealthy.
Chicken Kiev (although some claim it’s actually French or Ukrainian), a breaded chicken breast with butter rolled inside so that hot butter sauce spills out when it’s cut.
Olivier Salad, a potato salad dressed in mayonnaise, with carrots, peas, hard-boiled eggs, onion, and often, chicken. The most popular salad in Russia and a tradition food for New Year’s Eve. It was created by the Belgian chef Lucien Olivier who owned the Hermitage Restaurant in Moscow in the early 1860s.
Pelmeni, small meat-filled dumplings, boiled and served with butter or sour cream.
Pirozhki, small, savory or sweet pies with a variety of fillings, and are baked or fried.
Russian Dressing, originally a mayonnaise-based sauces that has become more American than Russian in the U.S. as a condiment for salads and sandwiches.
Russian Tea Cakes, also called Snowball Cookies, balls of butter, flour, nuts, and powdered sugar, very similar to Mexican Wedding Cookies. They’re popular holiday cookies in the U.S.
Schi, cabbage soup, is like borscht made with cabbage rather that beet.
Vinegret, a beet and potato salad with carrots, onions, and gherkins, with a festive red color from the beets. The original dressing was vinaigrette, but Americans often use mayonnaise.
To round out the buffet, have lots of dark rye bread, sour cream, fresh dill for garnish, pickled gherkins/
> Here are more dishes popular in modern Russian cuisine.
THE YEAR’S RUSSIAN FOOD HOLIDAYS
It’s a short list. We need someone to petition for more Russian food holidays—at least for blini, blintzes, borscht, and chicken Kiev (anyone can register a food holiday).
January 14: Novy God (Russian New Year)
July 14: National Caviar Day
September 21: National Beef Stroganoff Day
October 5: National Vodka Day
If you want a reason to have a Russian-themed dinner, there are also:
February 2: Ayn Rand Day
May 9: Russian Victory Day (over Germany in World War II)
June 6: Russian Language Day
June 12: Russia Day (commemorates the end of the Soviet Union)
July 7: Mark Chagall’s Birthday
August 22: Russian Flag Day
August 28: Leo Tolstoy’s Birthday
As of this writing, Russia isn’t the most popular place to celebrate. But consider all the great Russians who have contributed to the advancement of modern civilization: Sholem Aleichem, Milhail Baryshnikov, Joseph Brodsky, Yul Brynner, Catherine the Great, Marc Chagall, Anton Chekhov, Sergei Diaghilev, Fyodor Dostoevsky, Sergei Eisenstein, Peter Carl Fabergé, Michel Fokine, Nikolai Gogol, Maxim Gorky, Vladimir Horowitz, Mikhail Lermontov, Natalia Makarova, Dmitri Mendeleev, Modest Mussorgsky, Vladimir Nabokov, Vaslav Nijinsky, Rudoph Nureyev, Boris Pasternak, Ivan Pavlov, Anna Pavlova, Peter the Great, Alexander Pushkin, Ayn Rand, Sviatoslav Richter, Nikolai Rimsky-Korsakov, Mstislav Rostropovich, Alexander Scriabin, Dmitri Shostakovich, Aleksandr Solzhenitsyn, Konstantin Stanislavski, Igor Stravinsky, Pyotr Ilyich Tchaikovsky, Leo Tolstoy, Ivan Turgenev, and so many others.
|
________________
*Fried potato straws, called pommes paille (“potato straws”) in French cuisine, are extremely thin julienned potatoes that are deep-fried until crispy and golden. They’re much thinner than regular julienne French fries, cut to about 1/8 inch thick or even thinner so that they resemble blades of actual straw. They were typically served alongside the Stroganoff as a bed or on top as a garnish. The crispy texture was a perfect contrast to the creamy sauce and tender beef.
†Canned soup became a common cooking ingredient, particularly for sauces and casseroles, beginning in the 1940s and 1950s. In the 1930s, companies like Campbell’s which had introduced condensed canned soups in 1897, began publishing recipe booklets and ad showing how their soups could be used in other recipes. By the 1950s, casseroles had become a staple of American home cooking, often using cream of mushroom, cream of chicken, tomato soup, or other condensed soups as a base for sauces.
In 1955, Dorcas Reilly, a Campbell’s test kitchen employee, created the now-classic green bean casserole using cream of mushroom soup. By the 1960s, canned soup was firmly established as a go-to ingredient for home cooks seeking quick and reliable ways to add flavor to their meals.
‡The Stroganoff/Stroganov clan’s fortune was the result of salt mining, trade, and land acquisition. The family’s origin is not known with absolute certainty, but the leading theory, based on genealogical research by historian Andrey Vvedensky, is that they likely descended from affluent Pomor peasants—Russian settlers inhabiting the subarctic White Sea region of Russia. Other sources say they were well-do-do merchants in the Novgorod region of medieval Russia in the late 14th and early 15th centuries [source].
What we know reliably is that the documented Stroganovf dynasty began with Anikey Fyodorovich Stroganov (1488-1570), who is considered the true founder of the family’s wealth and prominence. He established their salt-mining empire in the Perm region, on the western slopes of the Ural Mountains [source].
The strategic move to salt mining transformed them from regional merchants into one of Russia’s wealthiest and most influential families. In addition to salt production, wealth came from fur trading, iron mining, and later cultural patronage. By the 16th century, the Stroganovs had become so powerful that they were granted extensive privileges by the Russian tsars, including the right to maintain private armies and govern vast territories in Siberia.
By the 17th century, the family was part of the Europe-hopping Russian aristocracy—which is why Count Pavel Stroganoff (1774–1817) was born in Paris. The count (1774–1817) was a Lieutenant General and Adjutant General to Alexander I, and a key figure in the Government reforms of Alexander I. He took part in the Napoleonic Wars, commanding an infantry division. Alas, he died of consumption at just 42 years of age. Were it not for Beef Strognoff, he would be a footnote in history.
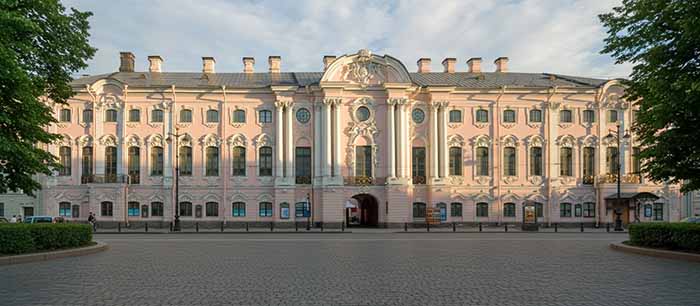
They were one of the most prominent noble families in Russian history, their influence lasting until the Russian Revolution. Their grand estate, the Stroganoff Palace in St. Petersburg, and a vast art collection part of the State Russian Museum, which is the world’s largest depository of Russian fine art, is open to visitors.
[13] The Stroganoff Palace in St. Petersburg. See more photos of the palace here (this photo A.I. generated).
CHECK OUT WHAT’S HAPPENING ON OUR HOME PAGE, THENIBBLE.COM.
|







 Edamame[/caption]