|
We’d read about Cara Cara oranges, we’d seen photos; but we hadn’t tasted one until this week. It was exquisite: sweet and “old school,” when all fruit was grown to be perfectly sweet and lush.
(Today, too much fruit is grown to look great on the shelf, to be durable for transport, to eliminate bothersome seeds, and just about every reason other than natural sweetness and deep taste.)
Cara Cara oranges are a variety of navel orange, distinguished by their rosy pink, juicy, sweet flesh and low acidity.
The rosy flesh has a berry-flavored zing with a touch of spice. Depending on where the oranges are grown, the undertones can be cherry, cranberry, raspberry, strawberry or a combination.
Cara Caras are not unlike like blood oranges, which are grown in the U.S. but hail from Italy, where they also were a natural mutation. As with blood oranges, some have a pink blush outside on the peel, as well as in the flesh.
Cara Caras are also called “pink navel” or “red navel” oranges.
CARA CARA ORANGE HISTORY
The Cara Cara variety was first discovered in 1976 on a Washington navel orange tree growing at the Hacienda Cara Cara, a private home in Valencia, Venezuela. It is believed to have been a mutation.
The delightful “new” orange was propagated. It has since been crossed with the Bahia navel orange and bred to remove the seeds, which increases consumer appeal.
The variety was first planted in Florida groves. Twelve years ago, commercial growing began in California, where the variety thrived in the climate of the San Joaquin Valley.
The trees bear fruit from December through April.
Cara Caras did not enter the national consumer market until the late 1980s.
For years, they were carried only by specialty markets.
The fruit was finally distributed nationally about 10 years ago by produce companies like Melissa’s Produce and Sunkist.
They are now available at a broader range of grocers nationwide.
|
|

[1] No, they’re not Ruby Red or Red Star grapefruit, but pink navel oranges, called Cara Caras (photo © Good Eggs).
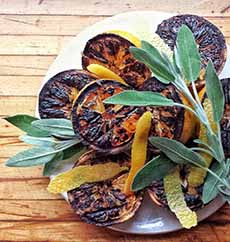
[2] The oranges are torched, or bruleed, to caramelize their sugars at The Pines in Brooklyn (photo © The Pines [alas, now closed]).
|