|
The other week we went shopping at a large Japanese superstore (and the largest Japanese supermarket in the U.S.), Mitsuwa Marketplace in Edgewater, New Jersey.
Strolling up and down the aisles, we wandered into the salad dressing area.
We found ourselves hungering for a big salad with ginger-miso dressing—the type of dressing, often orange in color, served on green salads at most Japanese restaurants. So…
We purchased three different brands, chopped up a big salad for dinner, and tossed it with dressing.
OMG: Is every prepared consumer food product sold in America drowning in sugar? Would the same brand sold in Japan be this sweet?
(Indeed, manufacturers alter their recipes to suit the tastes of different nationalities. For example, the original Dutch Heineken beer is much heartier than the watered-down product sold in the U.S.)
At $4.59 for a 12-ounce bottle, we were, to say the least, disappointed.
We rarely purchase salad dressing because it’s so easy to make, and the price is very high given the low cost of a bit of oil, vinegar, and seasonings. If we buy a bottle, it should taste great!
We knew we could do better than these overly sweet bottles. The next day, mixed our own, using it to top a dinner of grilled chicken on greens.
The recipe that follows took us 5 minutes (just toss all ingredients into the food processor); and the ingredients cost pennies, not dollars.
> Check out the information below on how to choose a salad oil.
> See our Culinary Oils Glossary for more information on the different types of salad oils.
RECIPE: GINGER MISO DRESSING
This recipe makes 3/4 cup dressing, enough for a salad for four. Feel free to double it and refrigerate the extra dressing—for your next salad, as a dip with raw vegetables, or as a sauce for grilled chicken, seafood, or vegetables.
Ingredients
1/3 cup rice vinegar
1/4 cup canola oil (you can substitute grapeseed or olive oil)
2 tablespoons sesame oil
1 tablespoon miso paste (white or red)
1 tablespoon soy sauce
1/4 cup onion, finely chopped
1 tablespoon grated fresh ginger
1 large garlic clove or 2 small cloves
Optional: 1 tablespoon toasted sesame seeds
Optional: 1/2 teaspoon agave nectar or honey
Preparation
1. COMBINE all the ingredients in a food processor or blender and process until creamy.
2. USE immediately or refrigerate.
|
|

[1] Freshly chopped and waiting for ginger miso dressing (photo by Elvira Kalviste | © THE NIBBLE).
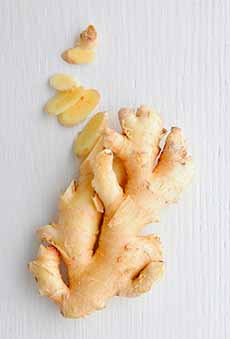
[2] Fresh ginger root (photo © Good Eggs).
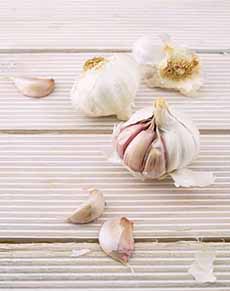
[3] Garlic bulb and cloves (photo Wesual Click | Public Domain).
|


