THE NIBBLE BLOG: Products, Recipes & Trends In Specialty Foods


Also visit our main website, TheNibble.com.

Grapefruit Meringue Pie Recipe For National Grapefruit Month

February is National Grapefruit Month. Before the month is out, how about a Grapefruit Meringue Pie recipe?

This was our weekend baking project. The flavor profile is different from a lemon meringue pie, but the texture is the same.

Thanks to Taste Of Home for sharing this recipe, which was created by Barbara Soliday of Winter Haven, Florida.

Barbara has a grapefruit tree in our backyard, so uses fresh grapefruit juice. The rest of us can shop for fresh-squeezed pink grapefruit juice or whole pink or red grapefruits to squeeze.
 
Below:

> The recipe for grapefruit meringue pie.

> The recipe for candied grapefruit peel.

> A hack if you don’t have a candy thermometer.

> Why do you need a separate candy thermometer?

> The history of the kitchen thermometer.
 
Elsewhere on The Nibble:

> The history of grapefruit, including pink and red grapefruit.

> 20+ more grapefruit recipes: savory, sweet, and cocktails.

> World Paloma Day is May 22nd, a delicious grapefruit cocktail.

> The year’s 45+ citrus holidays.

> The year’s 31 pie holidays.
 
 
RECIPE: GRAPEFRUIT MERINGUE PIE

You can bake your favorite pie crust recipe from scratch, or use a purchased crust.

After the crust is mixed, prep time is 35 minutes, bake time is 15 minutes, plus chilling.

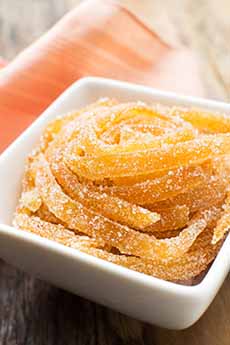
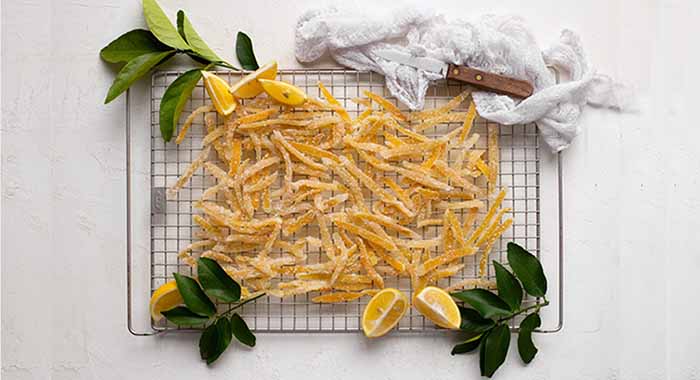
If you want to add a special garnish, how about candied grapefruit peel (photo #5)? The recipe is below.
 
Ingredients For 8 Servings

  • Pastry for single-crust pie (9 inches)
  •  
    For The Filling

  • 1-1/3 cups sugar
  • 1/3 cup cornstarch
  • 2 cups pink grapefruit juice (substitute regular)
  • 3/4 cup water
  • 3 large egg yolks, lightly beaten
  • 2 tablespoons butter
  • 1/2 teaspoon lemon extract
  •  
    For The Meringue

  • 3 large egg whites, room temperature
  • 1/4 teaspoon cream of tartar
  • 6 tablespoons sugar
  •  
    Preparation

    1. MAKE your pie dough. Then, on a floured surface, roll the dough to a 1/8-inch-thick circle; transfer to a 9-in. pie plate. Trim crust to 1/2 inch beyond the rim of the plate; flute the edge. Refrigerate for 30 minutes. Preheat the oven to 425°F.

    2. LINE the pie crust with a double thickness of foil. Fill with pie weights, dried beans or uncooked rice. Bake on a lower oven rack until the edges are golden brown, 20-25 minutes. Remove the foil and weights; bake until the bottom is golden brown, about 4 minutes. Cool on a wire rack. Meanwhile…

    3. COMBINE the sugar and cornstarch in a large saucepan. Stir in the grapefruit juice and water until smooth. Cook and stir over medium-high heat until thickened and bubbly.

    4. REDUCE the heat; cook and stir for 2 minutes longer. Remove from the heat.

    5. STIR 1/2 cup of the hot filling into the egg yolks; return all to the pan, stirring constantly. Bring to a gentle boil; cook and stir for 2 minutes longer.

    6. REMOVE from the heat. Gently stir in the butter and lemon extract. Pour the hot filling into crust.

    7. MAKE the meringue. In a large bowl, beat the egg whites and cream of tartar on medium speed until soft peaks form. Gradually beat in the sugar, 1 tablespoon at a time, on high until stiff glossy peaks form and the sugar is dissolved. Spread evenly over the hot filling, sealing the edges to out to the crust.

    8. BAKE at 350°F until the meringue is golden brown, 12-15 minutes. Cool on a wire rack for 1 hour. Refrigerate for at least 3 hours before serving. Store leftovers in the refrigerator.
     
     
    RECIPE: CANDIED GRAPEFRUIT, LEMON, LIME, OR ORANGE PEEL
     
    Candied citrus peel is delicious plain or dipped in chocolate.

    Ingredients

  • 5 lemons, 3 bright-skinned oranges or 2 grapefruits
  • 1 quart simmering water
  • 1 cup granulated sugar
  • 1/3 cup water
  • Candy thermometer
  • 1 teaspoon vanilla extract
  • Optional: chocolate bar or chips of choice
  •  
    Preparation

    1. PEEL the skin with a vegetable peeler. Cut into julienne strips 1-1/2 inches long and 1/16 inch wide.

    2. SIMMER in water for 10 to 12 minutes, or until just tender when bitten. Drain.

    3. REFRESH in cold water and dry on paper towels.

    4. BOIL the sugar and water in a small saucepan to the thread stage, 230°F on the candy thermometer. Remove from heat.

    5. STIR in the peel and the vanilla and let stand in the syrup for at least 30 minutes.

    6. DRAIN when ready to use. Under refrigeration the peel will keep in the syrup for several weeks.

    To coat in chocolate:

    7. MELT a chopped chocolate bar or chocolate chips of choice. Dark chocolate or white chocolate works better than milk chocolate.

    8. DIP the individual pieces of peel in the chocolate, and place on wax paper to dry.

    Below:

    A hack if you don’t have a candy thermometer.

    In fact, it’s what cooks did in the era before kitchen thermometers were invented.

    The history of the kitchen thermometer is also below.


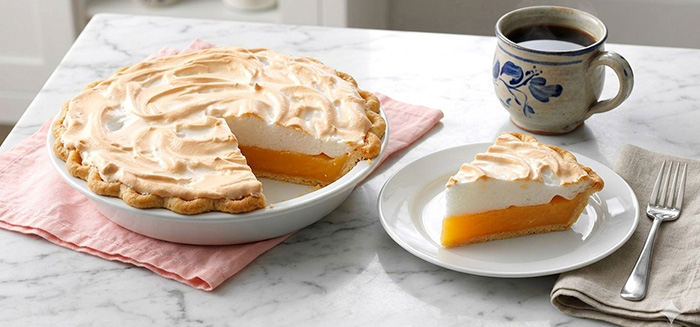
    Grapefruit Meringue Pie
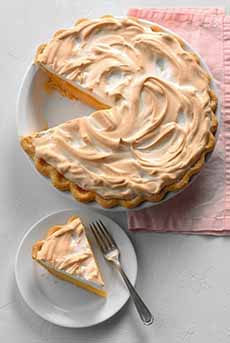
    [1] A sweet-and-tart grapefruit meringue pie. The yummy recipe is below (photo © Taste Of Home).

    Pink grapefruit, whole and halved, on a counter
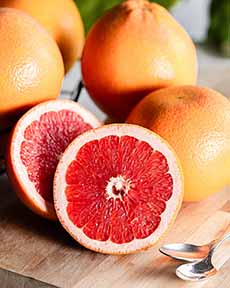
    [2] You can use pink or red grapefruit; and if you can’t find either, use regular white grapefruit (photo © Gelson’s).

    Pasture Raised Eggs In Dish & Carton
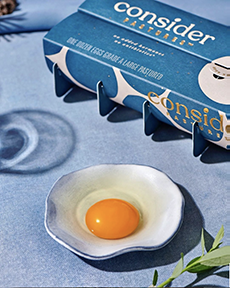
    [3] These pasture-raised eggs are from Consider Pastures).

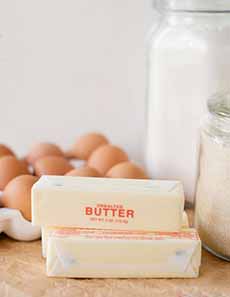
    Wrapped Sticks Of Sweet Butter
    [4] Butter, grapefruit juice, and sugar make up the filling (photo © Go Bold With Butter).

    A Dish Of Candied Grapefruit Peel
    [5] Candied grapefruit peel. The recipe is below.

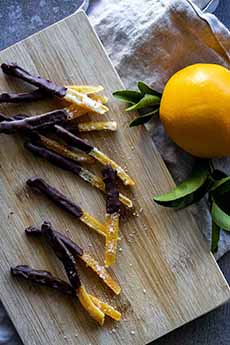
    Chocolate Dipped Orange Peel
    [6] Chocolate dipped candied orange peel is one of our favorite treats. Here’s the recipe (photo © Went Here 8 This).

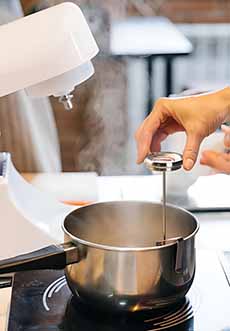
    Candy Thermometer In A Pot
    [7] You can get a candy thermometer for less than $10. You can get one at a hardware store or online. No candy thermometer? See the hack below (photo © Craft 911 Store).

     
    Candied Lemon Peel
    [8] Candied peel is delicious with a sugar coating—or dipped in chocolate, if you prefer.
     
     
    CANDY THERMOMETER SUBSTITUTE

    If you don’t have a candy thermometer, you can use the Cold Water Test, a classic culinary technique. You drop a small amount of hot syrup into a bowl of very cold water to identify the stage of the sugar:

  • Soft Ball Stage: The syrup forms a soft, flexible ball that flattens when removed from the water.
  • Firm Ball Stage: It forms a stable ball that does not flatten but is still pliable.
  • Hard Ball Stage: The syrup forms a thick, rope-like thread or a hard ball that is difficult to squash.
  • Soft Crack Stage: When dropped into water, the syrup forms flexible threads that bend before breaking.
  • Hard Crack Stage: The syrup forms brittle, hard threads that snap easily when bent.
  •  
    Preparation:

    1. CUT the peel into strips in the size of your choice.

    2. BLANCH. To remove the bitter edge from the pith, blanch the lemon strips in boiling water 2–3 times, using fresh water each time, before you start the sugar syrup process.

    3. USE a clean, room-temperature spoon for each test to avoid introducing sugar crystals (they could cause the whole batch to seize or grain). Drop a bit of the simmering lemon syrup into a bowl of very cold water.

    4. REACH into the water and try to pick up the syrup.

  • If it forms a liquid thread that just pulls away, it is in the Thread Stage.
  • If it forms a soft, flexible ball that flattens when you take it out of the water, you have reached the Soft Ball Stage. This is usually the “sweet spot” for a tender citrus peel.
  •  
    5. ADJUST: If the syrup disappears or doesn’t form a shape, keep simmering. If it turns into a hard, brittle snap, it has gone too far.

    6. COAT. Once the peels are done simmering and have been drained, toss them in granulated sugar while they are still tacky to give them the classic sparkling look. If you prefer, coat them in melted chocolate and set/dry on parchment or wax paper.

    The peels will keep for several weeks in an airtight container at room temperature, or even longer in the fridge.
     
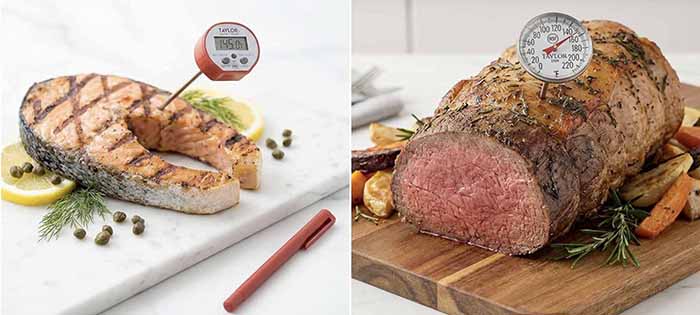
    Digital & Analog Kitchen Thermometers
    [9] Cooking thermometers are inexpensive. At left, a digital instant-read, at right, an analog instant-read (photo: The Nibble).
     
     
    WHY DO YOU NEED A SEPARATE CANDY THERMOMETER?

    Traditionally, the reason is that meat is cooked at relatively low temperatures: poultry at 165°F, beef anywhere from 125°F to 160°F, pork around 145°F. A meat thermometer needs to be precise in a fairly narrow, low range.

    Candy and sugar work, on the other hand, are cooked at significantly higher temperatures, as noted above: from about 230°F all the way up to 310°F.

    Deep-frying oil, which is also measured with a candy thermometer, spans 325°–375°F.

    Candy thermometers are also designed to clip onto the side of a pot so they stay submerged in the liquid continuously. A meat thermometer is used for quick spot-checks.

    Today, a high-quality instant-read thermometer like a Thermapen reads up to around 572°F, which covers both worlds. However, they run more than $100, so many cooks prefer to keep two separate thermometers for less than $15 apiece.
     
     
    THE HISTORY OF THE KITCHEN THERMOMETER

    The first reliable mercury-in-glass thermometer with a standardized scale, appeared in 1714 created the making temperature truly measurable and repeatable. It was created by Daniel Gabriel Fahrenheit.

    Anders Celsius followed in 1742 with his centigrade scale.

    You now know the origin of the Fahrenheit and Celsius scale names.

    But it was an additional 250 years before the arrival of the thermometer for everyday cooking.

    Precise temperature measurement in cooking didn’t become a concern until the 19th century, when scientific thinking began to be applied to domestic life.

    But still, they weren’t for home use.

  • Early references to using thermometers in cooking appear in the mid-to-late 1800s, particularly in professional and scientific kitchens.
  • It was only in the early 20th century that oven thermometers were made available to home cooks, since most ovens at the time were wildly unreliable in temperature.
  • The familiar probe-style meat thermometer became widely available to American home cooks in the period of the 1930s–1950s. It was encouraged by food safety awareness and the rise of the modern food industry.
  • The instant-read thermometer, used in most homes today, was introduced by Taylor in the 1970s. It has become a kitchen staple.
  •  
    Grapefruit Meringue Pie and a Cup Of Coffee
    [10] Enjoy a piece (photo The Nibble)!
     

    CHECK OUT WHAT’S HAPPENING ON OUR HOME PAGE, THENIBBLE.COM.


    Comments off

    Sweet Potato Recipes For National Sweet Potato Month

    Whole & Halved Sweet Potatoes
    [1] The beautiful sweet potato, bursting with flavor—and beta carotene (photo © Umami Information Center | Facebook).

    A dish of Chili Butter Sweet Potatoes
    [2] Chili Butter Sweet Potatoes are just one of the delicious sweet potato recipes below (photo © Gelson’s).

    Bush's Black Beans Canned
    [3] Black beans become crispy and crunchy in this recipe (photo © Bush’s Beans).

    Whole & Ground Cumin
    [6] Until they are ground,cumin seeds resemble caraway seeds. They have a savory, nutty flavor that becomes earthy and aromatic when used as an ingredient in cooking (photo © The Spice House).

    Ground coriander seed on a spoon
    [7] Coriander is the name for its dried seeds of the cilantro plant, but it tastes nothing like the herb. It has a deep, nutty flavor and a slight, citrus aroma (photo © Savory Spice Shop).

    Jar Of Honey With Drizzler
    [8] Honey is mixed with butter and hot sauce to create the chili butter (photo © National Honey Board | Facebook).

    A small box of cayenne chiles
    [9] Sliced red chiles are one of the garnishes (photo of cayenne © Good Eggs).


    February is National Sweet Potato Month, celebrating a tuber that’s delicious baked, fried, French-fried, mashed, roasted, turned into chips and pasta (gnocchi, ravioli), made into pies, muffins, and other baked goods.

    February 22nd is National Sweet Potato Day. September is National Fruits & Veggies Month.

    Delicious recipes follow. But first, from the Foundation For Fresh Produce:
     
     
    10 WAYS TO SERVE SWEET POTATOES

    1. Bake, Roast, or Steam ’em. Pick a cooking method and enjoy! Use whole, unpeeled sweet potatoes as a side dish to any meal.

    2. Mash ’em. Steam peeled sweet-potato chunks for about 10 minutes until tender, and mash with a dash of orange juice.

    3. Top Your Salad. Make a salad topping from diced sweet potatoes, pineapple, apples, and celery, plus cashews. Serve over salad greens.

    4. Sweet Potato Fries. Quarter sweet potatoes and drizzle with olive oil. Bake at 400°F for 40-60 minutes. For a spicy twist, add a dash of cayenne pepper.

    5. Grill ’em. Slice sweet potatoes into ½ inch rounds and grill until lightly browned. Drizzle with lime juice.

    6. Sweet Potato Salad. Substitute sweet potatoes for regular spuds in your favorite potato salad recipe.

    7a. Sweet Potato Pancakes. Make sweet potato pancakes by simply adding mashed sweet potatoes to regular pancake batter.

    7b. Sweet Potato Latkes. These savory sweet potato pancakes are a modern adaptation of the classic. Here’s a recipe.

    8. Add A Twist To Sandwiches. Cut thin slices of cold cooked sweet potatoes and add to your favorite sandwich or wrap instead of tomatoes.

    9. A Sweet Side Or Snack. Dice cooked, peeled sweet potatoes and drizzle with maple syrup for a side dish that’s sure to satisfy any sweet tooth.

    10. Sweet Potato Chips. Use a mandoline to thinly slice large sweet potatoes and brush lightly with olive oil. Bake at 350°F for 15 minutes or until lightly browned and crisp.

    > The history of sweet potatoes.

    > The difference between sweet potatoes and yams.

    > Chile, chili, chilli: What’s the difference?
     
     
    RECIPE: CHILI BUTTER SWEET POTATOES WITH CRISPY BLACK BEANS

    In this recipe, black beans are roasted with garlic, cumin, and coriander so they get spicy and super crispy. They crunch like potato chips!

    You may want to make subsequent batches of the beans as a garnish for other recipes, or for snacking with a beer.

    The butter sauce with Cholula and honey is also a keeper.

    The result, with garnishes of chiles and cilantro, is crunchy-soft, spicy-sweet, sprightly, and rich.

    Thanks to Gelson’s Markets for this recipe. Find many more wonderful recipes on Gelson’s website.
     
    Ingredients For 8 Servings

  • 3 pounds sweet potatoes, quartered lengthwise
  • 6 tablespoons extra virgin olive oil, divided
  • Kosher salt, to taste
  • 2 cans black beans, drained and patted dry
  • 4 garlic cloves, smashed
  • ½ teaspoon ground cumin
  • ½ teaspoon ground coriander
  • 5 tablespoons unsalted butter, room temperature
  • 2 teaspoons honey
  • 2½ tablespoons Cholula or Tapatio hot sauce
  • Garnish: rough-chopped cilantro, thinly sliced red chiles
  • Garnish: thinly sliced cayenne or other slender red chiles
  • For serving: lime wedges
  •  
    Preparation

    1. PLACE two oven racks in the lower third and upper third of the oven. Place one rimmed sheet pan on the lower oven rack and preheat the oven to 425°F. On a second rimmed sheet pan…

    2. TOSS the black beans and garlic with 2 tablespoons of the olive oil and the cumin and coriander. Season with salt and spread evenly. Roast until crispy, stirring halfway through, 25 to 30 minutes.

    3. TOSS the sweet potatoes in a large bowl with ¼ cup of the olive oil to coat. Season with salt. Place the sweet potatoes cut sides down on the preheated sheet pan, and roast for 20 to 25 minutes, until fork tender and caramelized.

    4. MAKE the chili butter: In a large bowl, mash together the butter and honey until smooth. Add the hot sauce, 1 tablespoonful at a time, blending well after each addition. Season with salt.

    5. REMOVE the sweet potatoes from the oven and brush them with the chili butter.

    6. PLATE the potatoes. Arrange the sweet potatoes on a large platter and drizzle with the excess honey butter. Garnish with the crispy black beans, chiles, and cilantro. Serve hot with lime wedges.

    Leftover potatoes can be stored in an airtight container in the refrigerator for up to 5 days.
     
     
    MORE SWEET POTATO RECIPES

  • Barbecue Stuffed Sweet Potatoes
  • Gluten-Free Pizza Crust Made From Sweet Potatoes
  • Sweet Potato & Apple Pizza
  • Sweet Potato Bourbon Pie With Ginger Whipped Cream
  • Sweet Potato Gnocchi With Mascarpone Cheese
  • Sweet Potato Pizza With Caramelized Onion, Soppressata & Balsamic Glaze
  • Sweet Potato Toast
  • Sweet Potatoes With 6 Toppings (Apple Walnut, Bacon, Chorizo Avocado, Garlic Shrimp, Pesto Chicken, Spiced Almond Butter & Honey)
  •  


    CHECK OUT WHAT’S HAPPENING ON OUR HOME PAGE, THENIBBLE.COM.


    Comments off

    ChocolaTea: A 20-Calorie High Antioxidant Brewed Chocolate Beverage

    ChocolaTea™, our Top Pick Of The Week, is a special drink: a naturally sugar-free, dairy-free, vegan, dark chocolate beverage. It’s made from fermented, dried, and roasted organic cacao beans*.

    It isn’t tea.

    It isn’t a creamy drink like hot chocolate or cocoa (unless you want it to be).

    Nor is it a product called drinking chocolate† (photo #6).

    It’s a “cousin” of those, in a category all its own.

    If you’re a fan of dark chocolate, we hope you’ll love this discovery as much as we do.

    (We discovered ChocolaTea when it was picked as a Top Trend at a recent specialty food trade show).
     
     
    CHOCOLATEA IS BREWED CHOCOLATE

    The drink is brewed or steeped, like French Press coffee or loose tea leaves. Just add boiling water and the result is beautifully smooth and chocolaty.

    ChocolaTea can be served like coffee and tea:

  • Hot or cold.
  • Plain or with your sweetener and creamer of choice (photo #2).
  •  
    The company’s proprietary cacao bean blend and roasting process yields a ready-to-brew drink that is very different from what you’d get by simply grinding cacao beans.

    (NOTE: Don’t try it—it won’t work.)

    Drunk plain, ChocolaTea is only 20 calories per cup (photo #1), delivering the flavor of chocolate without the calories of hot chocolate or cocoa.

    (The difference between hot chocolate and cocoa.)

    ChocolaTea is:

  • Rich in antioxidants (cacao is a superfood).
  • Low in caffeine†, calories, and carbs.
  • Naturally sugar-free, dairy-free, soy-free, and gluten-free.
  • Vegan friendly.
  • Made with organic and 100% pure ingredients.
  • Made with fairly traded, ethically sourced cacao beans.
  • All natural: no artificial flavors or ingredients.
  •  
     
    THE FLAVORS OF CHOCOLATEA 

    They’re all delicious, yielding deep, smooth, dark chocolate flavor.

    We tasted four flavors. Our personal faves are Dark Chocolate and Dark Chocolate Mexican. Our next order may well include Dark Chocolate Chai.

  • ChocolaTea Dark Chocolate
  • ChocolaTea Dark Chocolate Magic Coffee
  • ChocolaTea Double Dark Chocolate Dream
  • ChocolaTea Dark Chocolate Chai
  • ChocolaTea Dark Chocolate Fresh Mint
  • ChocolaTea Dark Chocolate Ginger
  • ChocolaTea Dark Chocolate Mexican
  • ChocolaTea Dark Chocolate Mocha
  • ChocolaTea Dark Chocolate Decaf Mocha
  • ChocolaTea Dark Chocolate Pumpkin Spice
  •  
     
    HOW TO BREW CHOCOLATEA

    The ground chocolate arrives in a bag like ground coffee (photo #3).

    For a hot brew, a French press is the best way to go, but a fine mesh tea brewer also works.

    For a cold brew, you can use a cold brew coffee maker pitcher with a very fine mesh filter basket.

    The ChocolaTea website sells different teaware items as well as the ground chocolate.
     
     
    GET YOUR CHOCOLATEA

    Head to GlobalTeas.co.
     
     
    KNOW YOUR CHOCOLATE

    > Chocolate Glossary

    > The history of chocolate.
     
     
    ________________

    *For the record, fermented, dried, and roasted is the process that almost all cacao beans undergo prior to becoming chocolate or cocoa (the exception is raw chocolate, which is not roasted). Here’s how chocolate is made.

    †Drinking chocolate consists of shaved, chopped, or roughly ground-up chocolate bars that melt into hot chocolate when mixed with hot milk or hot water (photo #5).

    ‡Cacao beans naturally contain a small amount of caffeine.


    Cup Of Chocolatea brewed chocolate beverage
    [1] Brewed in a French Press and ready to drink: 20-calorie ChocolaTea (photos #1 and #3 © Global Teas).

    Cup Of Hot Chocolate
    [2] Yes, you can add a bit of milk, just as with coffee (photo © Valrhona).

    A bag of Chocolatea ground chocolate drink
    [3] Chocolatea is sold in bags like ground chocolate or loose tea.

    Roasted Cacao Beans
    [4] Chocolatea is made from ground, roasted cacao beans (photo © Theo Chocolate).

    Two canisters of Dolfin Drinking Chocolate
    [5] Drinking Chocolate is a completely different product, composed of shaved, chopped, or roughly ground pieces of chocolate bar that melt into a drink when covered with hot milk or water (photo © Dolfin Chocolate).

    Omnom Milk Chocolate Bar
    [6] Cacao beans are most popularly turned into chocolate bars. Here’s the process (photo © Omnom Chocolate).


    CHECK OUT WHAT’S HAPPENING ON OUR HOME PAGE, THENIBBLE.COM.


    Comments off


    © Copyright 2005-2026 Lifestyle Direct, Inc. All rights reserved. All images are copyrighted to their respective owners.