|
For hard-to-buy-for people, a book in an area of their interest is something we fall back upon. Sometimes it’s a combination gift: a book about Champagne, for example, along with a bottle of it, a book on Cognac with a set of snifters, and so on.
Here we highlight books that would be welcome to people with specific food passions.
CHEESE
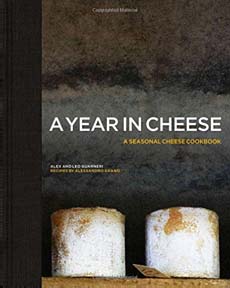
A Year In Cheese, A Seasonal Cheese Cookbook applies the seasonal eating approach to cheese. It was written by Alex and Léo Guarneri, the team behind the renowned Parisian artisan cheese shop and cheese restaurant, Androuet (established in Paris in 1909 and now in the Old Spitalfields Market in London).
What’s seasonal depends on the grazing cycle of the animal and what they graze on at which time of year. The recipes from chef Alessandro Grano are tantalizing.
CHOCOLATE
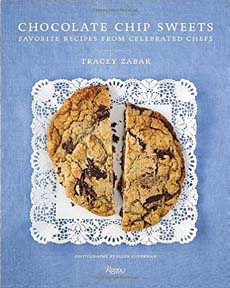
Tracy Zabar celebrates the chocolate chip cookie in Chocolate Chip Sweets: Celebrated Chefs Share Favorite Recipes. Chefs such as Dominique Ansel, Lidia Bastianich, Florian Bellanger, Daniel Boulud, Maida Heatter, Thomas Keller, Pichet Ong, Jacques Torres, Sherry Yard and other top chefs share their favorite recipes. Brownies, cakes, doughnuts, ice cream sandwiches, marshmallows, pies, puddings, waffles and more get the chocolate chip treatment.
Who could resist this book?
For people who appreciate fine chocolate, cookbooks from chocolatiers are always very interesting. No one knows chocolate more intimately, or can envision new ways to use it. This year’s chocolatier-authored cookbook is Theo Chocolate Recipes and Sweet Secrets From Seattle’s Favorite Chocolate Maker.
The authors, Debra Music and Joe Whinney, principals of Theo, worked with leading chefs to develop the more than 75 recipes in this book. They encompass chocolate for breakfast, cookies, cakes, confections, drinking chocolate, frozen desserts and dessert sauces, savory dishes, pies, puddings and tarts. Where to begin? We started with the Chocolate Bread Pudding.
SPECIAL INGREDIENTS
The next book is for cooks who seek out different ingredients. For anyone who’s bought a bottle of fish sauce for a particular Asian recipe, the challenge is what else to do with it. Open condiments decline over time, so you don’t want to tuck it out of sight. There are also plenty of home cooks who have decided not to buy a bottle for the same reasons.
|
|
|
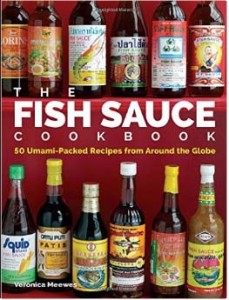
In The Fish Sauce Cookbook, 50 Umami-Packed Recipes From Around The Globe, Veronica Meewes has consulted with prominent chefs on using fish sauce as a key seasoning with popular American ingredients. This is the first cookbook to focus on fish sauce, and you can package it with a other fish sauces: naam plaa from Thailand, nuoc mam from Vietnam and numerous others.
Among those others is colatura di alici, a modern representation of garum, the fish sauce favored by the ancient Romans. Worcestershire sauce is is made with anchovy, a recipe brought back to England by a ship’s captain Captain and first sold commercially in 1837.
GENERAL COOKING
For the aspirational home cook, Mastering Sauces: The Home Cook’s Guide to New Techniques for Fresh Flavors will be a welcome addition to the cookbook shelf.
Taking a different approach from classic French and other sauce cookbooks, Susan Volland demonstrates how great cooks all over the world make sauces with impromptu drizzling and splashing. She provides the fundamental principles of great sauces: maximize flavor, manipulate texture and season confidently. Thus armed, you can add your own flair to any sauce.
There are more than 150 recipes that focus on seasonal produce, international ingredients and alternative dietary choices. She goes over the how’s and why’s of making great sauces. And at the end of it all, she provides a list of remedies for those attempts that don’t come out to your expectations.
Then there’s The Food Lab: Better Home Cooking Through Science. Kenji Lopez-Alt focuses on the science behind popular American dishes, providing easy-to-understand explanations of the interactions between heat, energy, and molecules that create great food. He shows that often, conventional methods don’t work that well, and home cooks can achieve far better results using simple new techniques.
But it’s also a cookbook, with hundreds of easy-to-make recipes and 1,000 full-color images. you will find out how to make foolproof Hollandaise sauce in just two minutes, how to transform one simple tomato sauce into a half dozen dishes, how to make the crispiest, creamiest potato casserole ever conceived, and much more.
|


|
|
FRIES
For people who love really good French Fries, Anne de la Forest’s handsome if slender volume, Frites, spans traditional, trendy, creative and yes, sweet fries recipes. The more than 30 recipes are half potato recipes, and half “other.” The other includes fries made from asparagus, beet, black radish, butternut squash, carrot, celeriac, Comté cheese, eggplant, feta, kohlrabi, panisse (chickpea paste), parsnip, polenta, pumpkin, salsify, sweet potato, turnip, and zucchini.
The sweet fries include apple, banana, pain perdu (French toast), pear and sweet potato. Savory or sweet, there are recommendations for dipping sauces and recipes for them, too. For those with reaching palates, this book is an inspiration.
PIZZA
Award-winning Executive Chef & Pizza Connoisseur, Craig Priebe, brings us The United States of Pizza: America’s Favorite Pizzas, from Thin Crust to Deep Dish, Sourdough to Gluten-Free. Chef Craig Priebe has scoured the country to present recipes forthe tastiest pies, from classics to semi-modern (smoked ham and cheddar) to of-the-moment (roasted cauliflower and salsa verde).
With beautiful photography, it gives the pizza lover a perspective on what’s happening nationwide, and the recipes to make those pies!
For people who love pizza and have a barbecue grill, there’s Grilled Pizza The Right Way: The Best Technique for Cooking Incredible Tasting Pizza & Flatbread on Your Barbecue Perfectly Chewy & Crispy Every Time. It was written by John Delpha, a 10-time award winner of the Jack Daniel’s BBQ Championship Grilling and BBQing Awards. He’s been grilling pizzas for 20 years.
Although a paperback, all the recipient will notice are the beautiful photos of grilled pizza. Each recipe includes the technique required to master it. Every type of pizza is represented: brunch, classic, cross-border, dessert, fish and seafood, flatbreads, meat, veggie and “the masqueraders,” favorite sandwiches converted to pizza.
We want to eat every one of them.
SUSHI & SASHIMI
We’ve eaten sushi and sashimi all of our life, at least twice a week. We’ve taken classes, hoping to make our own at home. If only we’d had The Complete Guide To Sushi & Sashimi, a compendium with step-by-step color photographs. It imparts hundreds of tips and techniques, that, in all of our sushi years, is still new information (and now we can finally cut squid properly!!).
|
This user-friendly book, for both novice and experienced sushi makers, has concealed wiro-bound hardcover binding, 500 photos and a whopping 625 recipes, this book is sure now our go-to guide.
BUT THAT’S NOT THE END
There are more, of course. So many food books, so little time to try recipes from each!
We just may get around to writing Food Books, Part 2.
|
|