|
While the historical record is scant, it is believed that the pasta Marco Polo brought back from China in 1295 was pillow pasta: stuffed and crimped sheets of pasta dough, a.k.a. dumplings.
And a.k.a. ravioli, too. The difference is largely local ingredients.
ASIAN DUMPLINGS & STUFFED PASTA: FRATERNAL TWINS
Noodles (spaghetti or other “long cut” pasta) had been introduced to the West centuries* before Marco Polo.
Arab traders brought the long noodles back home over the Silk Road, and then to Sicily during the Arab invasions of the 8th century.
In addition to being an everyday food, dried pasta was a boon for travelers, including soldiers. It was lightweight and required only boiling water to turn it into a hot meal. As in Asia, pasta was also added to soups.
In Italy, Chinese dumplings evolved into agnolotti, cannelloni, mezzalune (crescents), ravioli (plus the smaller raviolini and larger ravioloni), sacchette (beggar’s purses) and tortellini.
Instead Asian sauces made from soy sauce, vinegar, garlic, ginger, rice wine and/or hot sauce, among other ingredients, Italian pasta was accented with sauces made from local ingredients: cream, olive oil, Parmesan and tomatoes.
Pillow Pasta/Stuffed Pasta
Pillow pasta is stuffed pasta (pasta ripiena in Italian), but not all stuffed pasta is pillow pasta. In addition to the stuffed “pillows,” the other stuffed category includes large tubes and other shapes that are stuffed and baked, like cannelloni and jumbo shells. Other tube pasta, such as penne, rigatoni and ziti, are too small to be stuffed.
Pillow pasta can be stuffed with almost any kind of filling, either a single seasoned ingredient or combinations of different meats, cheeses, vegetables, seafood and herbs.
Here’s a brief history of pasta.
RECIPE: PORK & GINGER RAVIOLI…OR ARE THEY DUMPLINGS?
This recipe, from Chef Eric B LeVine could be ravioli. But because of the dough used (wonton wrappers) and the Asian ingredients—soy sauce, fresh ginger, lime, scallions—it could be a dumpling.
But wait: There’s also basil and Parmesan cheese, two Italian specialties.
This recipe, a fusion of Asian and Italian, illustrates how close Italian and Chinese (and other Asian) pastas can be; and not just in stuffed pasta, but in long cuts as well (mai fun = angel hair, chow fun = pappardelle, etc.).
Check out Chef Eric’s book, Small Bites, Big Flavor.
Ingredients
1 lime, zested and juiced
2 teaspoons soy sauce
1 teaspoon honey
1 tablespoon canola oil
1 teaspoon dark sesame oil
1/4 teaspoon hot red pepper flakes
1/2 pound ground pork
1/2 cup Parmesan cheese, grated
1 tablespoon fresh basil, finely chopped
2 teaspoons fresh ginger, peeled and grated
3 garlic cloves, minced
2 scallions, finely chopped
1/8 teaspoon fresh nutmeg, grated
1 egg
32 wonton wrappers
Preparation
1. MAKE the dipping sauce: Combine the lime zest, juice, honey, soy sauce, canola oil, sesame oil and pepper flakes. Whisk or shake well to combine and set aside.
2. WHISK together the Parmesan, basil, ginger, garlic, scallions, nutmeg and egg in a large bowl. Add the pork and mix very gently with your finger tips until just blended. Place the pork mixture in the fridge for 30 minutes to firm.
3. MAKE the dumplings, one at a time. Brush the flour side of the wrapper with water. Place a heaping tablespoon of the pork mixture in the center of the wrapper. Place another wrapper on top and press the edges together to seal. Use a pastry cutter† or ravioli stamp otherwise trim the edges with a zigzag pastry wheel. Repeat with the remaining filling and wraps.
4. COOK: Bring a large pot of water to a boil, add salt and cook the ravioli for 6 minutes.
|
|
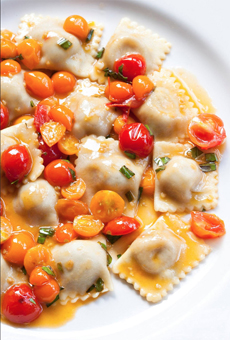


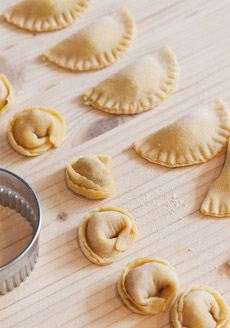
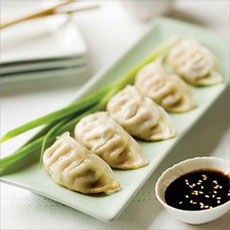
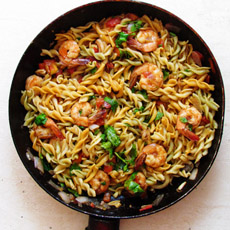
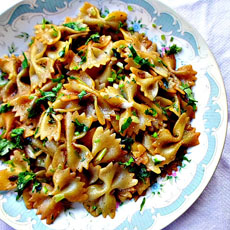
Top: classic ravioli (photo courtesy Delfino Restaurant). Second: round ravioli (photo courtesy Ristorante Morini. Third: The recipe below: Pork-Ginger Ravioli…or are they dumplings? (photo courtesy Chef Eric LeVine. Fourth: Italian mezzalune pasta (half moons or crescents) plus tortellini. Photo courtesy Eataly Chicago). Bottom: Chinese potstickers (photo courtesy Mackenzie Ltd).
|