THE NIBBLE BLOG: Products, Recipes & Trends In Specialty Foods


Also visit our main website, TheNibble.com.


TIP OF THE DAY: Ice Cream Donuts

A fun project for a long weekend: ice cream donuts.

There are two ways to look at them. One requires a donut pan and some fabrication. The other requires nothing but donuts and ice cream.

 
RECIPE #1: DONUT ICE CREAM SANDWICHES (Photo #1)

Ingredients

  • Donuts of choice (without frosting or filling)
  • Garnishes of choice: chopped nuts, cookie crumbs, mini-chips, sprinkles, etc.
  • Optional: chocolate chips or chopped chocolate for a chocolate dip
  •  
    Preparation

    1. SOFTEN the ice cream by leaving the container on the counter for 10 minutes or more.

    2. HALVE the donuts. Pile ice cream on the lower half and smooth the edges with a spatula. Add the top donut half.

    3a. ROLL the ice cream in a dish of garnishes. Wrap in plastic and return to the freezer to harden – or –

    3b. MELT the chocolate in a microwave-safe bowl. Dip part of the donut in the chocolate, then in garnishes as desired.
     
     
    RECIPE #2: ICE CREAM DONUTS (Photo #3)

    These donuts have no cakey component; they’re solid ice-cream shaped like donuts. You can add a crumb bottom for some donut effect.

    Ingredients

  • Ice cream of choice
  • Frosting
  • Garnishes of choice: chopped nuts, cookie crumbs, mini-chips, sprinkles, etc.
  • Optional: cookie crumb or cake bottom (we used purchased coffee cake crumbs, which we broke into smaller pieces)
  •  
     
    Preparation

    1. COAT the wells of the pan (photo #2) per manufacturer’s instructions.

    2. SOFTEN the ice cream by leaving the container on the counter for 10 minutes or more.

    3. SPOON the ice cream into the donut wells. Level with a spatula. Add the optional cake or cookie crumbs and lightly tamp down. Place the pan in the freezer.

    4. ASSEMBLE: Invert the pan to remove the donuts. Quickly frost, garnish and serve. Alternatively, just frost and serve the garnishes separately, in DIY fashion.
     
     
    DOUGHNUT VS. DONUT

    An old word for ball was nut; a doughnut is literally a nut (ball) of dough.

      Donut Ice Cream Sandwich
    [1] The easy way: slice a donut, add the ice cream. Paper ‘N Stitch Blog uses glazed donuts with colorful ice creams, like black cherry chip and mint chocolate chip.

    Donut Pan - Wilton
    [2] With a donut pan, you can soften ice cream and fill the circles. Refreeze, then frost and decorate (photo by Hannah Kaminsky, Bittersweet Blog.

    Ice Cream Donuts

    [3] If you invest in a donut pan, you can use it for other things. Check out 101 Donut Pan Ideas.

     
    The term “doughnut” was first used in print in 1809 by American author Washington Irving in his satirical “Knickerbocker’s History Of New York.” Irving wrote of:

    “…balls of sweetened dough, fried in hog’s fat, and called doughnuts, or olykoeks*.”

    These balls, or nuts of fried dough, are what we now call (in a smaller size) doughnut holes.

    Because the center of the cake did not cook as quickly as the outside, the softer centers were sometimes stuffed with fruit, nuts, or other fillings that did not require cooking (think of the chopped onions in the center of a bialy).

    What about the hole?

    Per Smithsonian, a New England ship captain’s mother made a notably delicious, deep-fried doughnut that used her son’s spice cargo of nutmeg and cinnamon, along with lemon rind. She filled the center with hazelnuts or walnuts.

    As the story goes, in 1847, 16-year-old sailor Hanson Crockett Gregory created the hole in the center of the doughnut. He used the top of a round tin pepper container to punch the holes, so the dough would cook evenly.

    He recounted the story in an interview with the Boston Post at the turn of the century, 50 years later.

    He effectively eliminated the need to fill the less-cooked center, and provided an inner cut-out that enabled the dough to be evenly cooked.

    Who changed the spelling to donut?

    The first known printed record of the shortened word “donut” appears (likely an inadvertent misspelling) in “Peck’s Bad Boy And His Pa,” a story by George W. Peck published in 1900.

    The spelling did not immediately catch on. That impetus goes to Dunkin’ Donuts, founded in 1950.

    While donut is easier to write, but we prefer the old-fashioned elegance of doughnut. Take your choice.

    Doughnuts didn’t become a mainstream American food until after World War I. American doughboys at the front were served doughnuts by Salvation Army volunteers. When the doughboys returned, they brought their taste for doughnuts with them [source].

    The name doughboy wasn’t related to the doughnuts, by the way. It dates to the Civil War, when the cavalry unchivalrously derided foot soldiers as doughboys. Two theories are offered:

  • Their globular brass buttons resembled flour dumplings.
  • They used flour to polish their white belts.
  • ________________

    *Olykoek is Dutch for oil cake, i.e., batter fried in oil. While dough was fried the world over, we can thank the Dutch for the sweet balls fried in hog fat that became modern doughnuts.
      

    Comments off

    TIP OF THE DAY: Make Dry Rubs For Meat & Poultry

    Spice Rub For Game
    [1] Take a look at the spices and herbs you own. Look for recipes online or use your own palate to choose what to use on your meat. These are some of the ingredients used in rubs for wild game by Wide Open Spaces.

    Spices
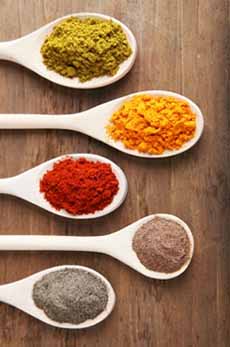
    [2] Pick what you want for your blend. Use smaller amounts of more intense spices (chiles, cumin, garlic, pepper, etc.) and larger amounts of base flavors (oregano, thyme, etc.). Use very small amounts of accent flavors like cardamom, cinnamon, lemon peel and nutmeg (photo courtesy M Magazine).

    Homemade Rubs

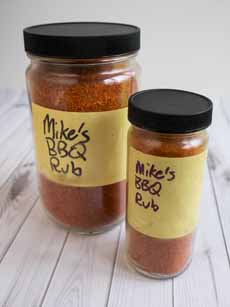
    [3] When you arrive at your signature rub, bottle it and give it as gifts. This one is from Dad Cooks Dinner.


    Just as you can throw together a vinaigrette or a marinade in one-two-three, you can make a rub for meats and poultry.

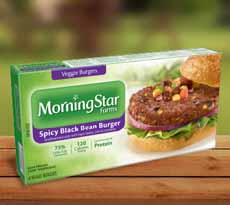
    Sure, you can buy them: But why pay big bucks for convenience foods when you can make them for pennies with ingredients you already own?

    Take a quick look at your spice shelf. Allspice, chili powder and ground chiles, cinnamon, cumin, garlic powder, lemon peel, mustard powder, nutmeg, onion powder, paprika, sage and thyme all have a place in rubs (although a limit of five or so is best).

    When you mix your own, you can also eliminate the large amount of salt blended into commercial rubs.

    Rubs:

  • Seal the flavor of the meat.
  • Form a tasty crust on the meat.
  • Enhance the color of the cooked meat.
  •  
    Rubs pull moisture from the air, as they draw up the juices from the inside of the meat. This process (osmosis) causes the meat to marinate itself as it cooks.

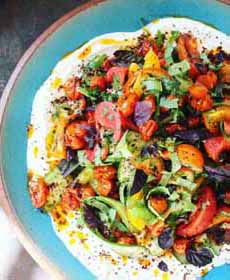
    They can also be used on fish and vegetables.

    There are two types of rubs:

  • Dry rubs are blends of herbs and spices that are rubbed onto the meat before cooking. The rubs are hand-rubbed, or sprinkled, onto on the surface of meat before it goes onto the the grill.
  • A dry rub is best on food that is cooked faster, at a higher temperature; and on food that probably doesn’t need to tenderize, like shrimp or chicken.
  • Dry rubs are also preferable on steaks and chops. Chefs generally cook them simply with salt and pepper; but if you want to add other touches of flavor, reach for a dry rub.
  • Some of the spices on your shelf are rubs, such as chili powder, curry powder, jerk seasoning and Old Bay; there are numerous rubs in the spices section, reflecting different cuisines (Cajun, Indian, etc.) or foods (barbecue, pork).
  • Rub both sides of the protein. With a whole chicken, rub the inside of the cavity as well.
  • The more time the rub has to react with the meat prior to cooking, the more the flavor it will yield.
  • Wet rubs mix the spices with oil, water or prepared mustard, to spread onto the meat. Pesto is an example of a web rub, although it’s a versatile ingredient that’s also used as a sauce.
  • Any dry rub you have can be turned into a wet rub. When a dry mix combines with the meat juices, it turns into a paste anyway.
  •  
    Today we focus on dry rubs. If you’re grilling this weekend, it’s an opportunity to try different combinations.

    Try different combinations and proportions over time. If you make too much, give it to friends or neighbors.

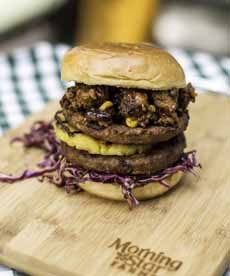
    Aim for a signature blend for each of your favorite foods: burgers, chicken, steaks, etc. When you have that eureka! moment, you can bottle it as stocking stuffers or house gifts.

    WHAT GOES INTO A RUB?

  • Sweet. White or brown sugar is a common ingredient because it is a flavor enhancer, it helps browning, and with crust formation. No other sweetener can substitute. If you’re concerned about adding sugar, one expert estimates that in a slab of ribs there’s one teaspoon of sugar.
  • Savory. Savory flavors come from amino acids called glutamates, which is why MSG has been a popular flavor enhancer. Green herbs, some spices and garlic, among others, contain glutamates.
  • Spices and herbs. If you’re looking for a certain flavor—curry, sesame, whatever—add it. Paprika is often included as a color enhancer.
  • Spicy. For some sizzle, add some heat. Common additions are black pepper, cayenne or chipotle, ginger, horseradish, and mustard powder.
  •  
    Should you add salt to a rub?

     
    To avoid over-salting, we recommend leaving salt out of a rub, and salting the meat as you normally would. Then apply the rub.

    Note that you cannot judge how a rub will taste when it’s raw. It tastes very very different after cooking.

    When the juices of the meat mix with the herbs and spices and the heat of cooking, they undergo chemical reactions. Thus, a rub may taste too hot when raw, but just right when on top of a piece of cooked meat.

    Similarly, the flavors blend together. People who don’t like a particular spice may not even know that it’s there.
     
     
    RUBS VS. MARINADES

    You don’t use a both a rub and a marinade. Just use one for flavor. If you want to make the meat less tough, a marinade that includes vinegar is better. Otherwise, Pereg Natural Foods advises:

  • Rubs self-marinate the meat, so you don’t have to continue to brush with marinade as the meat cooks.
  • Rubs add a colorful and tasteful crust to the finished meat.
  • Rubs make it easier to control the final flavor of the meat.
  • Rubs are perfect for larger pieces of meat such as spareribs, briskets, and tenderloins.
  •  
    You can apply the rub a few days before you cook the meat, wrap it up in plastic wrap or butcher paper, and place it in the fridge until you’re getting ready to cook (move it to the counter first; don’t put cold meat on the grill).

    Add a generous portion of the rub at first to the meat. After it sits for a few days, add a bit more rub before cooking.

    Ready, set, blend!


    Comments off

    TIP OF THE DAY: Make A Yogurt Moat For A Salad, With Sorrel

    There are two ideas in today’s tip:

  • Sorrel leaves in a green salad.
  • A yogurt ’moat.’
  •  
    We loved the idea of a yogurt moat (photo #1), observed at Botanica restaurant in the Silver Lake area of Los Angeles.

    In the photo, the chef piled a salad on top of a moat of garlicky sheep’s milk yogurt. The salad, which emphasizes different colors, is served for brunch or lunch with :

  • Tomatoes, both roasted and fresh (use different colors for each)
  • Cucumber ribbons
  • Bell pepper rings (red or orange)
  • Purple basil (substitute green)
  • Sorrel (substitute arugula*)
  • Garnish: drizzle of sumacaleppo-lemon compound butter (substitute flavored olive oil)
  •  
    The salad is placed in the center of the plate; the moat is spooned around it.

    It may be “just salad and yogurt,” but it has panache. The restaurant serves it with garlic toast and poached eggs.
    ________________

    *Arugula’s sharp, pepper taste contrasts with sorrel’s tart, lemony flavor.
    ________________
     
     
    WHAT IS SORREL

    Sorrel (SAW-rull) is not one of the most often-used herbs in the U.S., but it is a favorite worldwide.

    Common sorrel or garden sorrel—simply called sorrel—is a dark green (Rumex acetosa, photo #2) or variegated (photo #2) perennial herb. It’s a member of the Polygonaceae family, which includes buckwheat and rhubarb.

    Sorrel grows from early spring to late fall, but gets progressively more bitter as the months progress (a boon to those who like bitter herbs, but if it’s too bitter for you, simply blanch it).

    The plant has been cultivated for centuries. When the leaves are consumed raw they have a slight sour taste, due to oxalic acid. The tartness is enjoyed by many cultures.

  • Added to lettuce or spinach salads, or as a sandwich garnish.
  • Cooked as a vegetable in stews and soups.
  • Puréed into plain or cream soups and sauces.
  • Used instead of spinach in spanakopita, to fill vegetable or meat pies, and mixed with mashed potatoes for consumption with sausages.
  •  
    There are country-specific uses as well:

  • In Afghanistan the leaves are battered and deep fried as an appetizer.
  • In Nigeria, they are steamed and served with peanut cakes, or added to salad with onions and tomatoes.
  • In France, puréed sorrel sauce served with eggs and fish.
  •   Salad With Yogurt
    Salad atop a “yogurt moat” at Botanica | LA.
    Sorrel Sorre[/caption]
    [2] Common sorrel (photo courtesy Good Eggs).

    Variegated Sorrel
    Variegated sorrel with red veining (photo courtesy Specialty Produce). There are other, less-seen varieties in shades of purple.


    The oxalic acid in sorrel helps to cut through fatty or oily dishes.

    The next time you see fresh sorrel, pick up a bunch and experiment: Use some in a salad, some in a cooked dish.

    Sorrel is a “heart-healthy herb”—high potassium content, which lowers blood pressure and increases blood circulation. It is also loaded with antioxidant vitamins A and C.

    Sorrel, the herb, is not related to sorrel, the Caribbean drink. The later is made with hibiscus.
      

    Comments off

    TIP OF THE DAY: Veggie Burgers For Labor Day

    Island Burger Morningstar
    [1] The Island Burger has grilled pineapple, to whisk your taste buds to the tropics.
    Pita Burger Morningstar Vegetarian
    [2] The Pita Burger has Mediterranean accents, including feta cheese.

    Morningstar Grillers Prime
    [3] MorningStar Farms makes its Classic line of veggie burgers in 11 flavors (all photos courtesy Morningstar Farms).


    When one of Top Chef’s favorite chefs, Richard Blais.

    In addition to his cuisine moderne, Chef Blais previously owned the FLIP burger boutique in Atlanta.

    Using MorningStar Farms’ veggie burgers. The burger line alone is extensive (here are recipes for the entire product line):

  • Garden Veggie Burgers
  • Grillers Prime Burgers
  • Grillers Prime Burgers
  • Spicy Black Bean Burgers
  • Spicy Black Bean Burgers
  • Mediterranean Chickpea Burgers
  • Mediterranean Chickpea Burgers
  • Tomato & Basil Pizza Burgers
  • Tomato & Basil Pizza Burgers
  • Grillers Original Burgers
  • Grillers Original Burgers
  •  
    Chef Blais created four vegetarian burgers, just right for Labor Day Weekend.

    Even meat eaters like a good veggie burger—and these are great veggie burgers. Serve both beef burgers and veggie burgers, and you’ll be surprised to see who comes back for seconds on the veggie.

    National Veggie Burger Day is June 5th.
     
     
    RECIPE #1: ISLAND BURGER

    Prep/cook time is 20 minutes.

    Ingredients Per Burger

  • 1 MorningStar Farms Spicy Black Bean Burger
  • 1 tablespoon Kansas City-style barbecue sauce*
  • 2 MorningStar Farms Grillers Original Burger
  • 1 Slice pineapple, skin and center removed
  • 3 sprigs cilantro, torn
  • 1 cup shredded green or red cabbage
  • 1 tablespoon sesame oil
  • 1 teaspoon yellow mustard
  • 1 pinch salt
  • 1 pinch ground black pepper
  • 1 soft Hawaiian roll
  • ________________

    *Kansas City-style barbecue sauce is smoky and sweet. It is made by large brands like Bulls-Eye and Heinz, as well as by artisan producers.
     

    Preparation

    1. GRILL the Spicy Black Bean Burger to warm, and chop roughly while still warm. Toss with barbecue sauce. Set aside in bowl.

    2. GRILL to warm the Grillers Original Burger. Grill the pineapple slice on the hottest part of the grill, 1 minute on each side.

    3. TOSS the cilantro, cabbage, sesame oil and mustard in a bowl. Season with salt and pepper.

    4. PLACE a small handful of dressed cabbage on bottom half of the bun. Add the two Grillers Original Burgers, with the grilled pineapple slice between the patties. Top off with the Spicy Black Bean Burger-and-barbecue-sauce mix. Add the top bun half and serve.


    RECIPE #2: PITA BURGER

    Prep time is 25 minutes, cook time is 5 minutes.

    Ingredients Per Burger

  • 1/?2 cup cider vinegar
  • 1 tablespoons salt
  • 1 tablespoon sugar
  • 3 slices cucumber
  • 1 tablespoon Greek yogurt
  • 1 teaspoon dried garlic
  • 1/2 teaspoon dried cumin
  • 1 teaspoon dried mint
  • 1 slice seedless watermelon
  • 1 small handful of arugula
  • 1/4 cup feta cheese
  • 1 MorningStar Farms Grillers Original Burger
  • 1 slice pita bread, split lengthwise
  • 1 teaspoon ground turmeric
  • 1/2 teaspoon coriander seed, coarsely ground
  • 2 slices cooked canned beets
  •  
    Preparation

    1. PICKLE the cucumbers. Bring the bring vinegar, salt and sugar to a boil in a small pot. Remove from the heat; whisk in the turmeric and coriander seed. Add the sliced cucumbers. Cool in the fridge in an airtight container.

    2. MIX the yogurt with the garlic, cumin and mint in a small bowl. Set aside.

    3. GRILL the watermelon on the hottest part of the grill, 1 minute on each side. When cool enough to touch, dice into cubes.

    4. TOSS the watermelon with the arugula and feta in a small bowl. Set aside.

    5. SPREAD the herbed yogurt on the inside of the pita. Arrange the burger, cucumbers, beets, arugula, watermelon and feta inside of the pita shell.
     
     
    RECIPE #3: ROMESCO BURGER

    Perhaps the best known sauce of Spain, Romesco is a pungent, smooth, rich red sauce made from red peppers, tomatoes, ground almonds or other nuts, olive oil, garlic, and cayenne pepper. It originated in Tarragona, a port city on the Mediterranean Sea in the province of Catalonia in northeast Spain. Here’s more about romesco.

    Prep time is 30 minutes, cook time is 5 minutes.
     
    Ingredients Per Burger

  • 1 roasted red pepper
  • 1 small roma tomato, charred on the grill
  • 1 slice red onion, chopped
  • 1/2 teaspoon red wine vinegar
  • 2 tablespoons almonds
  • 1 pinch each salt and pepper
  • 2 tablespoons olive oil
  • 1/2 small head romaine lettuce
  • 1 MorningStar Farms Spicy Black Bean Burger
  • 1 large soft corn tortilla
  •   Romesco Burger - Morningstar Vegetarian
    [4] The Romesco Burger is garnished with the famed spanich tomato-almond-onion sauce.
    Tandoor Burger Morningstar Vegetarian
    [5] Taste India with the Tandoori Burger.

    Morningstar Farms Spicy Black Bean Burgers

    [6] The Spicy Black Bean Burger is MorningStar Farm’s best-selling burger.

     
    Preparation

    1. MAKE the romesco sauce. Purée the red pepper, tomato, red onion, vinegar, almonds, salt and pepper in a blender or food processor, until finely ground. Add 1 tablespoon olive oil with the blender running. Add more oil if necessary.

    2. SPRINKLE the salt and pepper and drizzle the olive oil over the romaine. Grill to warm the lettuce for 1 to 2 minutes, cut side down. Chop into 1/4 inch pieces. Set aside.

    3. GRILL the burger to warm, slice into strips and set aside.

    4. SPREAD the romesco sauce liberally over one side of the tortilla and place on grill. Lay the burger strips on top; then add the cilantro and romaine.

    5. FOLD the tortilla like a book to close, and flip to the other side. Grill for 1 minute longer and serve.
     
     
    RECIPE #4: TANDOOR BURGER

    Prep time is 25 minutes, cook time is 5 minutes.

    Ingredients Per Burger

  • 1 tablespoon yogurt
  • 1 teaspoon tandoori spice†
  • 2 tablespoons, olive oil
  • 2 small slices, eggplant
  • 1 pinch each salt and pepper
  • 1 tablespoons cottage cheese
  • 1 small handful fresh spinach, chopped finely
  • 2 slices white onion, chopped finely
  • 1 clove garlic, minced
  • 1 teaspoon garam masala
  • 3 sprigs cilantro
  • 1 MorningStar Farms Grillers Original Burger
  • 2 slices garlic naan bread, grilled
  • ________________

    †For 1 tablespoon, whisk together 1/2 teaspoon of each: cayenne pepper, ground coriander, ground cumin, ground ginger, paprika, turmeric, salt.

     
    Preparation

    1. MIX the yogurt and tandoori spice in a small bowl. Set aside.

    2. DRIZZLE the olive oil over the eggplant slices and season with salt and pepper. Grill for one minute on both sides.

    3. STRAIN the liquid from cottage cheese. Mix the cheese, spinach, onion, garlic and garam masala. Heat one tablespoon of olive oil in a frying pan over medium to low heat with and cook 15 minutes. If the mixture starts to dry, add a few drops of water to prevent burning. Set aside to cool.

    4. GRILL the burger to warm it. At the same time, grill the bread. Place the burger on the bottom of the naan bread. Top with the eggplant, spinach mixture, cilantro, and yogurt. Add the top slice of naan and serve.


    Comments off

    TIP OF THE DAY: It’s Time To Make Turnovers

    Cherry Turnovers
    [1] Turnovers can be any shape you can seal and crimp (photo courtesy Country Living Magazine).

    Cherry Turnovers
    [2] A cherry turnover from Pepperidge Farm. With the quality of the cherries and cream cheese dough in our recipe, below, no garnishing is necessary.

    Bing Cherries
    [3] Bing cherries, sweet but fleeting (photography courtesy Washington State Fruit Commission).


    Most people have never had a fresh cherry turnover.

    We make this statement categorically, because turnovers are not a commonly-found or -made food; and fresh cherries are ephemeral. Add these facts together, and the sum is that the cherry turnovers you’re likely to encounter are made with frozen cherries or cherry pie filling.

    So today, buck tradition and make cherry turnovers. The cherries are waiting for you in the produce section; and the cream cheese pastry pocket is so delicious, you’ll want to use this as your signature turnover recipe, with seasonal fruits.

    Seasonal Variations

  • Summer Fruit: berries, figs and stone fruits in (a magical combo with the cream cheese dough)
  • Fall/Winter Fruit: apple, banana, blood orange, pear, pumpkin/squash and quince turnovers in the fall and winter
  • Spring Fruit: kumquat, rhubarb and strawberry turnovers
  •  
    We adapted this recipe from one in Country Living. When you taste your first batch, there’s a good chance you’ll be back at the store for more cherries and cream cheese.

    You can leave out the crystallized ginger if you’re not a ginger fan, but it’s a wow factor.

    RECIPE: FRESH CHERRY TURNOVERS

    Ingredients For 15 Turnovers

    For The Dough

  • 2 cups all-purpose flour
  • ½ cup granulated sugar
  • 3 tablespoons chopped crystallized ginger
  • 1 teaspoon salt
  • ¾ cup unsalted butter
  • 4 ounces cream cheese
  • 4 tablespoons ice water
  •  
    For The Filling

  • 1 pound bing cherries
  • 1 tablespoon finely grated lemon zest
  • 1 tablespoon fresh lemon juice
  • 1 tablespoon cornstarch
  • ¼ tablespoon salt
  •  
    Preparation

    1. MAKE the dough: Combine the flour, sugar, ginger and salt in the bowl of a food processor fitted with a metal blade. Pulse until well blended; then add the butter and cream cheese and pulse until the mixture resembles coarse meal. With processor running…

    2. ADD the water slowly and mix just until dough comes together. Form dough into a disk, cover with plastic wrap and chill the dough for 30 minutes.

    3. FORM the turnovers: In a medium bowl, mix the cherries, lemon zest, lemon juice, cornstarch and salt together. Set aside.

    4. ROLL out the dough on a lightly floured surface and cut out 6-inch circles. Invert a 6″ diameter plate or bowl atop the dough and cut out with a pizza cutter or knife; if it’s a little larger or smaller, that’s fine. Gather and re-chill the dough scraps and repeat until you have 15 dough circles.

    5. Evenly divide the cherry filling among the dough circles, leaving an edge to fold and crimp. Dampen the edge of each dough circle and fold in half over the cherry filling. Lightly press the edges with the tines of a fork to seal each half-moon-shaped turnover. You can also cut squares or rectangles. For a triangular shape, follow these guidelines for spanakopita, making the triangle as large as you like.

    6. PLACE the turnovers on two parchment-lined baking sheets and chill for at least 30 minutes. While they chill, position the oven rack in the middle and preheat the oven to 400°F. When ready for the oven…

    7. USE a sharp knife to cut 2 or 3 small vents on top of each turnover. Place the baking sheets on the middle rack of the oven and bake until the crust is golden and cherry juice begins to ooze from the vent holes, 20 to 25 minutes. Cool turnovers on a wire rack. Store in an airtight container for up to 2 days.
     
     
    TURNOVER HISTORY

    The concept of cooking fruits and meats in pastry is thousands of years old. Given the lack of bakeware at the time—especially among the less affluent—it is easy to envision cooks of ancient eras filling squares of dough with whatever, folding the dough to seal the filling, and baking them in the fireplace.

    Turnovers can be sweet or savory and can be folded into half moons, rectangles, squares or triangles. Savory varieties are often used as a portable meal, as Americans grab a sandwich (think around the globe, from calzones to dosas to empanadas to spanakopita).

    In England, printed recipes start to appear around 1750. But given the paucity of printed cookbooks (and the literacy level of the general public), they may have been popular for centuries.

    Add to that a challenge: Turnovers were often called apple pies (apple being the most popular and widely available fruit filling).

    Sweet turnovers typically have a fruit filling and are made with a puff pastry or shortcrust pastry dough. Savory turnovers generally contain meat and/or vegetables and can be made with any sort of dough, although a kneaded yeast dough seems to be the most common in Western recipes.

    Turnovers are usually baked, but may be fried.

    Savory turnovers are often sold as convenience foods in supermarkets. Perhaps the largest number of [sweet] turnovers are sold by Kellogg’s Pop-Tarts, launched in 1965.
     
     
    MORE ABOUT CHERRIES

  • History Of Cherries
  • Types Of Cherries
  •   

    Comments off

    The Nibble Webzine Of Food Adventures
    RSS
    Follow by Email


    © Copyright 2005-2024 Lifestyle Direct, Inc. All rights reserved. All images are copyrighted to their respective owners.