THE NIBBLE BLOG: Products, Recipes & Trends In Specialty Foods


Also visit our main website, TheNibble.com.


RECIPES: Pork Fajitas With Apple Salsa & National Fajita Day


[1] Pork fajitas with homemade apple salsa (photo and recipe © U.S. Apple Association).


[2] Fajitas are typically made in a skillet, but there’s a sheet pan recipe under the next photo (photo © Good Eggs).


[3] Shrimp fajitas, made on a sheet pan. Here’s the recipe from Le Creme de la Crumb (photo © Le Creme de la Crumb).


[4] Lime is the best condiment for fajitas (photo © Christine Siracusa | Unsplash).


Peach salsa is one of the best-selling salsa flavors. But if you like to make your own salsa, summer peach season is a ways off. Mangoes are a delicious replacement; but how about apple salsa? Crisp apples provide some crunch in the salsa, and apple salsa is delicious with pork dishes and chicken dishes. Try this recipe, courtesy of the U.S. Apple Association. We also added julienned apple slices into the green salad we served on the side.

If you don’t want to use pork, substitute steak or chicken.

August 18th is National Fajita Day.

> The history of fajitas is below.
 
 
PORK FAJITAS WITH APPLE-CILANTRO SALSA

Yield: 4 servings, 2 fajitas each.

Prep & Cook Time: 2 hours 15 minutes (includes chilling and marinating time).

Apple Salsa Ingredients (2-1/2 Cups)

  • 3 unpeeled apples, cored and diced (more for optional garnish)
  • 1/2 cup cherry tomatoes, quartered
  • 1/2 ripe avocado, peeled and diced
  • 2 tablespoons sliced green onion, including top
  • 1 tablespoon chopped fresh cilantro leaves
  • 1 teaspoon granulated sugar
  • 1 teaspoon fresh lime juice
  • 1 teaspoon minced jalapeno pepper
  • 1/2 teaspoon minced garlic
  • 1/8 teaspoon black pepper
  • 1/4 teaspoon salt
  • Optional: fresh or sautéed apple slices for plate garnish
  •  
    Fajita Marinade Ingredients

    Combine in a small bowl and mix well:

  • 2 tablespoons vegetable oil
  • 4 tablespoons water
  • 4 tablespoons fresh lime juice
  • 6 large cloves garlic, finely minced
  • 3 teaspoons fresh cilantro leaves, minced
  • 1/4 teaspoon red pepper flakes
  • 1/4 teaspoon black pepper
  • 1/4 teaspoon salt
  •  
    Pork Wrap Ingredients

  • 1 pound pork tenderloin or lean pork roast
  • Fajita marinade
  • 8 flour tortillas (8-inch)
  •  
    Preparation

    1. Combine. Place all salsa ingredients in a bowl and mix well. Cover and refrigerate for several hours to meld flavors.

    2. Marinate. Place pork in a large sealable plastic bag and pour in the marinade. Cover and refrigerate for 1-1/2 hours or more, turning occasionally.

    3. Preheat grill. Drain marinated pork, saving excess marinade. Place pork on the grill and brush with leftover marinade. Grill over hot coals, turning frequently, for 8-10 minutes, until an internal thermometer reads 155-160°F. Remove from heat and place on a clean plate.

    4. Warm. Wrap tortillas tightly in foil and heat on upper grill rack for 10 minutes.

    5. Assemble. Cut pork diagonally across grain into thin slices. Arrange one-eighth of pork slices and 2 or 3 tablespoons salsa in the center of the tortilla. Fold the bottom half of the tortilla over filling and overlap sides on top. Arrange on serving plate. Garnish as desired.

    Serve with a side of brown rice and beans.

    The history of fajitas is below.


    THE HISTORY OF FAJITAS

    A popular Tex-Mex dish, fajitas were created at the end of the 1930s and beginning of the 1940s, by Mexican ranch workers in south and west Texas. During cattle roundups, animals were butchered regularly to feed the hands. Throwaway items such as the hide, the head, the entrails, and meat trimmings such as the skirt were given to the Mexican cowboys (called vaqueros) as part of their pay.

    Hearty border dishes were created by the chuck wagon cooks: barbacoa de cabeza (head barbecue), menudo (tripe stew), and fajitas or arracheras (grilled skirt steak). Given the limited number of skirts per carcass, the cut was not available commercially.

    Thus, fajitas on the grill remained regional and relatively obscure for many years, likely familiar only to the vaqueros, local butchers, and their families [source]. These are just two narrow skirts per cow, about 20 to 24 inches long and three to four inches wide once they’ve been trimmed [source].

    The word fajita has its origin in the Spanish “faja,” girdle. It referred to the little strips of meat cut from the beef skirt steak.

    The dish has evolved to include not just skirt steak but sirloin, chicken, seafood, and later, grilled vegetable Fajitas. It became a backyard and campfire staple, and ended up on Tex/Mex restaurant menus in the 1960s.

    At restaurants it is typically served on a sizzling hot metal plate with grilled bell peppers and onions.


    CHECK OUT WHAT’S HAPPENING ON OUR HOME PAGE, THENIBBLE.COM.


    Comments off

    TIP OF THE DAY: Try Different Focaccia Toppings

    Focaccia (foe-KAH-cha) is a thick Italian snack bread that is served with meals, used as a base for pizza and as sandwich bread. Basic focaccia is simple, sprinkled with salt; it can be topped with fresh herbs and ingredients as elaborate as any pizza. Popular toppings include sautéed onions and mushrooms, diced tomatoes, prosciutto and cheese—or they can be anything that appeals to the maker.

    “Focaccia is the canvas upon which you can paint,” says chef Johnny Gnall, “and your artistic freedom should know no bounds. Sure, everyone loves some herbs or cheese on their focaccia. But if you’re interested in really expanding your palate (pun intended), try looking beyond the everyday and reach a bit further into your fridge—and your imagination.”

    Check out the suggestions below as a jumping-off point, then survey your own on-hand ingredient list and get to topping! Focaccia is delicious any day of the year. If you’re a Super Bowl host, your guests will love it.

    Start with a basic focaccia recipe and try the toppings below. Enjoy a batch as you watch the Super Bowl.
     
     
    FOCACCIA TOPPINGS: MIX AND MATCH

    When you’re making a batch of focaccia, you don’t have to limit yourself to one type of topping. Feel free to “mix and match.”

    In addition to herbs and sea salt, common toppings include cherry or sundried tomatoes, cheese, olives, sautéed onions.

    Fruit toppings are also popular, cherries and figs in particular.

    Here are off-the-beaten-track options that are equally delicious.

    APPLES & PEARS
    Apples and pears, in season right now, work as focaccia toppings. Slice them very thin and lay them flat on the dough, then brush heavily with olive oil so they don’t dry out. Keep an eye on the focaccia as it bakes so that you can reapply some olive oil if the fruit gets too dry. Dust lightly with cinnamon if you’d like, but stop from heading too far in the direction of focaccia apple pie.

    BEANS
    Take your favorite cooked beans (canned black beans always work); toss them in olive oil and a generous amount of your favorite herbs, then sprinkle them atop the focaccia. You’ve just added protein and fiber that tastes like olive oil and herbs: a home run.

    CANNED TUNA & SARDINES
    Italian tuna brands are typically terrific. But as long as you use a top-grade brand, tuna is an outstanding focaccia topping. Moreover, you can use the oil it’s packed in to brush on the focaccia. The same goes for sardines or any other canned seafood. Clams and squid may seem like pushing it, but Italians will tell you otherwise. Just make sure the seafood is properly cooked and seasoned; toss it with roasted garlic to add more flavor and add some grated lemon zest.

    CITRUS
    No orange segments on your focaccia; instead, think of different ways to prepare citrus that would work well on soft bread with a hint of olive oil. Almost any citrus zest has a place, especially with a hearty green like kale or chard. Julienned pieces of preserved lemon rind are delicious, their intense flavor and saltiness softened with some crumbled goat cheese. For an even greater wow factor, top your focaccia generously with rosemary and paper-thin slices of grilled lemon or blood orange.
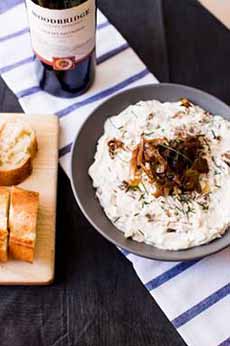
    CUSTOM SAUCES
    Create your own sauces for focaccia. An easy one is sour cream mixed with mustard and seasoned with salt and pepper. It’s a great way to add moisture to the focaccia and it goes well with almost any vegetable. Another option: Mix roasted garlic with olive oil or a bit of chicken stock to make a spreadable paste. If you’re stuck for ideas, grab an armful of jars out of the fridge and just start mixing!

    DRIED FRUIT
    Chop dried apricots and dried cherries, toss them in olive oil and sprinkle them over the focaccia, followed by a very light dusting of cinnamon. The key here is knowing that less is more; too much fruit or cinnamon will taste like a failed attempt at dessert. With just a bit of both, you still get a light olive oil flavor from the bread. It also works as breakfast focaccia.

    NORI
    Seaweed on pizza? Paired with the right ingredients, it works: Nori has umami, which pretty much makes anything better. Try a focaccia with anchovy filets, thin strips of nori, sesame seeds, chile flakes, and sea salt. You won’t find focaccia in Tokyo; but if you did, this is probably what it would be like.

    PICKLED PEPPERS
    Be they jalapeños, banana peppers, pepperoncini or another favorite, pickled peppers can bring a lot to an otherwise one-dimensional focaccia. They add brightness and acidity, both of which balance richer toppings. For a killer tag team, try focaccia with pickled peppers and shredded bacon or turkey bacon.

    PINE NUTS
    Not many nuts work on focaccia, but pine nuts—an Italian favorite—do. They get incredibly buttery when roasted and they also go well with fresh herbs. If you put basil, pine nuts, and a little Parmesan cheese on focaccia, you basically have a deconstructed pesto. Add some grated lemon zest for a final flourish.

    SEASONAL VEGETABLES
    Try butternut or your favorite squash: Peel it, cut it into a very small dice, coat generously with olive oil, and season with salt and pepper. Then sprinkle it onto the focaccia along with your favorite herbs (rosemary works great) and bake. Hearty winter greens (kale, chard, spinach, and even Brussels sprout leaves) are also ideal focaccia toppings; their edges get crispy in the oven and add a pleasant dimension of texture.
     
     
    Check out the different types of bread in our Bread Glossary.
     
     
    > THE HISTORY OF FOCACCIA
     
     
    > THE HISTORY OF BREAD


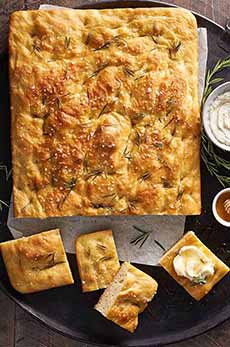
    [1] Basic focaccia can be completely plain, or topped with rosemary and sea salt (photo © King Arthur Flour).


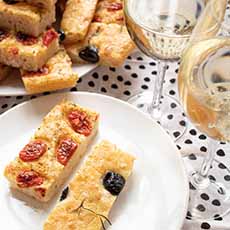
    [2] Popular toppings include cherry tomatoes, Kalamata olives, and sauteed onions (photo © Paula Berto | Unsplash).


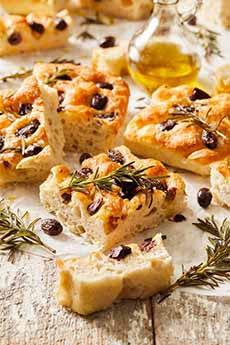
    [3] Kalamata olive with rosemary is a popular combination. Here’s the recipe (photo © DeLallo).


    [4] Add artichoke hearts for more sophistication (photo © Maman Restaurant | NYC).


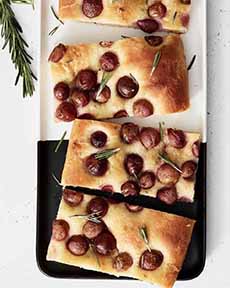
    [5] Grape focaccia. Here’s the recipe (photo © King Arthur Flour).


    [6] Blueberry focaccia. Here’s the recipe (photo © DeLallo).


    CHECK OUT WHAT’S HAPPENING ON OUR HOME PAGE, THENIBBLE.COM.

     
    &nbsp
      

    Comments off

    How To Make A Bánh Mì Sandwich & Banh Mi History


    Bánh-mi, a Vietnamese submarine sandwich
    on a baguette. Photo © Ppy2010ha |
    Dreamstime.


    A BRIEF HISTORY OF BANH MI SANDWICHES

    When Europeans colonized Asia, they brought Western bread to the table. In French Indochina, Vietnam, that emblem of French cuisine, the baguette, was introduced; as were sandwiches.

    Baguette-based sandwiches were called bánh mì (pronounced bon MEE), a Vietnamese word that refers to all types of bread. For sandwiches, it is made in individual portions, like hero sandwich rolls.

    The recipe is more airy than the conventional baguette, with a thinner crust. It actually uses a combination of rice and wheat flours, cutting back on the gluten.

    In recent years, bánh mì have made their way west, to the U.S. From hole-in-the-wall bánh mì sandwich shops to trendy lunch bistros to Whole Foods Markets, these fresh, tasty sandwiches have become the rage in neighborhoods lucky enough to have them.

    More often than not, pork is the meat of choice. But the defining characteristics of these sandwiches are their abundance of pickled vegetables and fresh herbs.

    Chef Johnny Gnall shares the basics of making bánh mì—just in time to serve them as Super Bowl fare.

     
    THE INGREDIENTS: BREAD

    Some cooks hold that the bread is the most important part of this sandwich, so go out of your way to find the right type. If you don’t live near a Vietnamese bakery or grocer, look for semolina flour rolls, which give you more room for fillings than a classic baguette. The roll should be crisp on the outside (if not, then juices from the ingredients will make it soggy) and very soft on the inside.

    Vietnamese bakeries create a roll that is more crust than center (as opposed to American breads that tend to be the opposite). So if you have a roll with an excess of soft white inside, tear some out: You want as much room for your fillings as possible!

    PORK

    Braised is the name of the game here: a slow braised pork shoulder works great, cooked to the point that you can pull it apart. The seasoning is up to you, but there’s nothing wrong with keeping it simple: salt, pepper, maybe a few chiles. Once the pork is mouthwateringly tender, pull it apart so that you can build layers easily. Let it drain for a few minutes to remove wetness that will create a mushy sandwich.

    PICKLED VEGETABLES

    Here’s an easy recipe to pickle vegetables. As for choice of vegetables, you can’t go wrong with carrots and cucumbers. You can julienne both or, for contrast, thinly slice the cucumber in circles. Radishes are also a great addition; red bell peppers add color; and pickled onions make almost anything better.

    FRESH CILANTRO

    You really won’t find a bánh mì sandwich without cilantro. Its leafy, flavorful goodness helps to round out the other flavors in the sandwich and makes it taste just right. But if you are not a cilantro fan, follow your own path by substituting other fresh herbs. Basil, mint or parsley will do the trick.

    Spread

    Every sandwich needs a spread. Chef Johnny’s favorite for bánh mì is sambal– (chile paste) or sriracha– (hot sauce) flavored aïoli (garlic mayonnaise).

    Just whisk together aïoli (store bought mayo works fine, whether or not you add garlic) and your preferred amount of the spicy paste or sauce. If spicy isn’t your thing, try honey, a little soy sauce, even some teriyaki sauce. Just mix in small amounts at a time: You want flavor, but you don’t want a teriyaki sandwich.
     
     
    A RECIPE TAILORED TO PERFECTION

    Once you’ve perfected the basic bánh mì sandwich, feel free to make it a bánh you, personalizing your culinary creation to suit your needs.

    Gluten-free? Turn the bánh mì into a wrap with a corn tortilla or rice paper. Watching the cholesterol? Substitute chicken or fish for the pork and use a lowfat spread.

    You can even leave the meat out altogether and just up the amount of veggies and toppings. It may not be traditional, but it’s tasty.

    Now start building: bread, spread, pork/other protein, veggies, herbs, spread. Enjoy!
     
     
    HOW ABOUT A BÁNH MÌ BURGER?

    Here’s a recipe from McCormick.

    And here’s another bánh mì burger recipe.
     
     
    > CHECK OUT THE DIFFERENT TYPES OF SANDWICHES IN OUR SANDWICH GLOSSARY


    Comments off

    TIP OF THE DAY: How To Emulsify Salad Dressing & Champagne Vinaigrette Recipe

    Chef Johnny Gnall shares a professional tip for making the best salad dressings: Emulsify them! The oil and vinegar won’t separate—at least, not for a while.

    “A velvety, fully emulsified dressing can really make a big difference when it comes to presenting a salad,” says Chef Johnny.

    “Its creamy texture and body cling better to the salad ingredients, making each bite that much more flavorful. Even the look is nicer: Emulsified dressings have a really lovely sheen that is nothing short of sexy.

    “But most people don’t bother to create emulsified dressings at home. Perhaps there is simply a lack of familiarity with the process; or maybe people just don’t know what they’re missing.

    “At any rate, there’s no need to whisk your arms to exhaustion when you make vinaigrettes. Simply grab the blender!”

    Here’s the easy process from Chef Johnny, including four salad dressing recipes. Two of them—Champagne Vinaigrette and Truffle Vinaigrette—are just right for a romantic Valentine’s Day dinner.
     
    CHAMPAGNE VINAIGRETTE RECIPE

    The biggest factor in getting a dressing or vinaigrette to emulsify (and stay that way) is some patience early in the process.

     
    This vinaigrette was not emulsified, and
    has separated into two layers. Photo by
    Elena Thewise | IST.
     
    It’s all about incorporating the oil and vinegar together gradually. Here’s an example, using champagne vinegar and champagne (or other sparkling wine) to make a glamorous champagne vinaigrette:

  • Start by combining 1/4 cup of champagne vinegar and 1/8 cup of champagne into a blender on medium speed.
  • Slowly drizzle the oil into the vinegar as it spins, creating as thin and consistent a stream as possible (use a measuring cup with a lip).
  • Start with a couple of tablespoons at a time. The more oil you incorporate into your vinaigrette, the more stable it will become, and the more quickly you can incorporate the rest of the oil.
  • When everything is mixed, season with salt and pepper (while still spinning in the blender).
     
    The result should be a smooth, unified dressing with a nice, velvety mouthfeel. Without any stabilizers (chemicals like xanthan gum, which professional chefs often use), it will not stay emulsified forever. So for best results, wait until close to serving time to emulsify the dressing.
  • Use this recipe as a template for any vinaigrette. Substitute balsamic vinegar for the Champagne vinegar, use cider or wine vinegar with a half teaspoon of Dijon mustard, or the variations below.
     
    MORE GOURMET VINAIGRETTE RECIPES

    For more salad flourish, try these gourmet vinaigrette recipes from Chef Johnny.

  • Cherry Vinaigrette: Bring 1 cup of dried cherries to a boil in 1 cup of pomegranate juice. Steep for ten minutes, then cool. Blend cherries until smooth (use only as much juice as you need to facilitate puréeing the cherries) with 1/2 cup of red wine vinegar, then drizzle in 1-1/2 cups of olive oil. Season with salt & pepper.
  • Honey Lime Vinaigrette: Add 1/4 cup lime juice and 1/8 cup honey to a blender and mix. Slowly drizzle in 3/4 cup of olive oil. Season with salt, pepper, plus chile powder or cayenne, as desired.
  • Truffle Vinaigrette: Reduce half a bottle of champagne to high viscosity (about 1/2 to 1/4 of original volume). Blend with an equal amount of champagne or white wine vinegar (altogether you should have about 2 cups of liquid in the blender). Add 1/4 cup of canned truffle peelings, then drizzle in 3 cups of “truffled” oil (1 cup of truffle oil blended with 2 cups of olive or canola oil). Season with salt, pepper and lime juice, as desired.
  •  
    THE PROPORTION OF OIL TO VINEGAR

    The traditional vinaigrette ratio is 3 parts oil to 1 part vinegar; the recipes above are written as such. But the important thing to keep in mind is that you are the only one who knows exactly how acidic and how viscous you want your dressing to be.

    More oil will mute flavors but add body and mouthfeel; more acidity can be helpful if the salad ingredients have stronger flavor (think chicories or heartier greens).

    Just pay attention to the dressing as you work and add ingredients in small increments at first. Once you become comfortable with the process, you’ll get the feel of exactly how much of each component you want.
     
    Find more recipes and our favorite oils and vinegars.


    Comments off

    Healthy Onion Dip Recipe

    Editor’s Note: The producer of the video has removed it from circulation. But you can use the ideas below to make a delicious dip.

    Have you planned your Super Bowl menu yet? Are you looking for healthy options?

    In the chips-and-dips department, we save on fats with Popchips potato chips and go for the more nutritious whole-wheat pretzels. Both products are just as delicious as their less-healthy counterparts.

    Making a yummy fat-free or low-fat dip is easy. In this video recipe, you’ll see how to make a delectable onion dip with caramelized onions, fresh chives, and nonfat yogurt.

    We have three tips to add to those in the video:

  • Use nonfat Greek yogurt—it’s thicker, creamier and closest to sour cream.
  • Caramelize the onions in heart-healthy olive oil. Here’s the separate recipe to caramelize the onions. While you’re at it, caramelize lots of onions and keep them in the fridge to add to baked potatoes, burgers, eggs, main course proteins, sandwiches and more.
  • Never use pre-ground pepper. Always freshly grind it with a pepper mill.
  •  


    Caramelized onion dip (photo © Robert Mondavi Winery).

     
    MORE DIP RECIPES

    Another healthy recipe is this white bean dip, which is dairy-free and packed with bean protein, fiber and other nutrition.

    Use the pull-down menu at the right for more dips and spread recipes.

    And don’t over look the Tequila Guacamole!


    CHECK OUT WHAT’S HAPPENING ON OUR HOME PAGE, THENIBBLE.COM.


    Comments off

    The Nibble Webzine Of Food Adventures
    RSS
    Follow by Email


    © Copyright 2005-2024 Lifestyle Direct, Inc. All rights reserved. All images are copyrighted to their respective owners.