THE NIBBLE BLOG: Products, Recipes & Trends In Specialty Foods


Also visit our main website, TheNibble.com.

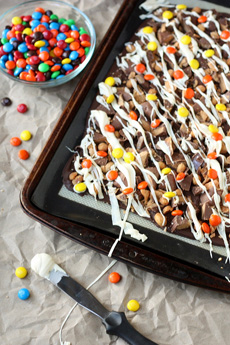
TIP OF THE DAY: Make Bark From Leftover Halloween Candy

halloween-bark-completely-delicious-230

Chop up those miniatures, add whatever else
you have and make bark. See the recipe
above at CompletelyDelicious.com.


Many American households woke up today to lots of Halloween candy. You can eat some of it as is, but we especially like this solution from BrownEyedBaker.com, who adapted it from this Bon Appetit recipe:

Turn it into chocolate bark studded with pieces of Halloween candy.

And on top of that, make it an annual tradition. We hereby proclaim that the day after Halloween is Leftover Candy Bark Day.

Use whatever candy appeals to you. If you’re not sure if certain combinations work (Junior Mints and Peanut Butter Cups, for example), pop them into your mouth and see how they blend.

If you need to round out the ingredients, add whatever you have at home: baking chips, cookie pieces, nuts, potato chips, pretzels, shredded coconut, and so on.

You’ll also need a base chocolate to hold all the pieces. You can use milk, semisweet or white chocolate. We bought two bags of Guittard semisweet chips and one bag of white chocolate chips at our supermarket.

 
What should you do with the finished bark?

  • Bring it into work or school.
  • Give some to anyone who didn’t participate in trick-or-treating.
  • Serve it on game day.
  • Keep it as your own stash, enjoying a piece per day.
  •  
    RECIPE: LEFTOVER HALLOWEEN CANDY BARK

    Ingredients For About 2 Pounds/30 Servings

    This is just a guideline; use whatever you have. The ingredients below focus on peanut butter-flavored candies. Prep time is 15 minutes, cook time is 1 hour.


  • 1 pound chocolate, chopped
  • 3 Butterfinger candy bars (or 8 fun-size bars), cut into 1-inch pieces
  • 3 Heath candy bars (or 6 fun-size bars), cut into ¾-inch pieces
  • 8 Reese’s peanut butter cups, each cut into 8 wedges
  • ¼ cup honey roasted peanuts
  • 3 ounces white chocolate, chopped
  • ½ cup M&Ms, Peanut M&Ms, Reese’s Pieces or a mix
  •  
    Preparation

    1. LINE a 12 x 12-inch* baking pan or a baking sheet with parchment paper; set aside.

    2. PLACE the chopped chocolate in a medium bowl and microwave at 50% power in 30-second increments, stirring after each, until it is completely melted and smooth.

    3. POUR the chocolate onto the prepared baking sheet and, using an offset spatula, spread it into a thin layer (¼-inch thick yields about a 12×10-inch rectangle*).

    4. SPRINKLE the melted chocolate with the chopped Butterfingers, Heath bars, peanut butter cups and honey roasted peanuts, making sure all pieces touch the melted chocolate so they adhere. Lightly press down on them as an extra effort to make sure the candy adheres to the chocolate. Refrigerate for 30 minutes.

    5. MELT the white chocolate using the same method as the bittersweet chocolate in Step 2, until completely smooth. Using a spoon, drizzle the white chocolate over the chilled bark in a zigzag pattern.

    6. SCATTER the M&Ms and/or Reese’s Pieces over the white chocolate drizzle, and again press to make sure the candy adheres to the melted white chocolate. Chill again until the white chocolate is set, about 30 minutes.

      halloween-bark-tasteofhome-230sq

    /home/content/p3pnexwpnas01 data02/07/2891007/html/wp content/uploads/halloween candy bark browneyedbaker 230
    TOP PHOTO: Add cookies to your Halloween Bark. Photo courtesy Taste Of Home. Here’s the recipe. BOTTOM PHOTO: Peanut-oriented bark (recipe above). Photo courtesy BrownEyed Baker via Bon Appetit.

     
    7. CUT or break the bark into irregular pieces and serve. Store leftovers in an airtight container in a cool place or in the fridge.

     
    *You can use whatever size pan or sheet you have. You don’t have to spread the chocolate to cover the entire area. Just keep it 1/4-inch to 1/2-inch thick and the candies pressed into it will add the heft.
      

    Comments off

    RECIPE: Chicken Chili Bake with Chipotle Cheddar Biscuits

    chicken chili chipotle cornbread
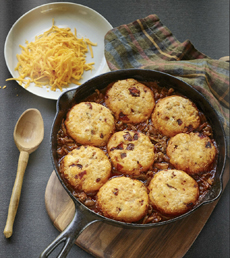
    [1] Here’s a hearty chili and chicken dish for game day. We made extra biscuits. Who can resist Cheddar Chipotle Buttermilk Biscuits? (photo © Wisconsin Dairy).

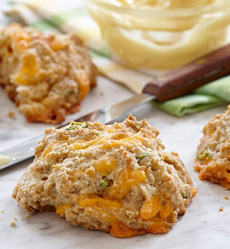
    Cheddar Jalapeno Biscuits
    [2] We served the extra biscuits with honey butter. Here’s the recipe (photo © McCormick).

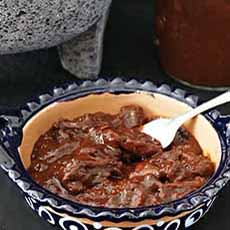
    Chipotles In Adobo Recipebr />
    [3] Chipotles in adobo sauce. You can buy them canned (next photo) or make your own. Here’s the recipe (photo © Venturists).

    Chipotle Chiles In Adobo Sauce
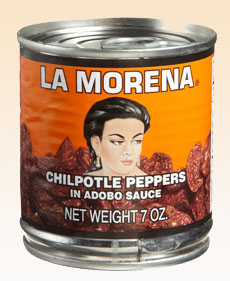
    [4] There are many brands of chipotle in adobo sauce. Hot and spicy La Morena combines smoked red jalapeños, onion, tomato and spices (photo © La Morena).

    Dried Whole Chipotle Chiles
    [4] Dried whole chipotle chiles. A chipotle is a smoke-dried ripe (red) jalapeño chili chile pepper (photo © iGourmet).


    We’re having a small group over tomorrow to watch the New York City Marathon, and are making the same recipe that was popular with them last year.

    We’re doubling the recipe, so we can have leftovers and because fights almost broke out over the Chipotle Cheddar Buttermilk Biscuits.

    National Totally Chipotle Day is May 5th.

    > The history of chile peppers.

    > The different types of chiles.
     
     
    RECIPE: CHICKEN CHILI BAKE WITH
    CHIPOTLE CHEDDAR BISCUITS

    Ingredients For 4-6 Servings
     
    For The Chili

  • 2 tablespoons olive oil
  • 2 pounds bone-in, skin-on chicken thighs
  • Salt and black pepper
  • 1 onion, chopped
  • 1 clove garlic, minced
  • 4 teaspoons chili powder
  • 1 teaspoon ground cumin
  • 1-1/2 cups crushed tomatoes
  • 1-1/2 cups chicken broth
  • 1 can (15 ounces) pinto beans
  •  
    For The Biscuits

  • 2 cups flour
  • 1-1/2 teaspoons sea salt
  • 1 tablespoon baking powder
  • 1/4 cup (1/2 stick) butter, cut in small cubes
  • 1 cup buttermilk
  • 1-1/2 cups (6 ounces) Wisconsin cheddar cheese, shredded
  • 2 tablespoons chipotles in adobo, any seeds removed, chopped and patted dry
  •  
    Preparation

    1. MAKE the chili: In a deep cast iron skillet or Dutch oven, heat the oil over medium-high heat. Season the chicken thighs with salt and pepper. When the pan is hot, brown the chicken on both sides, about 4 to 5 minutes per side. (You may need to do this in 2 batches–do not overcrowd the pan.) Transfer the chicken to a plate and set it aside.

    2. DISCARD all but 1 tablespoon of oil from the pan and return it to medium heat. Add the onions and cook until they begin to soften, 5 to 6 minutes. Add the garlic and cook for 1 minute. Add the chili powder and cumin, mix to combine, and cook for 1 minute. Add the crushed tomatoes and chicken broth.

    3. INCREASE the heat to medium-high and bring to a simmer. Return the thighs to the pan and nestle them in the tomato sauce mixture. Reduce the heat to low; cover and simmer 35 to 40 minutes.

    While chicken simmers, prepare the biscuit dough.

    4. HEAT the oven to 450°F. In a large bowl, whisk the flour, salt, and baking powder. Cut in the butter with a pastry blender or 2 knives until the mixture is crumbly. Add the buttermilk and cheese; stir until just combined. Fold in the chopped chipotles.

    5. TURN the dough onto a floured work surface. Flatten and gently fold the dough over onto itself 5 or 6 times. Press into an 8-inch circle, about 1-inch thick. With a floured biscuit cutter or cookie cutter (about 2.75-inch diameter), cut the biscuits. Press the dough scraps together and cut additional biscuits.

    6. REMOVE the chicken thighs when they have reached 165°F internal temperature on a meat thermometer. Place on a cutting board to cool slightly.

    7. ADD the beans to the tomato sauce mixture and keep the pan over low heat. Remove the skin and bones from the chicken and shred the meat using two forks. Return the shredded meat to the pan and mix well. Top the chili mixture with the biscuits so that they barely touch. Place the pan in the oven and bake for 20 minutes or until the biscuits are golden brown.

    If you are baking extra biscuits, bake them on a parchment-topped baking sheet.


    CHECK OUT WHAT’S HAPPENING ON OUR HOME PAGE, THENIBBLE.COM.


    Comments off

    TIP OF THE DAY: Pudding Parfaits

    Pudding Parfaits
    If your crowd is elegant, use finer ingredients
    than crushed Oreos and M&Ms. Photo
    courtesy Gather By Damico | Minneapolis.
     

    Add a special element to any small party, or even a quiet evening with the family, by putting together a mix and match pudding parfait bar. It’s a popular annual event at our place; and unlike ice cream parfaits, pudding doesn’t melt.

    If you don’t have glass dessert dishes, use juice glasses or wine glasses so people can enjoy their layering talents.

    You can make the pudding or buy it. At different times. we’ve made instant pudding or cooked pudding, even cooked from scratch (mixing and measuring all the ingredients). Sophisticated palates will prefer the cooked variations.

    Here’s what else you need:

    MIX & MATCH PUDDING PARFAITS

    Basic Ingredients

  • Pudding (offer several flavors, e.g. banana, butterscotch, chocolate, vanilla, lemon)
  • Crushed cookies (chocolate chip, chocolate wafers, gingersnaps, grahams, vanilla wafers)
  •  
    and/or

  • Cake and brownie cubes
  •  
    Crunchy Or Chewy Layers

  • Granola
  • Nuts (our favorites are pistachios, candied peanuts and spiced pecans)
  • Small candies (candy corn, chocolate chips/flavored chips, M&Ms, mini marshmallows, toffee chips, shredded coconut)
  • Berries or diced fruit
  •  
    Creamy Layers

  • Cherry pie filling, fruit purée, fruit curd or preserves
  • Caramel sauce, chocolate sauce, dulce de leche, marshmallow cream
  • Whipped peanut butter (use Jif Peanut Butter Whips or make your own)
  • Whipped cream or other topping
  •  

    Customize the ingredients to your crowd and the occasion. If you’d rather have pistachio or maple pudding, team colors, a layer of crushed peanut butter cups or Corn Flakes, and so forth, by all means set them out!


    NEW PRODUCT: TRUWHIP 100% NATURAL WHIPPED
    TOPPING

    If you like frozen whipped topping but not all the chemical additives, now there’s an all-natural alternative.

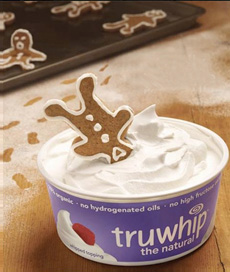
    Truwhip is the first frozen whipped topping that is 100% natural and gluten-free. Made from plant-based ingredients, it contains no high fructose corn syrup, no hydrogenated oils, no polysorbate 60, no trans fats and no GMOs.

    It’s also gluten-free and certified kosher (dairy) by OU.

    Truwhip Natural and Truwhip Skinny look just like the other stuff and can be used in the same way:

  • In coffee and hot chocolate
  • As a dessert topping
  • In parfaits sundaes
  • For snacking (cookie sandwiches, anyone?)
  •  
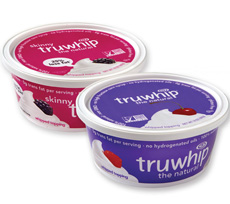
    Truwhip Natural has 30 calories, 20 from fat, per two-tablespoon serving. Truwhip Skinny has 25 calories, 15 from fat.

    Discover more at Truwhip.com.

    In terms of the flavor, to quote one of our tasters:

    “It tastes different from Cool Whip. You kind of get used to all those chemicals.”

    It tastes like what it is: cool, creamy and natural.


    truwhip-gingerbread-man-ps-230

    Truwhip Cartons

    Truwip, in Natural (regular) and Skinny (reduced fat). Photos courtesy Peak Foods.


    Comments off


    © Copyright 2005-2026 Lifestyle Direct, Inc. All rights reserved. All images are copyrighted to their respective owners.