THE NIBBLE BLOG: Products, Recipes & Trends In Specialty Foods


Also visit our main website, TheNibble.com.

TOP PICK OF THE WEEK: Pure Leaf Tea House Collection

Pure Leaf Lemon Honeysuckle Tea

Pure Leaf Fuji Apple Ginger
The New Pure Leaf Teahouse Collection from Pepsico.


Pepsico has made iced tea more elegant with its new line of Pure Leaf bottled teas, the Tea House Collection. Debuting in select markets nationwide, the teas are certified USDA Organic—and so delicious, we can’t get enough of them!

A super-premium line of the finest organic tea leaves brewed with fruits and herbs, the debut collection has three elegantly layered flavors:

  • Fuji Apple & Ginger green tea
  • Sicilian Lemon & Honeysuckle black tea
  • Wild Blackberry & Sage black tea
  •  
    In signature glass bottles, tall and squarish, both the glass and the metal cap are 100% recyclable. The sugar is restrained—almost 50% less than most sweetened bottled teas—allowing the sophisticated flavors to shine through. Each 14-ounce bottle from the Tea House Collection has just 90 calories.

    We “stretched” our bottles by drinking the teas from ice-filled rocks glasses. Some colleagues—we won’t name names—added shots of gin and vodka to create “Tea-tinis.”
     
    ABOUT PURE LEAF

    There are 8 flavors of sweetened Pure Leaf teas, 2 diet flavors and 3 unsweetened flavors with zero calories—all in 18.5-ounce plastic bottles (you can find the full collection here). The brand recently introduced Unsweetened Black Tea and Unsweetened Green Tea.
     
    The Unsweeted Green Tea is really special, with a delightful undertone of honeysuckle (there’s no honeysuckle in it; the flavor comes from the particular tea leaves). Who needs sweetener?

    Good job, Pure Leaf!

    Here’s a store locator.


    Comments off

    TIP OF THE DAY: Make Your Own Corn Tortillas

    Do something different for Cinco de Mayo: Make your own corn tortillas.

    Americans eat lots of tortillas: Back in 2000, the Tortilla Industry Association estimated that Americans consumed approximately 85 billion tortillas (not including tortilla chips). They haven’t updated their website information, but we can safely assume that tortilla sales have only gone up. [Source]

    Yet the majority of us have never have seen handmade tortillas. Most Mexican restaurants and retailers have machine-made tortillas, pressed very flat with added preservatives to extend their shelf life.

    Tortillas are a flatbread (see the different types of bread). In a tortilleria (tortilla bakery) or Mexican restaurant, masa (cornmeal dough) is rolled into small balls of dough, flattened and cooked them quickly on a hot skillet. They require only one ingredient—masa harina, a special cornmeal—plus water.

    Like fresh-baked loaves of bread, fresh-baked tortillas are heavenly—and much faster to make. They have no fat or preservatives, so must be eaten the day they’re made (or stored in the fridge for 2-3 days).

    If you don’t have a local tortilleria, it’s easy to make your own. The recipe is below.

    > Also below, the different forms of ground corn (cornmeal, hominy, masa, etc.).

    Corn tortillas vs. flour tortillas.>


    THE HISTORY OF TORTILLAS

    Before wild yeast was harnessed by man, bread meant flatbread the world over: arepa, bánh, bannock, focaccia, injera, johnnycake, lavash, matzoh, naan, piadina, pita, pizza, puri, roti, tortilla and dozens of others.

    Tortillerias are native to Mexico and Central America, where they remain a staple food. The oldest tortillas discovered by archaeologists date back to around 10,000 B.C.E., made of maize (maize—corn—is native to Central America). The dried corn kernels were ground into cornmeal, which was mixed with water to make a dough called masa.

    When Hernán Cortés and his conquistadors arrived in what is today Mexico (on April 22, 1519), they encountered the native women making tortillas—flat corn bread. In the Aztec language Nahuatl, it was called tlaxcalli (teu-ax-CAH-lee). The Spanish called them tortillas, little cakes.

    Originally hand-flattened, “technology” most likely evolved to flattening with an implement, and later to manually operated wooden tortilla presses, flattening the tortilla dough one by one. Modern machinery can produce up to 60,000 tortillas an hour.

    Tortillas are now wheat flour in addition to maize. Typically, corn tortillas are used for tacos, flour tortillas for burritos.


    Tortillas Recipe
    [1] The dough is rolled into small balls, eachh of which becomes a tortilla (photo © LoveAndOliveOil.com).

    Tortillas Recipe
    [2] The balls are flattened and placed on the grill (photo © Jim Damaske | Tampa Bay Times).

    Tortilla Recipe
    [3] Beautiful, fresh tortillas (photo © TheGumDropButton.com).

     
    Women Making Tortillas
     
    Mexican women making grits in a work by Carl Nebel, 1836.
     
     
    THE DIFFERENT FORMS OF GROUND CORN

    Unless you work with these products regularly, you can’t be expected to know that all arground cornmeal, dried corn that’s ground down into smaller, coarse bits.

  • Corn flour is the most finely-ground maize. When nixtimalized, it becomes masa harina, used to make tortillas and other flat breads. Compare it in uses to all-purpose wheat flour: for fried food batter (start with a 50:50 mix of wheat and corn flours, for dredging, pancakes, etc.).
  • Cornmeal, also spelled corn meal, is coarse-ground maize (corn). It is used for arepas, grits for breakfast cereal or dinner sides, cornbread, fried foods, gluten-free cakes and pie crusts, hush puppies, Indian Pudding, shrimp and grits, and many other recipes.
  • Cornstarch is a thickener made from refined maize starch. It is a very fine powder.
  • Grits are hulled and coarsely ground grain. Grits can be made from any cereal, although corn grits are the norm. Here are uses for grits for breakfast, lunch and dinner.
  • Hominy grits are the same thing as grits. Grits is the shortened term for hominy grits.
  • Masa harina, meaning “dough flour for tamales,” is very fine-ground nixtimalized corn used for tortillas and tamales.
  • Masa and hominy are both nixtimalized corn kernels, but hominy is ground from white corn.
  • Nixtimalization is a process that soaks the grain kernels in an alkaline solution, usually limewater—a diluted solution of calcium hydroxide. The kernels are then rinsed. This loosens the hulls from the kernels and softens the corn. Masa harina is nixtimalized corn,
  • Polenta is a paste or dough made from medium- or coarse-ground cornmeal. It is cooked, formed into a roll and then fried or baked.
  • Southern grits are made from a different type of corn than polenta. Grits are made from dent corn; polenta from Italy is made from flint corn. Flint corn holds its texture better, which is why grits are the consistency of porridge and polenta is coarser and more toothsome.
  •  
     
    RECIPE: HOMEMADE CORN TORTILLAS

    All you need to make tortillas is masa harina and water. Masa harina, Spanish for dough flour, is the corn flour (corn meal) used to make tortillas and tamales. You can’t substitute regular cornmeal: Masa harina is specially treated corn (see the next section).

    You can find masa harina in any Latin American market or another market with a good Latin American foods section. We prefer Bob’s Red Mill brand, which we pick up at Whole Foods. Rick Bayless uses Maseca brand. Since the cornmeal provides the only flavor in the tortilla, go for the freshest, best quality product. And don’t buy “instant.”
     
    Ingredients For 15 Tortillas

  • 1-3/4 cups masa harina (substitute 1 pound fresh smooth-ground corn masa*)
  • Water
  •  
    ________________________________

    *If you’re near a tortilleria, you may be able to purchase fresh, smooth-ground corn masa. On the other hand, if you’re at a tortilleria, you can purchase the tortillas freshly baked.


    Masa  Harina Bob's Red Mill
    [4] All you need to make tortillas: masa harina and water. Because the corn flour is the only flavor to the tortilla, buy the best (photo © Bob’s Red Mill).

    51L2KlaJw7L._SX258_BO1,204,203,200_
    [5] The tortilla recipe is from Rick Bayless’ great book, Everyday Mexican (photo © W.W. Norton, Inc.).


    Preparation

    1. MEASURE the masa harina into a bowl and add 1 cup plus 2 tablespoons of hot tap water. Knead with your hands until thoroughly combined. Cover and let stand 15 minutes. (If using fresh-ground masa, available from a tortilleria, scoop it into a bowl, break it up and knead a few times until smooth.)

    2. SET a large griddle (one that stretches over 2 burners) or 2 skillets on your stovetop. Heat one end of the griddle (or one skillet) to medium, the other end (or another skillet) to medium-high.

    3. SQUEEZE the dough gently. If it is stiff (it probably will be), knead in some water, 1 or 2 teaspoons at a time, until the dough feels like soft cookie dough: not stiff, but not sticky. Divide the dough into 15 pieces, rolling each into a ball. Cover with plastic.

    4. CUT 2 squares of a plastic bag, 1 inch larger than your tortilla press (we used our George Forman grill with the flat plates). Open the press and lay it on one piece of plastic. Lay a dough ball in the center, and gently mash it. Top with the second piece of plastic and close press. Gently flatten the dough into a 1/8-inch-thick disk. Peel off the top piece of plastic.

    5. FLIP the tortilla onto your right hand (if you’re right-handed); the top of the tortilla should line up with the side of your index finger. Gently roll it onto the side of the griddle (or skillet) heated to medium. Let the bottom of the tortilla touch the griddle, then lower your hand slightly and move it away from you. The tortilla will stick to the hot surface so you can roll your hand out from under it as it rolls down flat. After 30 seconds, the edges of the tortilla will dry slightly and the tortilla will release from the griddle. Until this moment, the tortilla will be stuck.

    6. FLIP the tortilla onto the hotter side of the griddle (or the hotter skillet) with a metal spatula. After 30 seconds, the tortilla should be lightly browned underneath. Flip it over. Cook 30 seconds more—the tortilla should puff in places (or all over—a gentle press with a metal spatula or fingers encourages puffing). Transfer to a basket lined with a napkin or towel.

    7. PRESS and bake the remaining tortillas. Stack each newly baked tortilla on top of the previously baked tortillas. Keep the tortillas well wrapped in a kitchen towel for warmth.


    REHEATING CORN TORTILLAS

    Some people have a tortilla steamer to reheat tortillas in the microwave (we picked up a silicone steamer and use it every day to warm or steam other foods in our microwave). But you don’t need one: You can substitute a kitchen towel.

  • In the microwave: Drizzle 3 tablespoons of water over a clean kitchen towel and wrap the tortillas. Place in a microwaveable plastic bag and fold it over—don’t seal the bag. Microwave at 50% power for 4 minutes to create a steamy environment around tortillas. Let stand for 2 or 3 minutes before serving.
  • In a vegetable steamer: If there is a center post, remove it. Pour 1/2 inch of water into the bottom of a pot. Wrap the tortillas (no more than 12 at a time) in a clean kitchen towel. Place it in the steamer, put the lid on the pot, and set it over high heat. When the steam begins to seep out under the lid, time for 1 minute. Then turn off the heat and let the tortillas steam for 10 minutes.
  • On a griddle: Quickly reheat the tortillas one at a time on a dry griddle or skillet.
  • With kitchen tongs: Hold the tortilla with tongs over a low flame.
  •  
     
    CORN TORTILLAS VS. FLOUR TORTILLAS

    People who don’t enjoy the more pronounced flavor or texture of corn tortillas prefer the milder, softer flour tortillas are prized for their mild flavor and softness. Either can be used in any recipe requiring tortillas. However:

  • Flour tortillas are made with added fat—lard or vegetable shortening—and salt.
  • A standard six-inch corn tortilla contains about half the fat and calories and one-fourth the sodium of a similar-sized flour tortilla.
  •  
    Recipe © copyright 2005 Rick Bayless, Mexican Everyday, W.W. Norton & Company, Inc.


    CHECK OUT WHAT’S HAPPENING ON OUR HOME PAGE, THENIBBLE.COM.


    Comments off

    TIP OF THE DAY: Bok Choy & Endive ~ Veggies To Grill

    We wager that anyone who likes veggies looks forward to vegetables cooked outdoors on the grill, for as long as the weather allows. Asparagus, bell peppers, corn, eggplant, onions, portabella mushrooms, tomatoes and zucchini are popular.

    But why not try vegetables you’ve never grilled before?

    Previously we’ve recommended grilled cabbage, grilled cauliflower and grilled romaine for a Caesar Salad.

    Today, for your consideration: Belgian endive and Chinese bok choy (both grown in California).
     
     
    WHAT IS ENDIVE?

    Endive is one of the vegetables that were once available in the late fall. Once imported from Europe, it is now grown year-round in California.

    Endive can be grilled, added to salads, or used as “boats” to hold finger foods at parties. You can even make a type of Tarte Tatin using endive instead of apples.

    Endive, Cichorium endivia, is a member of the chicory genus in the Asteraceae family. The genus includes other bitter-leafed vegetables, including escarole, frisée and curly endive and radicchio. It has a crisp texture and a sweet, nutty flavor with a pleasantly mild bitterness. It can be served raw or cooked.

    Endive is pricey because it’s one of the most difficult vegetables to grow. There’s a two-step growing process:

  • The seeds are planted and grow into a leafy green plant in 150 days.
  • They are then harvested, the leafy tops are cut off and the deep roots are dug up and placed in cold storage, where they enter a dormancy period.
  • The dormant roots are removed from cold storage for their second growth, which takes 28 days in dark, cool, humid forcing rooms (similar to a mushroom growing facility).
  • The control over the initiation of this second growing process allows for the year-round production of endive.
  •  
    You can sometimes find good prices on endive, especially when the edges of the tips start to brown, reducing the aesthetic. Since they brown on the grill anyway, it’s an impetus to grill.

    Bonus: A leaf of endive has just one calorie! It’s a good source of potassium, vitamins, and minerals, high in complex fiber, and promotes digestive health.

    Here’s an easy recipe from Endive.com, which has many more endive recipes.
     
     
    RECIPE #1: GRILLED ENDIVE

    Ingredients

  • 3-4 heads endive, sliced lengthwise
  • 1 tablespoon olive oil
  • Optional: chopped fresh rosemary
  •    
    Grilled Endive

    Endive With Root

    Top: Endive hot off the grill. Bottom: This is what endive looks like when it’s pulled from the ground. The huge taproot is grown from seeds, harvested, placed in dormancy, and then re-planted to grow the endive heads. This technique enables endive, once a cool-weather vegetable, to be grown year-round. Photos courtesy Endive.com.


    Preparation

    1. PREHEAT the grill over a medium flame. Brush each endive half with olive oil and place on grill, cut side down. After 8–10 minutes, flip and cook another 12-15 minutes, turning occasionally and lowering the flame if needed until the endives soften.

    2. SEASON with salt and pepper and garnish with chopped rosemary. You can serve it hot off the grill or at room temperature.

    3. VARIATION: You can also toss cooled grilled endive into a salad. Cut it into one-inch slices; mix with arugula, watercress, or other bitter green; and toss with an olive oil-lemon dressing. Garnish with crumbled chèvre or feta cheese and roasted nuts.


    Grilled Bok Choy
    Grilled bok toy and lamb patties. Photo courtesy Good Eggs | San Francisco.
      RECIPE #2: GRILLED MISO BOK CHOY & LAMB PATTIES

    Bok choy, a member of the powerful cruciferous* vegetable family (Brassica), has even more nutrients than some of its cousins (see the list below).

    This easy dinner is a cultural fusion: Chinese bok choy (also called pak choi and Chinese cabbage) meets Middle Eastern lamb patties. The bok choy doubles as a salad and a vegetable side; the miso butter gives it a celestial flavor. The fresh herbs are the icing on the cake.

    The recipe, from Good Eggs, takes 15 mins active time and 10 minutes cooking time.

    Ingredients For 2-3 Servings

  • 1 pound ground lamb
  • ½ cup of feta cheese, crumbled
  • 1 egg
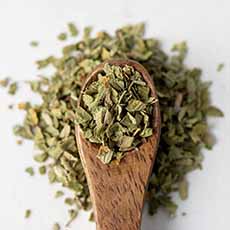
  • 3 tablespoons fresh oregano, roughly chopped (substitute 3 teaspoons dried oregano)
  • 1½ teaspoons salt
  • 1 cup Greek yogurt
  • 1 clove garlic, mashed into a paste
  • 3 tablespoons fresh mint, roughly chopped
  • Olive oil
  • 3 tablespoons salted butter, at room temperature
  • 3 tablespoons miso
  • 3 heads bok choy, sliced in half lengthwise and rinsed
  • Lime wedge
  • Preparation

    1. COMBINE the lamb, feta, egg, oregano, salt, and egg in a mixing bowl. Mix well with clean hands and form into patties about 1” thick and 3” wide. Set aside.

    2. MIX the yogurt, garlic, mint, 1 teaspoon of olive oil, and a pinch of salt in a small bowl. Taste and adjust salt to taste (not too salty, as you’re also using salted butter). Set aside.

    3. MIX the butter and miso in a small bowl with the tines of a fork. Melt two tablespoons of the mixture in a cast iron pan over high heat. When melted and hot, tip the pan to coat the bottom of the pan with the mixture.

    4. ADD the bok choy cut side down and sear until it is a deep golden brown, about 4-5 minutes. Flip and cook on the back side for about a minute. Remove from the pan and squeeze a bit of lime over the bok choy. Return to the pan to finish cooking. When the bok choy is finished…

    5. WIPE the pan clean, add a tablespoon of olive oil, and place the pan over high heat. When the oil is hot…

    6. ADD the lamb patties, leaving 1” in between each patty. Cook over high heat for about 4 minutes until the patty is golden brown. Flip to the other side and repeat. When both sides have good color…

    7. CHECK for doneness by inserting a sharp knife into the center of a patty. If the center has a flush of light pink, they’re ready. If the center is still dark pink, pop them in the oven (or toaster oven) at 350°F for 2-3 minutes.

    8. SERVE with the minted yogurt and bok choy. If desired, garnish with a sprig of mint or oregano.
     
    ________________________

    *The botanical family Brassicaceae, also known as the brassicas, cabbage family, cauliflower family, and mustard family, consists of nutritional powerhouses that are packed with potent, cancer-fighting phytonutrients (antioxidants). Brassica members include arugula, bok choy, broccoli, Brussels sprouts, cabbage, collard greens, cauliflower, horseradish/wasabi, kale, kohlrabi, mizuna (Japanese mustard), mustard greens, radish, rapeseed/canola, rapini, rutabaga, tatsoi and turnips, among others.


    CHECK OUT WHAT’S HAPPENING ON OUR HOME PAGE, THENIBBLE.COM.


    Comments off


    © Copyright 2005-2026 Lifestyle Direct, Inc. All rights reserved. All images are copyrighted to their respective owners.