
[1] Sophisticated: lemon-dill popcorn. Here’s the recipe (photos #1, #3, #4 © The Popcorn Board).
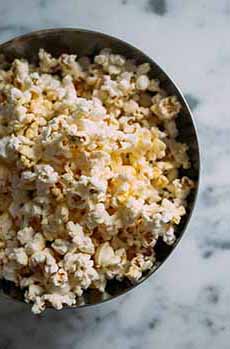
[2] For the purist: plain popcorn with butter or flavored oil (photo © Charles Deluvio | Unsplash).

[3] Seasonal: white chocolate peppermint popcorn. Here’s the recipe.

[4] Hot stuff: cheesy jalapeño popcorn. Here’s the recipe.
|
|
For more than 30 years, October has been celebrated as National Popcorn Poppin’ Month.
It became “official” in 1999, when then-Secretary of Agriculture Dan Glickman proclaimed October as National Popcorn Poppin’ Month (see all of the October food holidays).
It’s often shortened to National Popcorn Month.
The popcorn industry chose the month of October because of the popcorn harvest which takes place each fall in the Midwest. Here are some “corny facts” from the Popcorn Board, the industry’s trade association.
> The history of popcorn.
> The history of popcorn salad (and recipe).
> 20+ popcorn recipes.
> Popcorn, a whole-grain food.
POPCORN TRIVIA & FACTS
The Grain
Popcorn is a type of maize (corn), a grain that’s a member of the grass family Poaceae. It originated in Mesoamerica. Maize/corn belongs to the genus Zea, the true grasses. Its botanical name is Zea mays everta. The word “maize” derives from the Spanish form the Taíno* word for the plant, maiz.
Of the 6 types of maize/corn—pod, sweet, flour, dent, flint and popcorn—only popcorn pops.
Nutrition
Popcorn is a whole grain, good-for-you treat. Americans consume some 16 billion quarts of it annually. That’s 51 quarts per man, woman and child.
Compared to most snack foods, popcorn is low in calories. Air-popped popcorn has only 31 calories per cup and oil-popped has 55 calories per cup. A full whole-grain serving is 3 cups.
If you don’t like to eat dry popcorn, use olive oil (especially flavored olive oil), a heart-healthy fat. Butter is chock full of cholesterol.
Growing & Popping
Popcorn differs from other types of maize/corn in that is has a thicker pericarp (hull). The hull allows pressure from the heated water to build, and it eventually bursts open. The inside starch becomes gelatinous while being heated; when the hull bursts, the gelatinized starch spills out and cools, giving popcorn its familiar shape.
Most popcorn pops into two basic shapes: snowflake and mushroom. Snowflake is used in movie theaters and ballparks because it looks and pops bigger. Mushroom is used for candy confections because it doesn’t crumble.
“Popability” is industry lingo that refers to the percentage of kernels that pop.
Popcorn kernels can pop as high as 3 feet in the air.
There is no such thing as “hull-less” popcorn. All popcorn needs a hull in order to pop. Some varieties of popcorn have been bred so the hull shatters upon popping, making it appear to be hull-less.
Most U.S. popcorn is grown in the Midwest, primarily in Kentucky, Illinois, Indiana, Iowa, Missouri, Nebraska and Ohio.
Many people believe the acres of corn they see in the Midwest during growing season could be picked and eaten for dinner, or dried and popped. In fact, those acres are typically field corn, which is used largely for livestock feed, and differs from both sweet corn and popcorn. It is inedible by humans.
Fun Facts
Popping popcorn is one of the main uses for microwave ovens. Most microwave ovens have a “popcorn” control button.
The world’s largest popcorn ball was created by volunteers in Sac City, Iowa in February 2009. It weighed 5,000 pounds, stood over 8 feet tall and measured 28.8 feet in circumference.
IF CORN IS A NEW WORLD GRAIN, WHY IS IT MENTIONED IN THE BIBLE?
According to the Popcorn Board, a trade association, biblical accounts of “corn” stored in the warehouses of Egypt are misunderstood. The “corn” from the bible was probably barley.
The reference comes from a changed use of the word corn, which used to signify the most-used grain of a specific place. In England, “corn” referred to wheat, and in Scotland and Ireland the word referred to oats.
__________________
*The Taínos were seafaring indigenous peoples of the Bahamas, Greater Antilles and Lesser Antilles.
|


