THE NIBBLE BLOG: Products, Recipes & Trends In Specialty Foods


Also visit our main website, TheNibble.com.

TIP OF THE DAY: How To Avoid Burnt Cookies, & How To Fix Them

Novices and experts alike have faced down a sheet of cookies with burnt bottoms, wondering whether to:

  • Toss them and start over.
  • Try to hide them among a plate of other cookies.
  • Race out to buy the cookies needed.
  •  
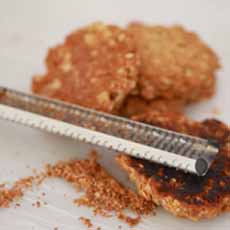
    Recently, we heard of a much better solution: Use your microplane to shave or grate away the burned part!

    And, we picked up a side tip from professional chef Gemma Stafford: This works on burned biscuits and scones too (duh to us!). Read the rest of her suggestions at BiggerBolderBaking.com.
     
     
    7 WAYS TO KEEP YOUR COOKIES FROM BURNING

    Cookies burn because they get too much heat from the bottom heating element in the oven. This is why a middle rack is always the best option.

    There are a number of ways to protect the cookie bottoms.

    1. Use a convection oven. If you have the option, the convection fan distributes the heat more evenly.

    2. Use an oven thermometer. If your cookies often burn on the bottom, check the heat with an oven thermometer. It will tell you if your oven is calibrated properly. If not, adjust the baking temperature accordingly.

    If you still have the oven manual, check for instructions on how to recalibrate.
     
    Before The Cookies Go Into The Oven

    3. Bake the cookies on the middle rack. The temperature is highest there, but the bottom of the pan is away from the bottom heating element.

    When you need to bake two sheets at the same time, you can’t avoid the bottom rack. But pay special attention to those cookies, which will bake faster than the upper rack. You may need to remove them earlier.

    4. Use a heavy, light-colored (silvery) aluminum cookie sheet, ideally with no rim. Dark cookie sheets promote browning; sheets with rims block the air circulation to the tops of the cookies, so the tops cook more slowly while the bottoms cook at a normal pace.

    If it’s time to replace or add to your cookie sheets, consider an insulated cookie sheet. It’s built with a layer of air between the top and bottom, giving your cookies protection from the oven’s lower heating element. Farberware, Nordicware and other brands make them.

    5. Use parchment paper. Lining the pan with parchment paper provides more insulation (and for delicate items like meringues and macarons, it helps with uniform baking).

    6. Use a silicone liner. This is especially important if your cookie sheet is thin (another reason to pay a bit more for professional-quality bakeware). Otherwise, try this trick: Stack another thin cookie sheet under the sheet with the cookies, to provide more protection from the oven’s heating element.

      Burnt Cookies
    [1] Get out the Microplane for the rescue: Just grate off the burnt part (photo courtesy Gemma Stafford | Bigger Bolder Baking).

    Christmas Cookies
    [2] No one will ever know you scorched the bottoms (photo courtesy Wisconsin Milk Marketing Board).

    Christmas Cookies
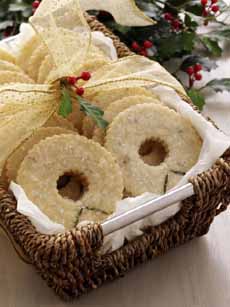
    [3] Whether delicate or robust (like chocolate chip), cookie bottoms can burn (photo courtesy Wisconsin Milk Marketing Board).

     
    While The Cookies Bake

    7. Set the timer for the lower end of the baking range. Check the cookies when it rings. If your cookies still need some baking time, stand watch over them and check them in another few minutes.
      

    Comments off

    TOP PICKS OF THE WEEK: Nancy’s Petite Stuffed Bagels & Bantam Pancakes

    Nancy's Stuffed Bagels
    [1] Nancy’s Petite Stuffed Bagels: delicious (photo courtesy Is This Really Is My Life).

    Nancy's Stuffed Bagels Jalapeno

    [2] Look for the box in the freezer section (photo Kraft Heinz).


    This week we have a tie for Top Pick. Both sit in the freezer until you want them. And we want more and more of them.

    1. NANCY’S PETITE STUFFED BAGELS

    We received samples of Nancy’s Petite Stuffed Bagels right before Thanksgiving; and what a festive treat they were.

    The bagels are stuffed with different flavors of cream cheese:

  • Original
  • Apple Cinnamon
  • Jalapeño
  • Pumpkin (limited edition, exclusively at Walmart)
  •  
    The bagels are kept frozen, then heated in the oven or microwave. We found microwaving worked just fine.

    We enjoyed a mixed selection of them with our morning coffee or tea.

    But these lovely bites will make a brunch or special-occasion breakfast all the more festive.

    The marketing materials explain that the product was inspired by Nancy Mueller, a San Francisco hostess.

    But surprise: The brand is owned by The Kraft Heinz Company, which produces the NANCY’S Frozen Appetizers & Entrées line.

    This detail came as a surprise to us, because the product packaging and the bagels themselves seem more like a small brand labor of love than the product of a mega-manufacturer.

    Bravo, Kraft Heinz. We plan to keep our freezer full of these little treats.

    Petite Stuffed Bagels are available on nationwide at select grocers, at a suggested retail price of $6.99 for 16 bagels.

    Each petite bagels delivers two big bites.

    We have an admission: As a bagel lover who often eats a large bagel for breakfast, we are just as satisfied with one or two of Nancy’s Petite Stuffed Bagels.


    2. BANTAM PANCAKES

    You may be familiar with Bantam Bagels, the original mini stuffed bagel.

    We enjoyed them for several years, fresh at their shop in Greenwich Village. But when the frozen version came out, for us it lost something in translation.

    We found that microwaving produced chewy dough. While we didn’t test Bantam Bagels side by side with Nancy’s, we didn’t have this problem with the latter.

    However: Bantam, we love your new Bantam Pancakes. They’re not flat, but rounded like the bagels to include a delicious filling.

    The varieties include:

  • Apple Cinnamon
  • Banana Praline
  • Blueberry
  • Chocolate Chip
  • Homestyle
  • Strawberry Shortstack
  •  
    Now when you have a pancake craving, just pop one or two into the microwave.

    There’s a store locator on the website, or buy them online.

    They’re an innovative thank-you gifts for dinner, party or weekend hosts.

    Note to our friends and family: We’d be happy if Santa brought us a few more boxes.

      Bantam Pancakes Blueberry
    [3] Blueberry pancake bites are winners (both photos courtesy Bantam Bagels).

    Bantam Pancakes Box
    [4] Look for Bantam Pancakes in the freezer section.


    Comments off

    TIP OF THE DAY: How To Clean Your Coffee Grinder

    Mr. Coffee Burr Grinder
    [1] Large or small, a coffee grinder needs regular cleaning (photo courtesy Mr. Coffee).

    Coffee Grinder Bread Crumbs
    [2] Clean the grinder regularly with bread or rice (photo courtesy Coffee & Tea Newsletter).

    Coffee Grinder Cleaning Brush
    [3] Brush out fine grounds with a soft brush (photo courtesy Alibaba). You can also repurpose a clean makeup brush.


    If you care enough about the freshness of your coffee to grind your own beans, you need give the grinder a regular cleaning.

    Just as oils collect in the bottom of the coffee pot, they leave their oily residue in the well and on the blades of the grinder.

    Over time, the oil becomes stale and affects the flavor of the coffee.

    You may or may not notice oil on the lid or blades of the grinder. If you do, you know it’s time to act. But even if you don’t, plan to clean the grinder a few times a year. If you use the grinder daily, clean it once a month.

    Here’s the technique from TODAY Home:

  • Unplug the grinder. Always unplug any appliance before cleaning it.
  • Fill the grinder halfway with plain bread cubes or raw rice and process it in the grinder (photo #2). The abrasion cleans the blades while the starch in absorbs the oils.
  • That’s why simply wiping the surfaces with a paper towel isn’t optimal. Toss the crumbs.
  • In fact, when you find yourself with two-day-old bread that can’t be otherwise repurposed, use it to clean the grinder.
  • Dust with a brush. Use a small, soft brush as needed (photo #3). Many grinders come with the brush for cleaning. Use them to give the grinder a quick clean every time you use it.
  • Wash the lid with soapy water.
  • Never submerge the base of an appliance in water.
  •  
     
    OTHER USES FOR A COFFEE GRINDER

  • Bread crumbs
  • Flours: almond flour, oat flour, etc.
  • Garnishes: chocolate, citrus peel, coconut, etc.
  • Herbs and spices
  • Nuts and seeds
  • Peppercorns and coarse salt
  • Powdered sugar
  • Rubs
  • Superfine sugar
  •  
    In fact, if you have a second coffee grinder—an older one you haven’t tossed, for example—clean it thoroughly and use it for these non-coffee purposes.

     
    However, you still have to clean it thoroughly, so the dried chile residue doesn’t meld with the powdered sugar.
      

    Comments off


    © Copyright 2005-2026 Lifestyle Direct, Inc. All rights reserved. All images are copyrighted to their respective owners.