|
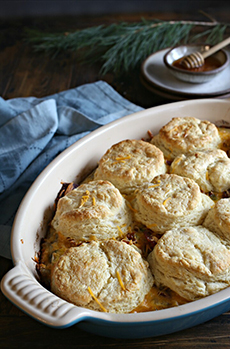
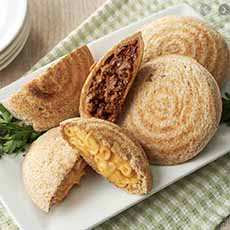
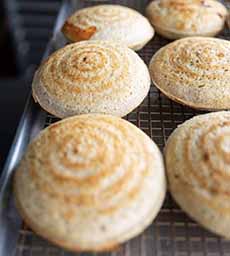
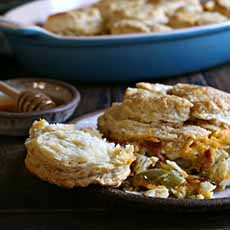
[1] Breakfast pot pie, with breakfast fillings and a buttermilk biscuit crust (photos #1, #2, #3 copyright Hungry Couple NYC | Idaho Potato Commission).
[2] We can’t wait to eat this!
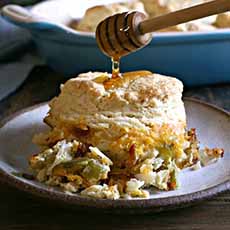
[3] Drizzle some honey on the biscuits, breakfast-style.
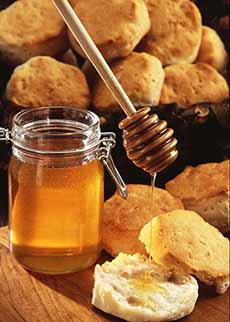
[4] Pass a jar of honey to drizzle over the biscuits (photo © National Honey Board).
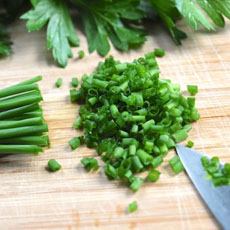
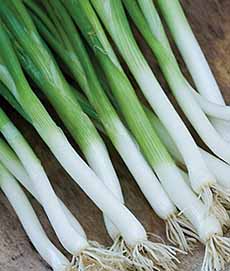
[5] We added this optional “fully loaded potato’ garnish: chopped chives. Serve it in a bowl so people can help themselves (photo © Away To Garden).
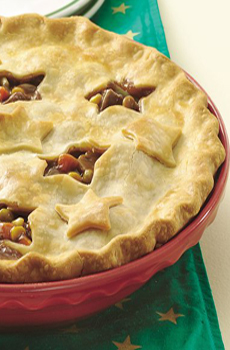
[6] A beef pot pie (photo © Betty Crocker).
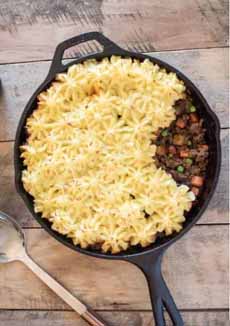
[7] Shepherd’s pie with a piped mashed potato topping. You can top it with regular mashed potatoes, spread over the top with a spatula (photo © Food Fanatic).

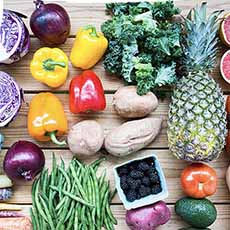
[8] Vegetarian pot pie. You can make it vegan by using almond milk (photo © Almond Breeze).
|
|
Pot pie is viewed as a comfort food by many people.
Modern pot pie (think 17th century and beyond) was a type of meat pie with a top pie crust and sometimes a bottom pie crust, made with flaky pastry.
It could (and still can) be prepared in a skillet on the stove, or a baking dish in the oven. There’s even a mountain pie, cooked over a campfire.
In the U.S., chicken and beef are the most popular, with vegetarian and vegan pot pies claiming their place (and are called “shepherdless pie”). Turkey sometimes substitutes for chicken.
Beef pot pie, may also include diced potatoes.
Common ingredients include diced chicken or beef, carrots, celery, onion, peas, salt and pepper.
The gravy is made from chicken, beef or vegetable broth, thickened with milk and flour.
The pie shell can be made from scratch, from store bought pie crust, or from biscuit dough.
As with any pie, the recipes, including the types of crust, vary. Some people make it from leftovers.
Types of crust also vary: from mashed potatoes, mashed sweet potatoes, cornbread and biscuits.
A pot pie with a mashed potato top, popular in the U.K., is called shepherd’s pie when made with lamb, and cottage pie when made with beef.
In the South, some people make a distinction between chicken pie and chicken pot pie. The former, also known as chicken and pastry, is a savory version of a fruit pie or cobbler. It may have a pie crust or a cobbler top, as with the recipe below.
There’s more chicken than vegetables. Some recipes have very few, or no, vegetables (source).
The history of pot pie is below.
RECIPE: FULLY LOADED BREAKFAST POT PIE
This recipe, developed by Anita of Hungry Couple NYC for the Idaho Potato Commission. You can read her full post here.
Anita made her crowd-pleasing breakfast casserole with, with eggs and the ingredients of a loaded baked potato: potatoes, eggs, bacon and cheese.
Instead of a pie crust, she tops the pot pie with buttermilk biscuits (technically, this makes it a cobbler instead of a pie).
You can save time by purchasing a tube of refrigerator buttermilk biscuits.
The recipe can be a special-occasion breakfast or brunch. Mother’s Day and Father’s Day are coming up!
A tip from Anita: Makes the recipe the night before but doe’t bake it yet. Cover it in plastic wrap, stick it in the fridge and bake it in the morning (it’s best to let it come to room temperature before baking).
Ingredients
For The Filling
1 tablespoon butter
1 large onion, peeled and diced
1 large green bell pepper, diced
4 Idaho® baking potatoes
8 eggs
1/2 teaspoon salt
8 slices thick cut bacon
2 cups shredded cheddar cheese
For The Buttermilk Biscuits
2 cups all-purpose flour
1 tablespoon baking powder
1 teaspoon salt
1/2 teaspoon baking soda
1 stick (8 tablespoons) unsalted butter, chilled and cut into 1″ pieces
3/4 cup cold buttermilk
2 tablespoons cream for topping
Optional garnish: honey, minced chives
Preparation
1. PREHEAT the oven to 400°F.
2. PLACE the slices of bacon on a baking sheet lined with parchment paper and cook in the oven for 20 to 25 minutes or until crisp. Drain on a paper towel but leave the oven on.
While the bacon is cooking, …
3. ADD the butter, onion and bell pepper to a large skillet and sauté for 10 to 15 minutes or until softened. Cool for a few minutes.
4. MAKE the biscuits by combining the flour, baking powder, salt and baking soda in a large bowl. Cut in the butter using a pastry cutter or fork until the mixture resembles coarse crumbs. If the butter becomes warm, place the bowl in the fridge for a few minutes to firm up.
5. STIR in the buttermilk and turn the dough out onto a floured surface. Knead just until it’s no longer sticky. Then fold it onto itself, roll it back out and repeat 4 times.
Pat it out to about 3/4″ thick and, using a 2-1/2″ pastry cutter, cut out rounds. Re-roll the scraps and continue. You should end up with about 10 biscuit rounds.
6. PEEL the potatoes and grate on the large side of a box grater. You can also shred them in a food processor. Butter the bottom of a baking dish (this recipe used a 14″ dish) and add the potatoes.
7. WHISK the eggs, salt and onion mixture together and pour over the potatoes. Crumble the cooked bacon and spread over the egg mixture. Sprinkle the cheese over the bacon.
8. TOP with the biscuit rounds, brush them with the cream and bake for 25 to 30 minutes or until the biscuits are a light golden brown.
THE HISTORY OF POT PIE
Pot pie is believed to have originated in Greece. The Greeks cooked meats mixed with other ingredients in open pastry shells, called artocreas.
Before there were baking pans, meats were cooked in a dough shell called a coffyn because of its rectangular coffin shape. The dough was laden with salt and not for eating. It was just a vessel cook the pie. Metal cake and pie pans didn’t come onto the scene until the 17th century.
Pastry was further developed in the Middle East. It was brought to Mediterranean Europe by the Muslims in the 7th century.
Another leap forward occurred in the 11th century, when Crusaders brought phyllo dough back to Northern Europe (the First Crusade was 1096 to 1099).
Greek and Roman pastry did not progress further because both cultures used oil, which can’t create a stiff pastry. In medieval Northern Europe, the traditional use of lard and butter instead of oil for cooking hastened the development of other pastry types.
Pies crusts developed, and the stiff pie pastry was used to provide a casing for various fillings. Pyes (pies), still predominantly meat, appeared in England as early as the 12th century, cooked in a coffyn.
According to Smithsonian magazine, cooks from the Roman Empire era would sometimes make pot pies with a living bird that would burst through the pie shell when cut and fly out. Surprise! While this would scare any unsuspecting diner, this active meal was still prepared in 16th century England.
The metal pie pan developed, and meat pies stretched leftover meat scraps by baking them in a pie plate with vegetables. In early cookbooks, shepherd’s pie was a created to use leftover roasted meat of any kind, and both the top and bottom crusts were made from mashed potatoes: The pie (pye) pan was lined with mashed potatoes on the bottom and sides as well as the top.
The pot pie came to America with colonists.
Fast forward a few centuries: In 1951, the first frozen pot pie was created by the C.A. Swanson company and was made with chicken.
And the rest is comfort food history!
|