THE NIBBLE BLOG: Products, Recipes & Trends In Specialty Foods


Also visit our main website, TheNibble.com.

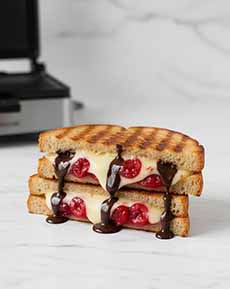
Chocolate-Cherry-Brie Grilled Cheese Recipe For George W.

Cherry Chocolate Grilled Cheese Sandwich
[1] With chocolate chunks, you get bigger bites of chocolate (photos #1, #2, #3, and #8 Abacus).

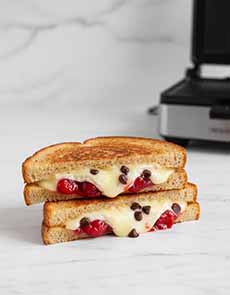
Cherry Chocolate Chip Grilled Cheese
[2] Otherwise, chocolate chips work perfectly well. .

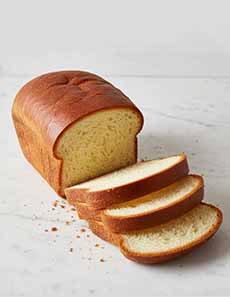
A Loaf Of Brioche Bread
[3] You can use white bread, but rich brioche makes any dessert grilled cheese sandwich better.

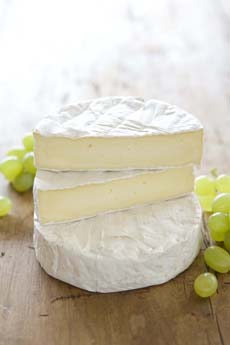
Wheel Of Brie Cheese, Whole & Sliced
[4] Brie is perfect for dessert grilled cheese, but we have plenty of alternatives below (photo © Isigny Sainte-Mère).

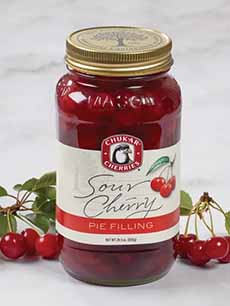
Jar Of Chukar Cherry Pie Filling
[5] Top with cherry pie filling (photo © Chukar Cherries).

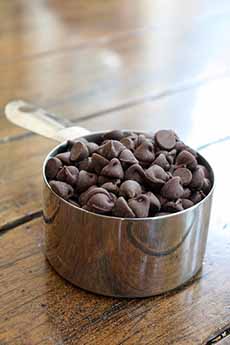
A measuring cup of Chocolate Chips
[6] Add as many as you like (photo © Bella Baker).

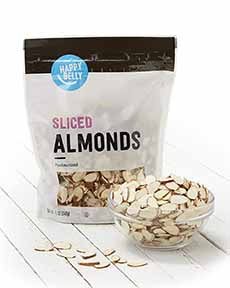
Sliced Almonds Bag & Bowl
[7] The recipe calls for chopped almonds, but you can substitute another favorite nut. We made a version with one of our faves, pistachios, and liked it equally well. If you’re chopping your own almonds, you an use cinnamon-, honey-glazed, or spiced nuts for an extra layer of flavor (photo © Amazon).


While George Washington never chopped down a cherry tree, the myth created in his first biography by Parson Weems will never die*. Acknowledging this, we elect to celebrate his birthday each year, February 22, with a new cherry recipe.

We adapted the following recipe from one we found on Taste Of Home, called Cherry-Chocolate Pudgy Pie, created by Josh Carter of Birmingham, Alabama.

Although it had no cheese (see photo #10 at the bottom), we thought: Let’s turn this into a grilled cheese sandwich with Brie!

  • We made it on brioche (photo #3), a rich, tender French pastry-bread renowned for its high egg and butter content.
  • We quartered the sandwich, and served it as dessert with a glass of vin santo dessert wine†, which pairs nicely with the dark chocolate in the recipe†.
  •  
    While Josh makes his Pudgy Pie for campfires and cookouts, we turned the concept into a great indoor snack and dessert.

    Below:

    > The chocolate-cherry grilled cheese recipe.

    > Beyond Brie: different cheeses you can use.

    > More chocolate-cherry recipes.

    Elsewhere on The Nibble:

    > More dessert grilled cheese recipes.

    > The history of the grilled cheese sandwich.

    > The history of the sandwich.

    > The different types of sandwiches: a photo glossary.

    > The history of Brie.

    > The history of cherries.

    > Homemade cherry pie filling recipe.

    > 20 more ways to use cherry pie filling.

    > The year’s 25+ sandwich holidays.

    > The year’s 30 cheese holidays.

    > The year’s 15+ cherry holidays.
     
     
    RECIPE: CHERRY-CHOCOLATE DESSERT GRILLED CHEESE SANDWICH

    We made the sandwich both on good-quality white bread and on brioche. Brioche wins!

    You can also make a simpler recipe on toast with cream cheese or mascarpone, no grilling needed.
     
    Ingredients

  • 2 slices white bread, brioche (photo #3), or challah (photo #9)
  • 3 tablespoons cherry pie filling
  • 1 tablespoon chopped almonds or other nut
  • 1 tablespoon semisweet chocolate chips
  •  
    Preparation

    1. PLACE 1 slice of bread in a greased sandwich iron, panini press, or grill pan. Spread with pie filling; top with almonds, chocolate chips and remaining bread slice.

    2. COOK until golden brown and heated through, 3-6 minutes, turning occasionally.
     
     
    BRIE CHEESE ALTERNATIVES

  • Camembert:, a sister to Brie with a similarly rich, creamy texture and bloomy rind, but with a slightly more intense, earthy flavor. Here’s the difference.
  • Coulommiers: A French cheese actually known as “Brie’s little sister,” similar in texture and flavor.
  • Fontina: A semi-soft cheese with a mild, nutty flavor that melts beautifully, creating a very gooey, rich sandwich.
  • Havarti: A mild, creamy Danish cheese that provides a very buttery, mild, and gooey texture without the a rind (for those who don’t care for Brie’s bloomy rind).
  • Mascarpone: Very soft with a natural sweetness.
  • Mozzarella: A superior, gooey, stringy stretch, it also acts as a neutral base, ideal for pairing with the flavors of cherries and chocolate.
  • Port Salut: A mild, creamy semi-soft cheese that melts wonderfully.
  • Reblochon: A similarly Brie-like creamy, bloomy-rinded experience.
  • Taleggio: An Italian washed-rind cheese that is very similar in creaminess to brie but offers a slightly more complex, nutty, and savory taste that pairs well with fruit, jam, or bacon.
  •  
     
    MORE CHOCOLATE-CHERRY RECIPES

  • Black Forest Cake
  • Black Forest Cupcakes
  • Cherry Cheesecake With Chocolate Glaze
  • Cherry Chocolate Chip Coookies
  • Chocolate-Cherry Brownies
  • Chocolate-Cherry Cupcakes
  • Chocolate-Covered Cherries
  •  
     
    Mascarpone Grilled Cheese Sandwich
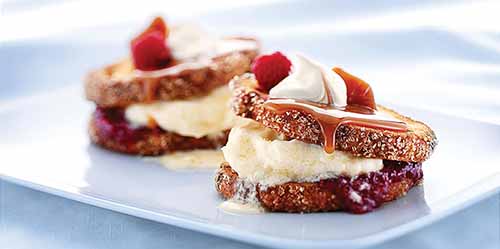
    [8] Mascarpone and dulce de leche make this grilled cheese sandwich a sweet treat. Here’s the recipe. You can add a layer of raspberry preserves or fresh raspberries (photo © Dairy Farmers Of Wisconsin).
     
     
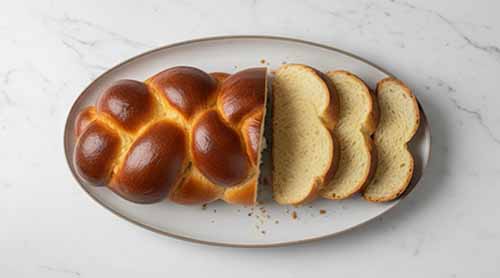
    A Loaf Of Challah
    [9] Challah is a more affordable alternative to brioche. Both are rich, yeasted, egg-based breads; as enriched doughs, they share a similar, slightly sweet, and buttery taste, making them ideal substitutes for each other in recipes like grilled cheese and French toast (note that challah is dairy-free, substituting olive/vegetable oil for butter).

     
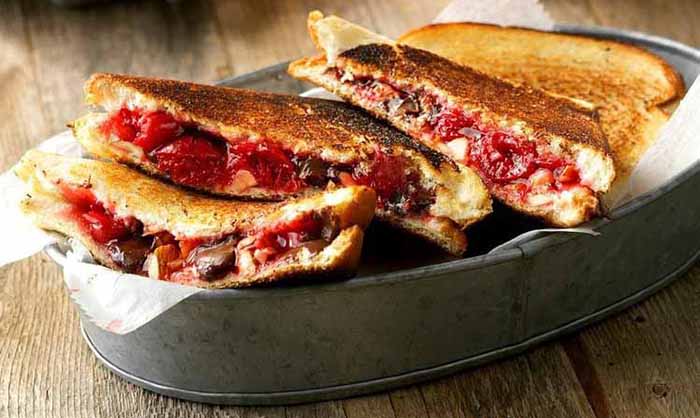
    Chocolate Cherry Grilled Sandwich
    [10] The original inspiration: Cherry-Chocolate Pudgy Pie. Here’s the recipe (photo © Taste Of Home).

    ________________
     
    *More George Washington myths: He never had wooden teeth. His dentures were made of materials like ivory, gold, lead, and even human teeth from enslaved people, which were wired together. Nor did he wear a wig. Even though it was the fashion of the time, Washington kept his own hair long, tied back, and powdered white. The list goes on.

    †Dessert wine wine pairings with dark chocolate: Banyuls, late harvest Zinfandel, Maury, Port, shiraz, and Vin Santo. The Nibble capitalizes words that are a proper nouns, e.g., New York cheesecake.
     

    CHECK OUT WHAT’S HAPPENING ON OUR HOME PAGE, THENIBBLE.COM.


    Comments off

    Homemade Cherry Pie Filling Recipe & 20 More Ways To Use It

    February 20th is National Cherry Pie Day. If you like to bake but have a discerning palate, you may want a better option than the canned pie filling on the grocer’s shelf.

    Julie Laing of the Taste of Home Test Kitchen developed this recipe using fresh summer cherries. However, she gave those of us who don’t want to wait until summer, or don’t want to pit the cherries, the option to use frozen tart pitted cherries to make cherry pie filling.

    We were sold!

    The frozen cherries don’t even need to be thawed beforehand. However, since frozen cherries have more moisture than fresh cherries, you may need to adjust the amount of cornstarch to compensate for the extra liquid.

    Either way, we generally use sour or tart cherry varieties when making pie filling because they provide cherry sweetness with a touch of tartness. However, any type of cherry can be used.

    Below:

    > The recipe for cherry pie filling.

    > Recipe variations for a more complex cherry pie filling.

    > 20 more ways to use cherry pie filling.

    Elsewhere on The Nibble:

    > The history of pie.

    > The history of cherries.

    > The history of pie à la mode.

    > The different types of pie: a photo glossary.

    > The year’s 30+ pie and cobbler holidays.

    > The year’s 15+ cherry holidays.

    > The difference between a pie and a tart.

    > Cherry cobbler recipe.
     
     
    RECIPE: HOMEMADE CHERRY PIE FILLING

    Make your cherry filling bright red with some red food coloring. Please note that this recipe was not created for canning.

    Be sure to take a look at the variations below.
     
    Ingredients

  • 2/3 cup sugar
  • 1/4 cup cornstarch (more as necessary)
  • 1/4 teaspoon salt
  • 4 cups fresh or frozen tart cherries, pitted
  • 1-1/2 cups water
  • 2 tablespoons lemon juice
  • Optional: 6 drops red food coloring, optional
  •  
    Preparation
     
    1. COMBINE the sugar, cornstarch, and salt in a large saucepan. Add the cherries, water and lemon juice.

    2. BRING to a boil; cook and stir until thickened, 2 minutes. Remove from the heat; if desired, stir in food coloring.

    3. COOL completely, then store in an airtight container in the fridge for three to five days.
     
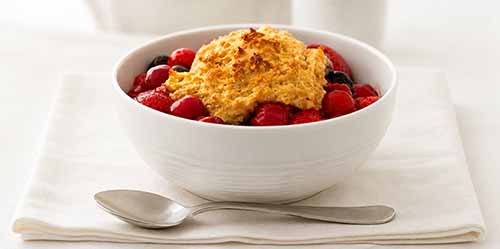
    A Bowl Of Cherry Cobbler
    [6] How about cherry cobbler? Here’s the recipe. National Cherry Cobbler Day is May 17th (photo © Choose Cherries).
     
     
    20+ MORE USES FOR CHERRY PIE FILLING

    Beyond making cherry pie, cobbler, cookies (especially thumbprints), and pastry filling, and tarts, cherry pie filling is a versatile ingredient for quick desserts and garnishes.

  • Breakfast: Top cottage cheese, crêpes, oatmeal pancakes, yogurt, even a bagel or toast with cream cheese; fill omelets.
  • Cake and Cookies: Add to dump cake, layer cake filling and topping (especially Black Forest Cake and surprise cupcake centers), and batter swirls (brownies, cheesecake).
  • Savory Garnish: Add a large dab next to grilled chicken, duck, fish, or pork chops.
  • Sauce: Cherry topping is almost a sauce that can be used for savory as well as sweet dishes. See the recipe in the *footnote below.
  • Topping: For angel food cake, cheesecake, ice cream, pudding, pound cake.
  •    
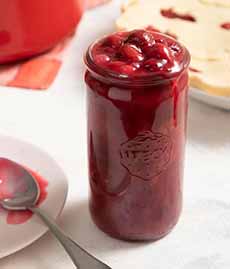
    A jar of homemade cherry pie filling
    [1] The best cherry pie filling is homemade (photo © Taste Of Home).

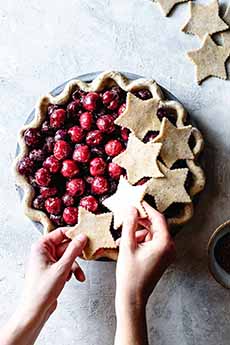
    Unbaked cherry pie with star cutouts crust
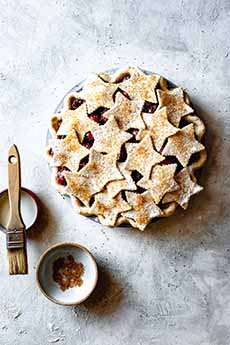
    [2] Instead of a conventional top crust, cut out shapes of dough. Even better, cut out shapes of sugar cookie dough. Here’s the recipe for this gluten-free cherry pie (photos #2 and #3 © Bonjon Gourmet).

    Cherry pie with star cutouts crust
    [3] Ready for my ice cream, Mr. DeMille.

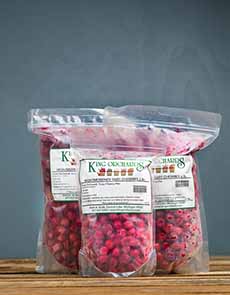
    A bag of frozen tart cherries
    [4] These pitted frozen Michigan tart cherries are available directly from the grower, King Orchards.

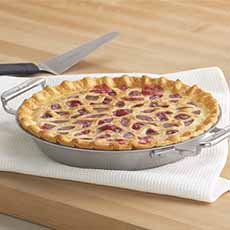
    Cherry Pie With Cutout Stencil Top
    [5] A pie stencil will give you a cutout effect (photo © Chefs Catalog [alas, now closed]).

     
    Cherry Almond Lattice Pie
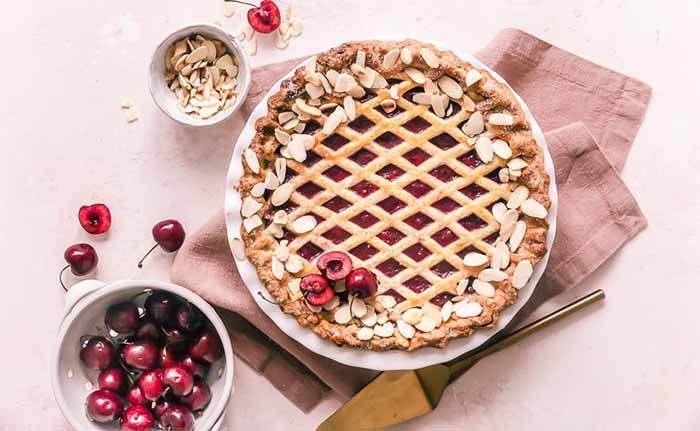
    [7] How about a sour cream crust with a cherry-almond filling? Here’s the gluten-free recipe (photo © Emma Duckworth Bakes).
     
    One of our favorite super-easy desserts or snacks:

    Use cherry topping over a brick of cream cheese and serve with cookies: chocolate, shortbread, or plain butter cookies and sugar cookies).

    For a quick, no-bake option, mix the filling with softened cream cheese and whipped topping to make a “cherry yum yum” dessert
     
     
    Cherry Cheesecake
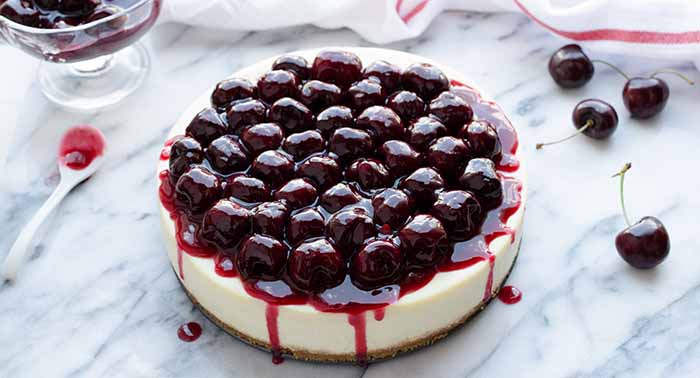
    [8] An easy cherry cheesecake. Here’s the recipe (photo © Stemilt).
     
    ________________
     
    *Cherry sauce recipe per cup of cherry filling: In a small pot add the cherries, 1/4 teaspoon fresh lemon juice, 1/4 teaspoon vanilla extract, 2 teaspoons brandy, orange liqueur, or rum. Taste and adjust the seasonings as you like. For a thinner sauce, dilute with water, 1 tablespoon at a time. For a thicker sauce, add cornstarch, using 1/2 tablespoon each of cornstarch and cold water. First whisk them into a slurry until smooth. Bring the sauce to a simmer and whisk in the slurry. Cook for 1-2 minutes until it thickens and becomes glossy. You can serve it warm or cool.
     

    CHECK OUT WHAT’S HAPPENING ON OUR HOME PAGE, THENIBBLE.COM.


    Comments off

    Homemade Ice Cream In 5 Minutes With A Tern Ice Cream Maker

    Tern Ice Cream Maker On A Kitchen Counter
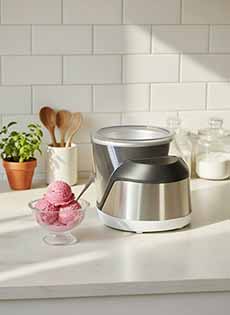
    [1] We adore our Tern ice cream maker (photo © The Nibble).

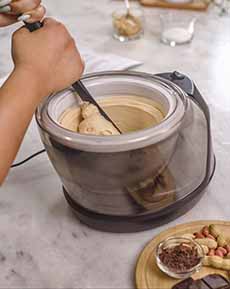
    Churning Vanilla Ice Cream
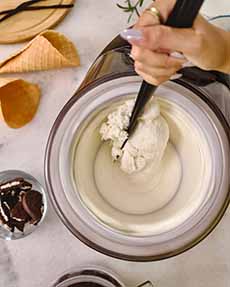
    [2] Just hold the paddle against the side of the bowl and watch your ice cream harden (photos #2 through #6 © Tern Ice Cream).

    Tern Ice Cream Maker
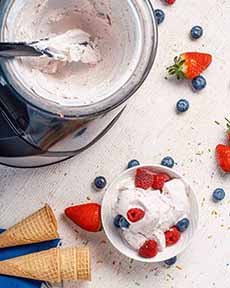
    [3] Most commercial berry ice creams don’t have enough berry intensity for us. Strawberry typically tastes like “strawberries and cream” instead of deep, luscious berries. So: We make our own!

    Tern Making Peanut Butter Ice Cream
    [4] Peanut butter ice cream. Unlike commercial brands, you can make it crunchy!

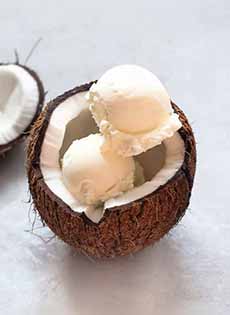
    Coconut Ice Cream Served In A Coconut
    [5] We love coconut ice cream. We added chocolate chips to our batch.

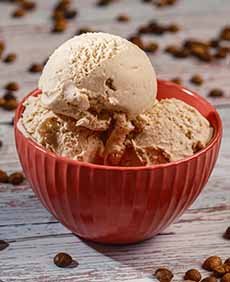
    Bowl Of Coffee Ice Cream
    [6] When you make your own coffee ice cream, you can make the coffee flavor as intense as you like.

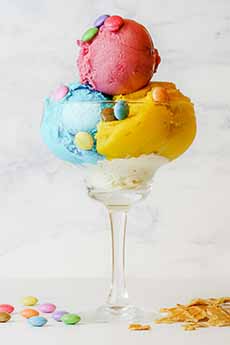
    3 Scoops Of Sorbet In A Coupe Glass
    [7] Don’t forget sorbet—especially the flavors you want but can’t find in stores (photo © Sebastian Coman Photography | Unsplash).

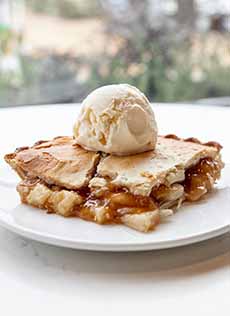
    Apple Ice Cream On Apple Pie
    [8] We made apple cinnamon ice cream to top apple pie. We’ve also made Cheddar ice cream and blue cheese ice cream (photo © Spencer | Pexels).

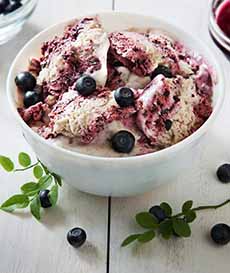
    A Bowl Of Blueberry Swirl Ice Cream
    [9] When you want blueberry swirl frozen yogurt, rev up your Tern (photo © Elena Leya | Unsplash).

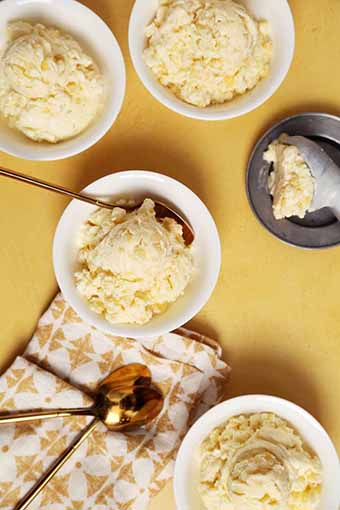
    Dishes Of Corn Ice Cream
    [10] Corn ice cream is a flavor we adore. Although we tend to make it with summer corn, canned or frozen corn work too. Here’s the recipe (photo © Taste Of Home).


    Updated July 2026

    The best gift we received this past holiday season—by far—is the Tern Craft Ice Cream Maker. Luscious ice cream, frozen yogurt, or sorbet is ready in just five minutes (with the bowl kept in the freezer and the base mix previously chilled).

    It’s our Top Pick Of The Week (and perhaps every week forever!).

    Watch it making ice cream here:

    There’s more in a minute about this remarkable little machine, but we want to point out some goodies you can find elsewhere on The Nibble:

     
    > The year’s 50+ ice cream holidays.

    > The different types of frozen desserts: a photo glossary.

    > The history of ice cream.

    > The history of the ice cream maker.
     
     
    TERN: THE BEST SMALL ICE CREAM MAKER WE’VE TRIED

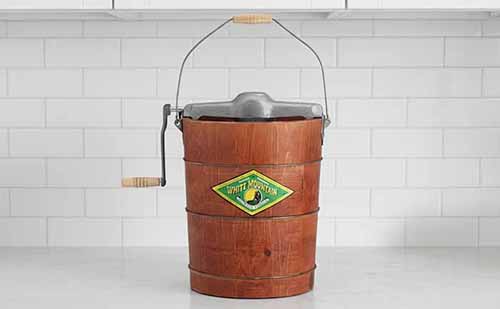
    We’ve been making ice cream at home since childhood. Our mother had one of the hand-cranked White Mountain ice cream makers (photo #11), which set a quart-size cylinder of ice cream base into an old-fashioned wood bucket of rock salt. Adding water to the bucket created the slurry that froze the ice cream.

    But it required the upper arm strength to turn the crank for 30 to 45 minutes. (And we’re always surprised that despite creating electric versions decades ago, the hand-cranked versions are still sold!)

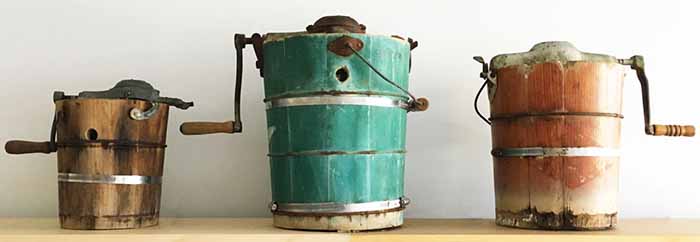
    In the 1970s, electric ice cream makers for home use appeared. No more upper arm workout, and it used regular ice cubes instead of the rock salt slurry (photo #12).

    Cuisinart introduced its first electric home ice cream maker in 1978. We got one as a birthday gift, and happily created flavors that could not be purchased in stores (banana chocolate chip [a decade before Chunky Monkey!], Grand Marnier, malted milk ball, vanilla double malt, and peach [a favorite flavor we could enjoy all year round, using frozen peaches]).

    But the real advance was the unit that didn’t require ice. In 1984, the Donvier ice cream maker was introduced to the U.S. from Japan. It was the first unit to use frozen gel in a double-walled canister to chill the ice cream, instead of ice and water.

    You’d freeze the metal cylinder overnight in your freezer, then pour in the ice cream mixture and manually turn the handle intermittently for 15–30 minutes. Yes, it was manual—but not painfully so.

    Then came a parade of small ice cream makers with pre-frozen cylinders that had electricity! We tried a few of them but never found the perfect one. Our complaint generally was that they didn’t freeze the ice cream firmly enough to enjoy it right out of the churn. We had to place the ice cream in the freezer to harden.

    So when we opened the box and pulled out the Tern, it was with both anticipation but also and concern. But Tern is a champion: firm ice cream in an amazingly swift five minutes. And at just 8″ x 10″ x 12″, it’s a space saver as well.

    That’s it in a nutshell. For “beyond the nutshell,” keep scrolling.

    And for the story of the weirdest ice cream maker we’ve ever tried, see the †footnote below.
     
     
    IS THE TERN FOR YOU?

    If you like to cook, then YES! If you’d like artisan alternatives beyond what you can buy at the grocer’s, then YES! If you want your ice cream ready in 5 minutes (with planning ahead to chill the mix and the bowl), then YES! If you don’t need to produce large quantities, then YES!

    The Tern Craft Ice Cream Maker succeeds brilliantly at what it sets out to do: produce small batches of genuinely premium ice cream quickly, using an artisan-style process.

    It makes a pint at a time, so it’s not for a crowd—but it’s perfect if you want ice cream for two.

    At just under one hundred twenty dollars, it’s an investment, but one that pays dividends of delight.

    While the company doesn’t make any “savings” claims, we’ve found that the cost of ingredients is far less than the $7-$10 that better pints of ice cream cost in our area.
     
     
    GET YOUR TERN

    > Head to TernIceCream.com.
     
     
    MORE TO KNOW

    It’s So Fast!

    In a world of automatic ice cream machines that churn away for 25 to 40 minutes, the Tern Craft Ice Cream Maker promises something different: ready-to-eat, artisan-quality ice cream in five minutes. And it delivers!
     
     
    The Simple Process

    The five-minute churning time is accurate for the actual ice cream making, but this doesn’t include preparation time for your base mixture or the overnight freezing requirement for the bowl. If you decide at eight in the evening that you want ice cream, the Tern won’t help you unless you’ve kept the bowl in the freezer.

    The company recommends leaving it there permanently, which is reasonable if you have a small amount of freezer space to spare.

    For simple, no-cook vanilla ice cream recipes, it takes less than 60 seconds to whisk together the cream, milk, sugar, and vanilla. If you’re making a custard base with egg yolks, it needs to be whisked for 5 minutes in a saucepan.

    Whatever the recipe, it needs two hours of chilling. However, this is true with any automatic ice cream maker.

  • You keep the freezer bowl in the freezer overnight (we leave ours there permanently) which completely freezes its internal fluid.
  • When you’re ready to make ice cream, attach the bowl to the base, pour in the prepared mixture, and use the paddle to scrape and churn for about five minutes (photos #2, #3, and #4).
  • The machine spins the bowl while you hold the paddle, scraping down the bowl as needed.
  •  
    The task is pretty effortless, and it’s enjoyable to watch the frozen treat come together. Numerous electric ice cream makers have you push a button and walk away, but the five minutes of interactive “work” with the paddle is fun.

    The only drawback is that it makes a pint at a time, not a quart (the same is true with other smaller machines). For two people, that’s enough; for a larger family, not.

    However, you can purchase an extra bowl and be ready to make the next pint as soon as the first bowl is done spinning.

    And if you work quickly, you can sometimes get a second batch out of the same bowl before it needs to return to the freezer.

    Either way, you have means to make a quart.
     
     
    The Result: Simply Wonderful Ice Cream!

    The quality of its finished product is truly wonderful. Using only the recipes provided by the manufacturer, we enjoyed bowl after bowl of ice cream, custard (i.e., Philadelphia stye, with egg yolks), gelato, and sorbet.

    The ice cream comes out firm and scoopable immediately, ready for a bowl or cone—unlike other home machines where the mixture resembles soft-serve and requires additional freezing time.

    Non-dairy milks work equally well. In fact, if you’ve been less than thrilled with how your current machine makes plant-based ice cream, we can assure you the recipes we made with coconut cream and oat milk were just as impressive as cow-based.

    Because the rapid freezing technology creates a superior texture regardless of fat content, you can reduce the amount of cream and egg yolks in recipes.

    You can also use the sweetener of choice, including non-caloric options.
     
    White Mountain Hand-Crank Ice Cream Freezer

    [11] Our mother hand-cranked our family’s ice cream (photo © The Nibble).
     
     
    How Tern Came To Be

    Tern was created by mechanical engineer Josh Stuckey after years of disappointment with home ice cream makers. They took too long to freeze batches, resulting in larger ice crystals and less smooth, less creamy ice cream.

    After studying ice cream production books written for the industry, Stuckey realized that the difference was speed. Commercial artisan machines freeze ice cream rapidly, creating smaller ice crystals.

    After almost two decades of testing, dozens of design integrations, and many hundreds of hours of making ice cream, he found the solution.

  • Rather than slowly churning the ingredients in a stationary bowl, the patented Tern machine rapidly spins a pre-frozen bowl while the user manually scrapes the freezing ingredients with a paddle.
  • This fast-freeze technology mimics what happens in professional gelato shops, dispersing the mix onto the extremely cold aluminum walls of the bowl where it freezes almost instantly.
  • Speed also enables recipes to churn out creamy, smooth frozen fare with less fat and sugar. Not that we’re touting ice cream as protein, but every little bit of savings helps.
  •  
    For how the Tern got its name, see the *footnote below.

     
    Early White Mountain Ice Cream Freezers
    [12] Early White Mountain ice cream freezers, hand cranked. Here’s more about them. While hand-cranked models were the original, first produced in 1872, the company introduced electric motors in the 1950s. (photo © Triple Motion).
     
     
    ________________
     
    *The meaning of Tern: The Arctic Tern has the longest migration of any animal on Earth, traveling from pole to pole each year: from the Arctic to the Antarctic and back. It’s a creature associated with endurance, precision, and remarkable journey*. These qualities that could metaphorically relate to the founder’s 17-year quest to create the perfect home ice cream maker. The tilted “e” in the logo symbolizes the spinning function of the machine.

    Out of curiosity, we looked up the the shortest migration journey—representing the shortest amount of time to make a batch of ice cream. That title belongs to North America’s blue grouse, which migrates just 300 meters (about 1,000 feet) vertically down the mountain to breed. And it doesn’t fly, it walks!
     
    †Here’s a fun ice cream story that’s absolutely true. Somewhere around 2010, a company sent The Nibble an ice cream maker, hoping for a review. It was a large plastic ball, perhaps eight inches in diameter, that screwed apart. You poured your ice cream mixture into the ball and then kicked it around, like a soccer ball. I recall the pitch was something like “The kids get to make their own ice cream while having fun playing ball.”

    It sounded too good to be true, but how could we resist a sample to try? You won’t be surprised to hear that it did not work. We ended up with the same cream mixture we had put in—and ended up drinking it like a milkshake.

    What we subsequently found out from an engineer friend is that it never could have worked. Basic thermodynamics says you need sustained cold temperatures to freeze ice cream, not the brief contact with a cold surface while being kicked around a yard. The mixture just sloshed, around getting warmer from all that motion and friction!

    There’s a sucker born every minute, and at least all it cost The Nibble was a few dollars’ worth of heavy cream.


    CHECK OUT WHAT’S HAPPENING ON OUR HOME PAGE, THENIBBLE.COM.


    Comments off


    © Copyright 2005-2026 Lifestyle Direct, Inc. All rights reserved. All images are copyrighted to their respective owners.